PS红色质感Logo教程
2022-12-26 11:00:18
来源/作者: /
己有:74人学习过
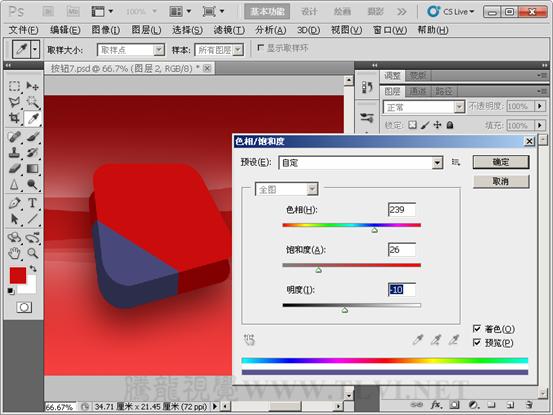
(8)执行“图像”→“调整”→“色相/饱和度”命令。
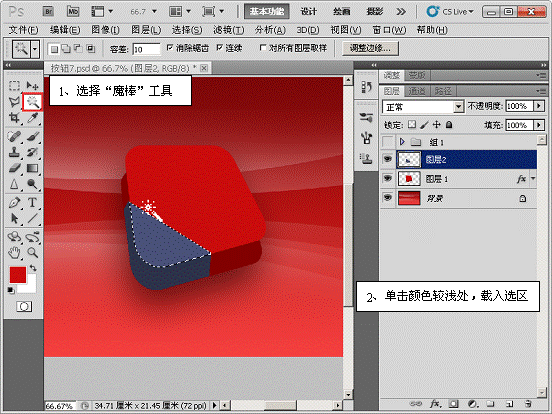
(9)使用“魔棒”工具载入选区。
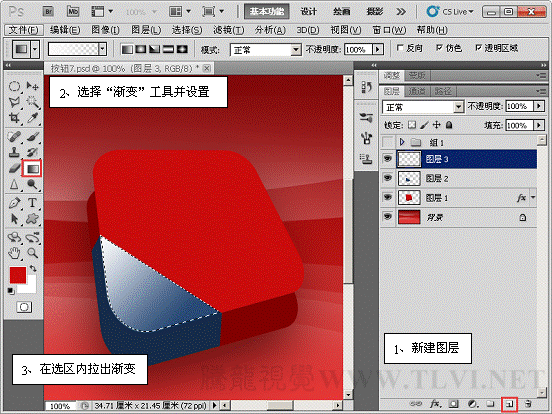
(10)新建“图层 3”,使用“渐变”工具拉出渐变。
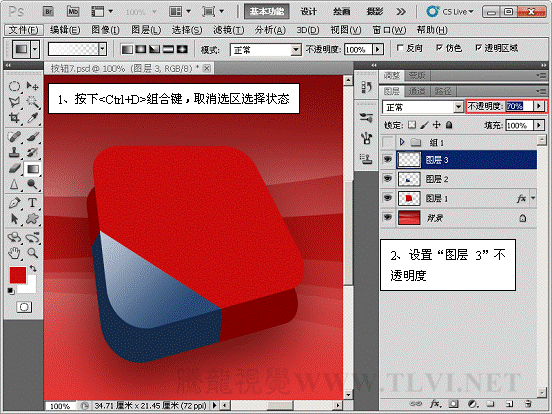
(11)取消选区选择状态,设置“图层 3”的不透明度为“70%”。
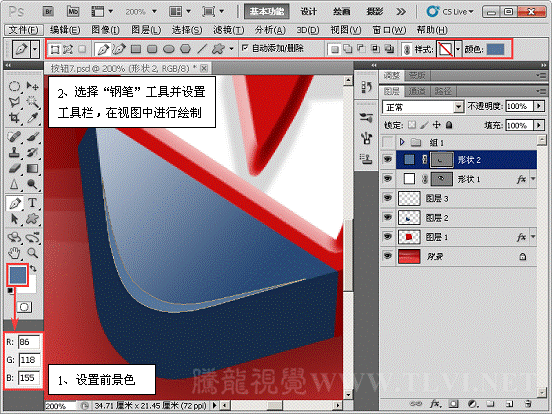
(12)设置前景色,使用“钢笔”工具进行绘制。

(13)为“形状 1”添加图层样式。
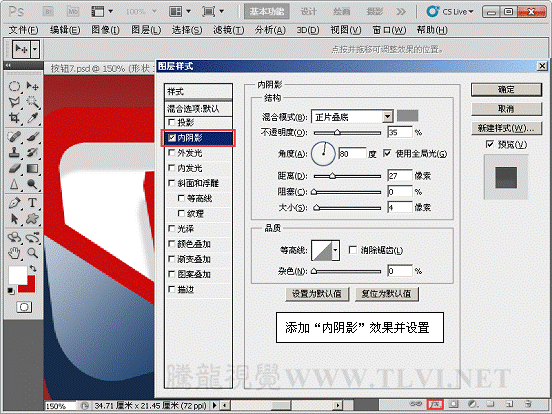


(14)使用“钢笔”工具进行绘制。
(8)执行“图像”→“调整”→“色相/饱和度”命令。

(9)使用“魔棒”工具载入选区。

(10)新建“图层 3”,使用“渐变”工具拉出渐变。

(11)取消选区选择状态,设置“图层 3”的不透明度为“70%”。

(12)设置前景色,使用“钢笔”工具进行绘制。

(13)为“形状 1”添加图层样式。


(14)使用“钢笔”工具进行绘制。

 如何将PS文字巧妙的融入背景图里
人气:74
 用Photoshop去除图片中的锯齿
人气:74
 在Photoshop里面如何去除图片白色的底?
人气:74
 PS滤镜把城市建筑照片转成素描线稿效果
人气:74
 婚纱写真,调出清新风格外景婚纱写真照片
人气:74
  婚纱后期,郊外婚纱摄影后期实例
人气:74
  巫师3用不了猎魔感官怎么办
人气:74
  我的连云港如何提取公积金(图文攻略)
人气:74