ps质感的红色3D立体字教程
2022-12-25 12:28:19
来源/作者: /
己有:24人学习过
先来看看最终的效果图吧:

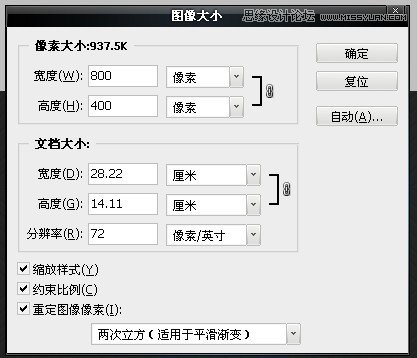
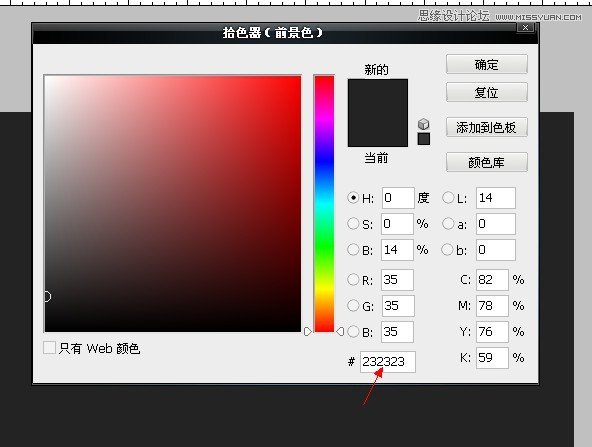
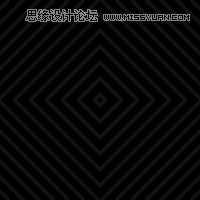
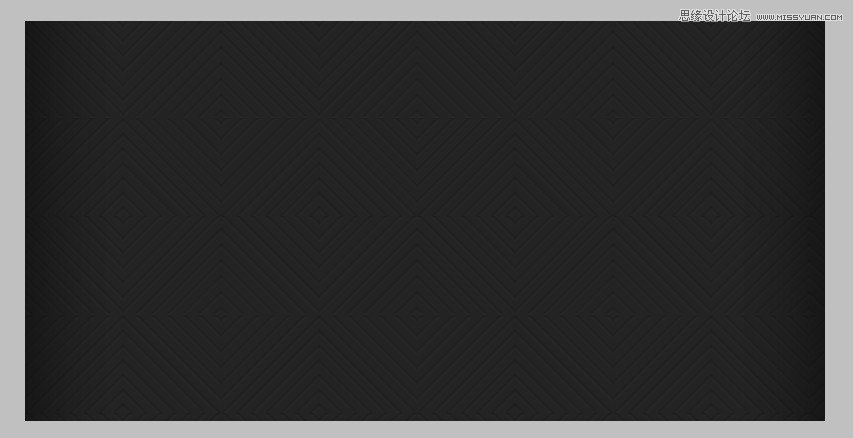
让我们首先创建背景。 把一个新的psd文件,大小的800 x 400像素,并添加一个新层(ctrl + shift + n)与背景颜色# 232323。 。
在新图层上添加图层样式
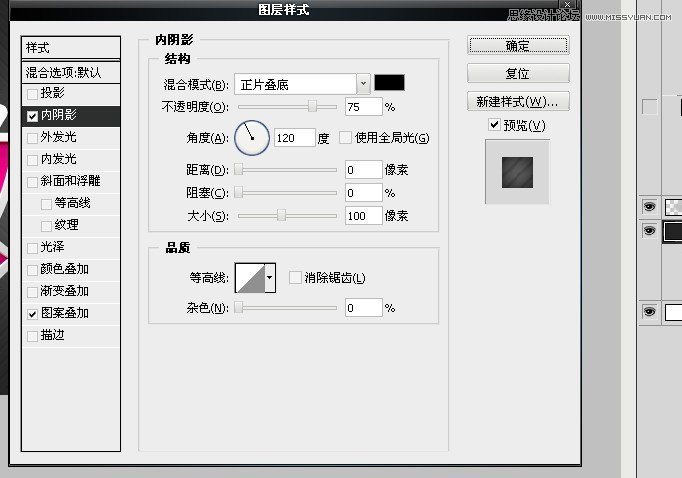
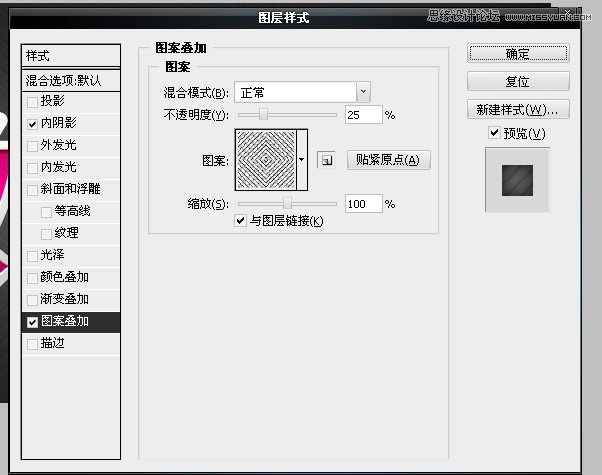
图案叠加

最后的背景
相关推荐

Photoshop抠出复杂背景下的乱发

工具抠图,ps钢笔工具抠图视频教程

Photoshop抠图:魔棒抠图为照片换背

Photoshop高速抠出美女发丝

彩绘艺术字, PS液化工具制作彩绘背景设计教程

Photoshop制作非常流行的金沙立体字,细腻的金沙字体,金粉字。

Photoshop制作金色的海报标题文字教程

Photoshop使用笔刷制作书法艺术字教程


