Photoshop合成火炎美女实例教程
2022-12-26 00:32:54
来源/作者: /
己有:24人学习过
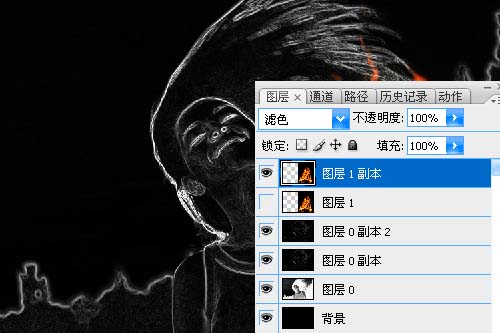
步骤 7、将火焰层的图层混合模式设为“滤色”。
步骤 8、复制火焰层,并将其中一层设置为不可见。
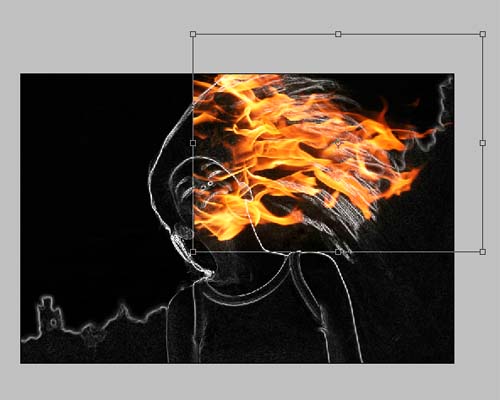
步骤 9、选择火焰层,自由变换。
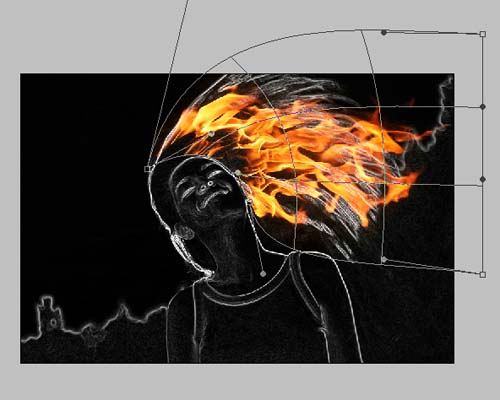
步骤 10、编辑 >> 变换 >> 变形。
标签(TAG) 照片合成 Photoshop合成火炎 ps火炎美女 ps合成实例教程
相关推荐

PS照片合成火焰天使图片

ps照片合成三个炮筒的坦克车

PS照片合成童话场景

ps照片合成落日场景

合成行驶在梦幻森林中火车照片的PS教程

合成恐怖灵异双重曝光头像照片的PS教程

PS合成明亮夜色下的天使白狼场景图片

战争海报,PS合成战争电影主题海报图片设计教程


