用Photoshop打造怀旧风格版画
2022-12-26 18:33:50
来源/作者: /
己有:85人学习过
用Photoshop打造怀旧风格版画“遥远的夜空有一个弯弯的月亮 弯弯的月亮下面是那弯弯的小桥 小桥的旁边有一条弯弯的小船 弯弯的小船悠悠是那童年的...”。每次听到这首歌我们就会想起儿时故乡那静静的小河与寂寞的小船,下面用PS来打造这样一款怀旧版画。
1、打开一幅清明上河图的图片,如图01所示。

2、将背景图层拖拽到图层面板底部的“创建新图层”按钮上,复制背景层为背景副本层。然后按Ctrl B键,打开色彩平衡对话框,设置参数如图02所示,单击确定,画面效果如图03所示。


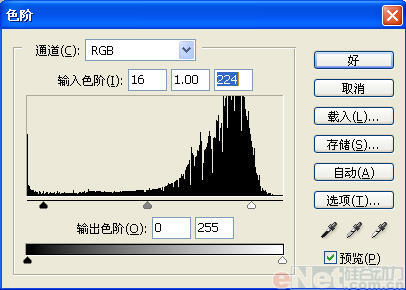
3、按Ctrl L键打开色阶对话框,设置参数如图04所示,单击确定,画面效果如图05所示。

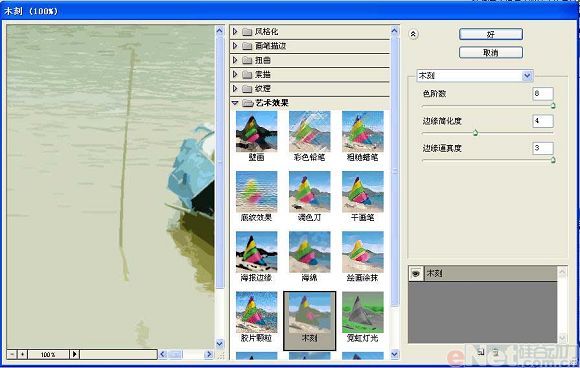
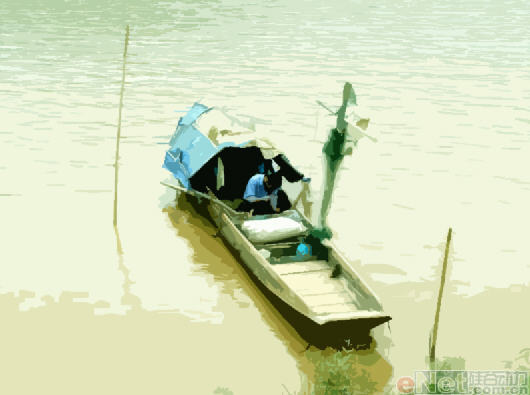
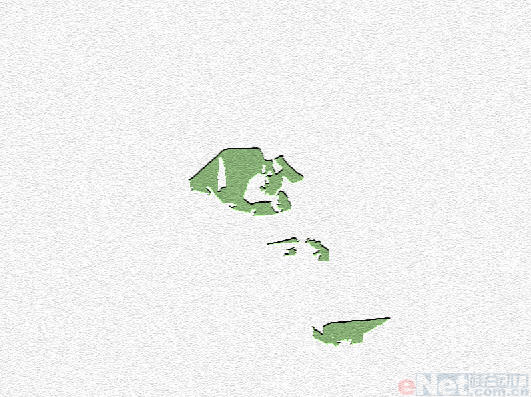
4、选择背景副本,执行菜单栏中的“滤镜”“艺术效果”“木刻”命令,在弹出的木刻对话框中设置参数如图06所示,单击确定,画面效果如图07所示。
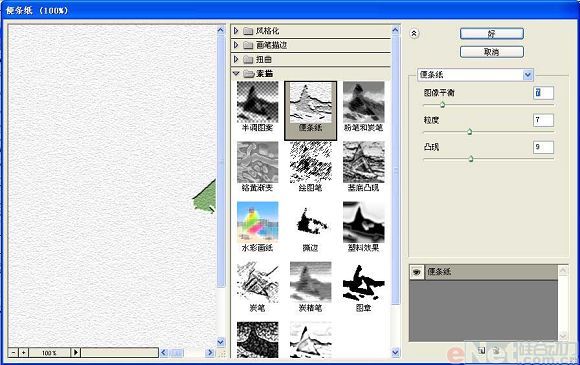
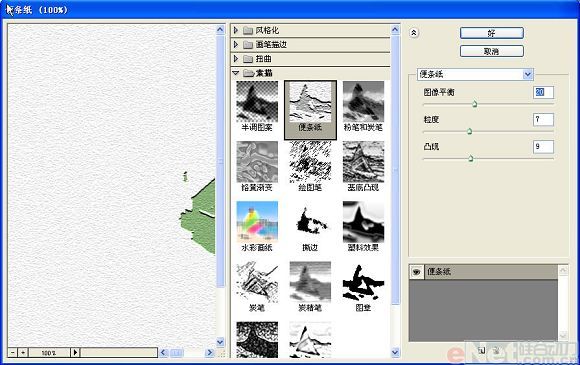
5、复制背景副本3次,按D键恢复颜色面板默认颜色。选择背景副本,执行菜单栏中的“滤镜”“素描”“便条纸”命令,在弹出的便条纸对话框中设置参数如图08所示,单击确定,隐藏其他图层画面效果如图09所示。
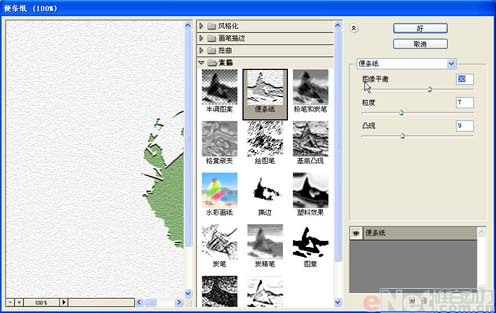
6、显示所有图层,选择背景副本2图层,按Ctrl Alt f键,在弹出的便条纸对话框中设置参数如图10所示。
7、使用相同的方法,对背景副本3图层和背景副本4图层应用便条纸命令,将图像平衡的参数分别设置为30和40,效果如图11和12所示。

8、设置背景副本2、背景副本3、背景副本4的图层混合模式设置为正片叠底,图像效果如图13所示。
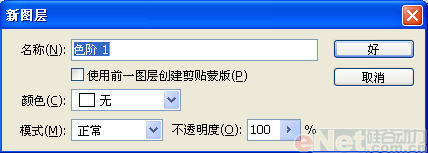
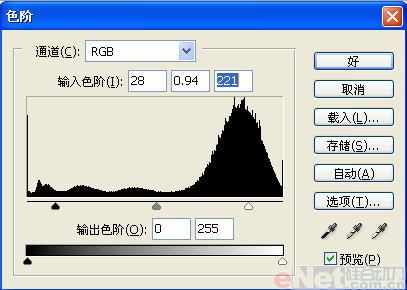
9、选择背景副本4,执行菜单栏中的“图层”“新建调整图层”“色阶”命令,在弹出的对话框中保持默认参数,如图14所示,单击确定,弹出色阶对话框,调整参数如图15所示。
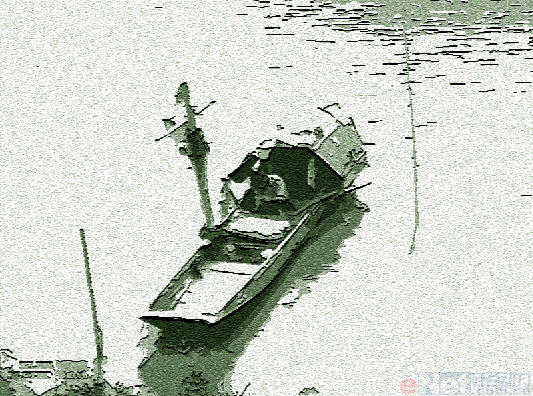
10、执行菜单栏中的“图层”“新建调整图层”“色彩平衡”命令,在弹出的对话框中保持默认参数,单击确定,弹出色彩平衡对话框,调整参数如图16所示,画面效果如图17所示。

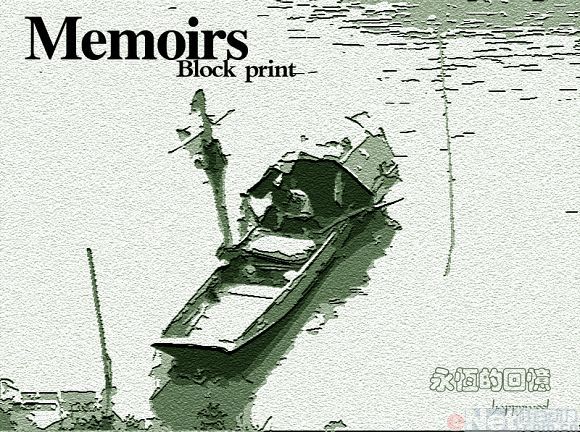
11、使用文字工具添加文字,最终效果如图18所示。
1、打开一幅清明上河图的图片,如图01所示。
2、将背景图层拖拽到图层面板底部的“创建新图层”按钮上,复制背景层为背景副本层。然后按Ctrl B键,打开色彩平衡对话框,设置参数如图02所示,单击确定,画面效果如图03所示。
3、按Ctrl L键打开色阶对话框,设置参数如图04所示,单击确定,画面效果如图05所示。
4、选择背景副本,执行菜单栏中的“滤镜”“艺术效果”“木刻”命令,在弹出的木刻对话框中设置参数如图06所示,单击确定,画面效果如图07所示。
5、复制背景副本3次,按D键恢复颜色面板默认颜色。选择背景副本,执行菜单栏中的“滤镜”“素描”“便条纸”命令,在弹出的便条纸对话框中设置参数如图08所示,单击确定,隐藏其他图层画面效果如图09所示。
6、显示所有图层,选择背景副本2图层,按Ctrl Alt f键,在弹出的便条纸对话框中设置参数如图10所示。
7、使用相同的方法,对背景副本3图层和背景副本4图层应用便条纸命令,将图像平衡的参数分别设置为30和40,效果如图11和12所示。
8、设置背景副本2、背景副本3、背景副本4的图层混合模式设置为正片叠底,图像效果如图13所示。
9、选择背景副本4,执行菜单栏中的“图层”“新建调整图层”“色阶”命令,在弹出的对话框中保持默认参数,如图14所示,单击确定,弹出色阶对话框,调整参数如图15所示。
10、执行菜单栏中的“图层”“新建调整图层”“色彩平衡”命令,在弹出的对话框中保持默认参数,单击确定,弹出色彩平衡对话框,调整参数如图16所示,画面效果如图17所示。
11、使用文字工具添加文字,最终效果如图18所示。
上一篇:调色工具,曲线工具使用视频教程
相关推荐

用Photoshop制作无缝拼接背景图

Photoshop轻松特效:抽线效果

PS打造美丽蝴蝶化石

photoshop教程:简单做雨夜效果

PS如何制作人物照片中的逼真影子效

PS如何快速替换衣服颜色

漫画图片,PS鼠绘科幻场景美女特警漫画图片教程

头像照片精细化磨皮润色的PS技巧


