Photoshop制作线条人物速写
2023-12-04 17:36:40
来源/作者: /
己有:0人学习过
Photoshop制作线条人物速写来源:新浪博客
本教程主要是介绍使用钢笔及画笔工具来制作简单的线条人物速写,教程写得比较简单,不过只要明白作者的思路以后就很容易上手!
最终效果
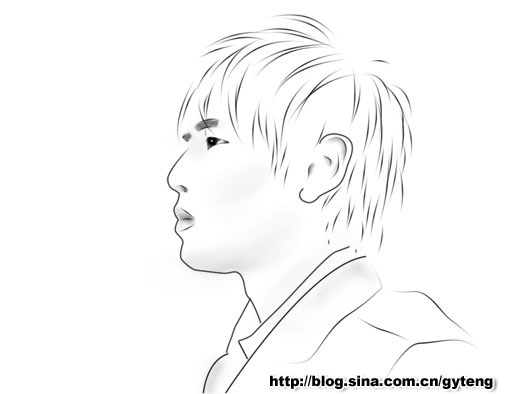
photoshop
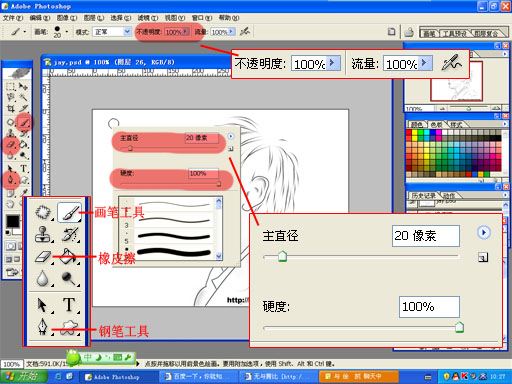
1.先介绍下所用的工具及设置参数。
photoshop
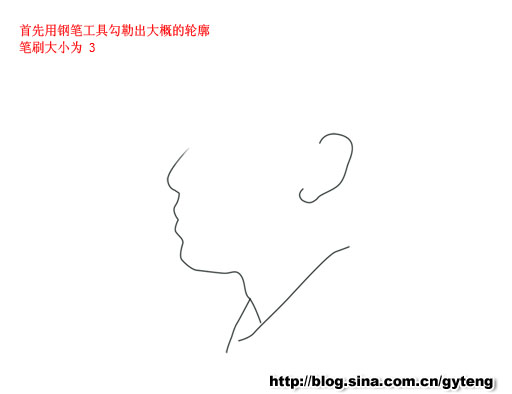
2.用钢笔工具勾出大概的轮廓,把画笔的大小设置为3px,前景颜色设置为黑色,勾好后点路径图层,按右键选择路径描边选择画笔。
photoshop
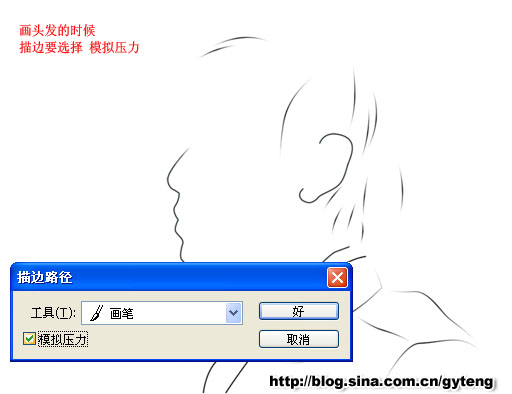
3.同样的方法制作头发,描边选择模拟压力。
photoshop
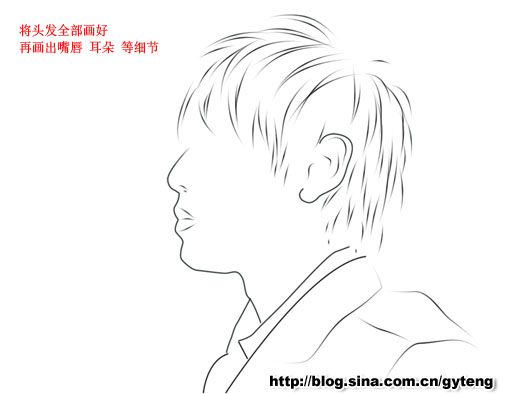
4.画好头发后再画出嘴唇耳朵等细节。
photoshop
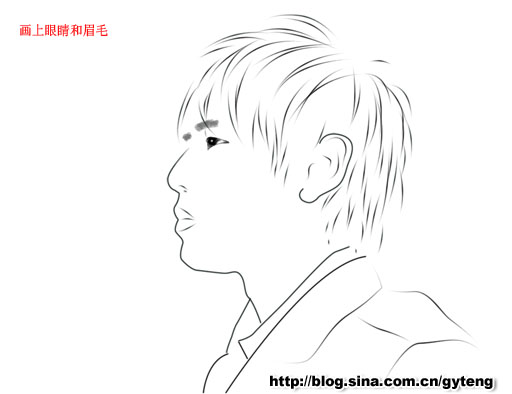
5.画上眼睛黑眉毛
photoshop
6.用画笔和橡皮配合增加点人物立体感完成最终效果。
photoshop
本教程主要是介绍使用钢笔及画笔工具来制作简单的线条人物速写,教程写得比较简单,不过只要明白作者的思路以后就很容易上手!
最终效果
photoshop
1.先介绍下所用的工具及设置参数。
photoshop
2.用钢笔工具勾出大概的轮廓,把画笔的大小设置为3px,前景颜色设置为黑色,勾好后点路径图层,按右键选择路径描边选择画笔。
photoshop
3.同样的方法制作头发,描边选择模拟压力。
photoshop
4.画好头发后再画出嘴唇耳朵等细节。
photoshop
5.画上眼睛黑眉毛
photoshop
6.用画笔和橡皮配合增加点人物立体感完成最终效果。
photoshop
搜索更多相关主题的帖子:photoshop教程 平面设计教程 photoshop
上一篇:鼠绘杯子,ps鼠绘一杯啤酒教程
下一篇:ps鼠绘火焰蝴蝶教程
相关推荐

ps鼠绘一只朋克风格的手表教程

ps绘制逼真的运动鞋鞋带教程

Photoshop点阵图转矢量图一法

蒙版教程,深度讲解蒙版工具的使用和

Photoshop钢笔工具绘制逼真的头发教程

鼠绘袋子,绘制一个透明的塑料袋教程

PS绘画变形金刚中的霸天虎

绘画人像,皱纹雀斑疤痕的绘制方法


