ps如何做铜版字
2022-12-25 14:58:49
来源/作者: /
己有:38人学习过
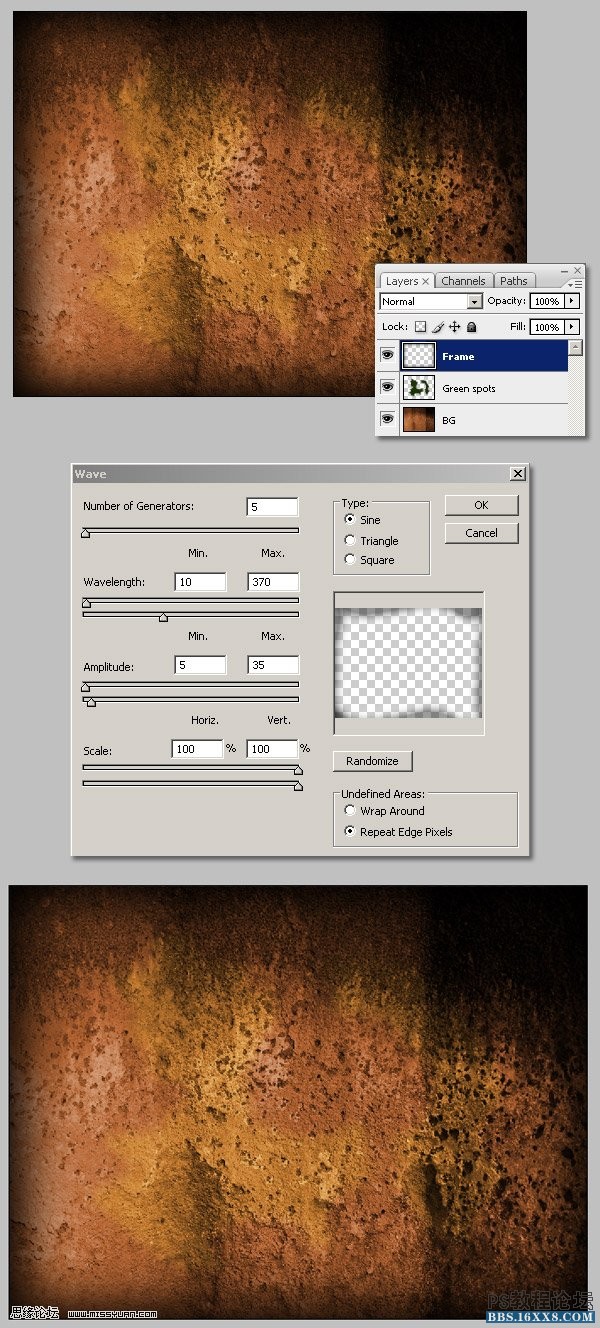
step 4 不要取消选区,反选,新建图层 frame层 填充选区范围 黑色 ,
取消选择,执行滤镜: 滤镜-扭曲-波浪
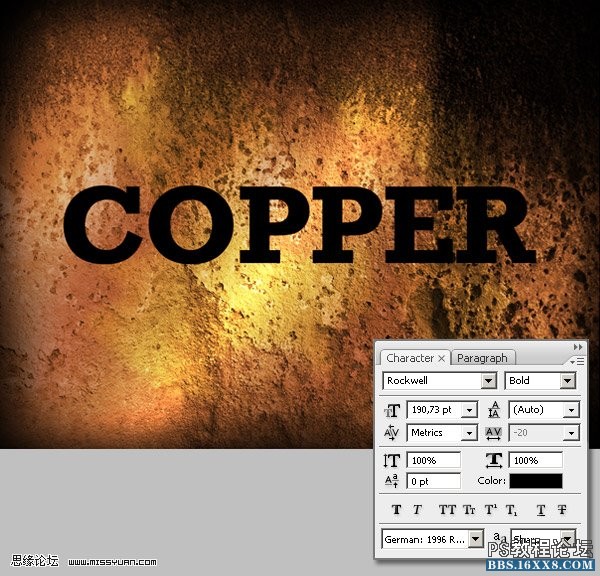
step 5 新建图层 light层 设置为顶层,填充 白色-黑色 的【对称渐变】
调整图层的曲线
然后将图层模式更改为【叠加】

step 6 ok 有趣的部分开始啦, 打上文字,这里选用的是 Rockwell 字体
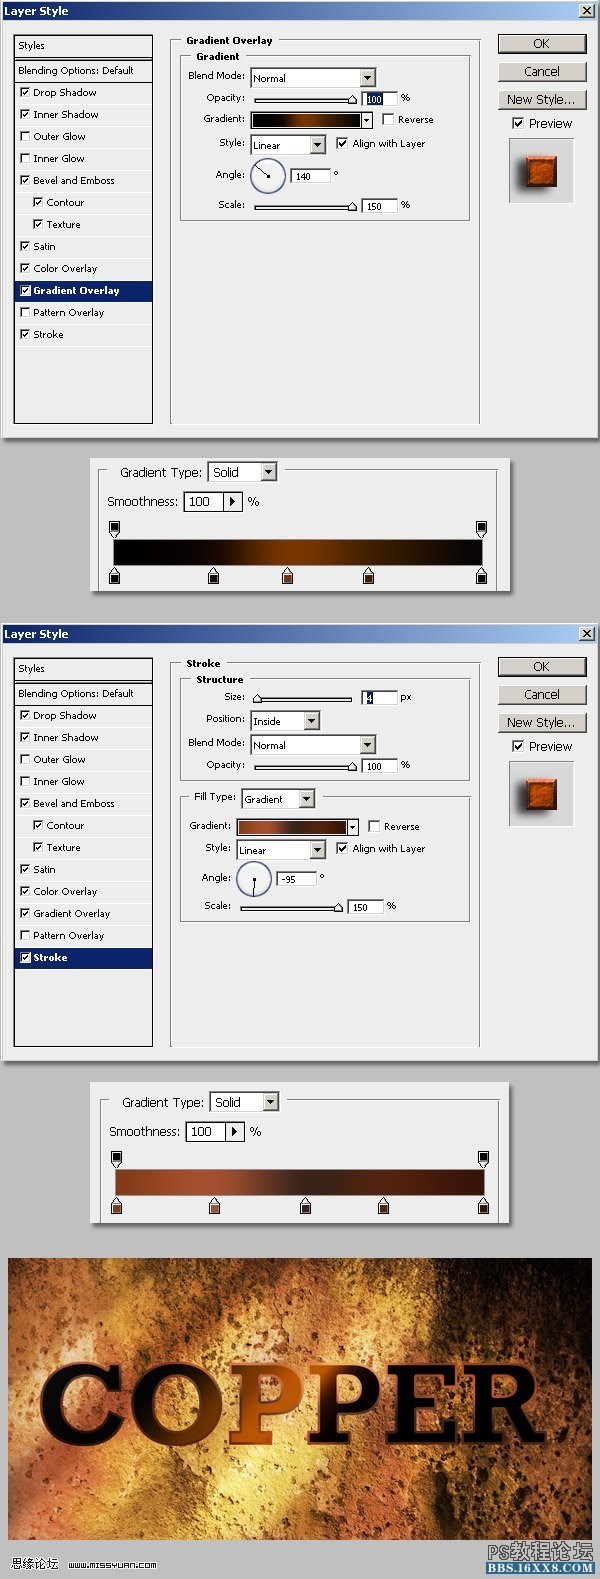
step 7 开始为文字添加图层样式
渐变叠加,选择【线性渐变】 ,设置有 【#000000, #160700, #783501, #421F01, #050505】 五种颜色的渐变 角度=140
描边 选择【渐变】 设置为【#803C17, #A44F30, #52230F, #52230F, and #381408】 五种颜色的渐变 角度=-95
取消选择,执行滤镜: 滤镜-扭曲-波浪
step 5 新建图层 light层 设置为顶层,填充 白色-黑色 的【对称渐变】
调整图层的曲线
然后将图层模式更改为【叠加】
step 6 ok 有趣的部分开始啦, 打上文字,这里选用的是 Rockwell 字体
step 7 开始为文字添加图层样式
渐变叠加,选择【线性渐变】 ,设置有 【#000000, #160700, #783501, #421F01, #050505】 五种颜色的渐变 角度=140
描边 选择【渐变】 设置为【#803C17, #A44F30, #52230F, #52230F, and #381408】 五种颜色的渐变 角度=-95
标签(TAG) 普通字效 学photoshop
上一篇:刻章字
相关推荐

零基础学photoshop,18节课从小白到

彩绘艺术字, PS液化工具制作彩绘背景设计教程

Photoshop制作非常流行的金沙立体字,细腻的金沙字体,金粉字。

Photoshop制作金色的海报标题文字教程

Photoshop使用笔刷制作书法艺术字教程


