photoshop文字效果教程:岩石雕刻字
2022-12-25 11:43:08
来源/作者: /
己有:2人学习过
作者令彬 译 出处:外文翻译
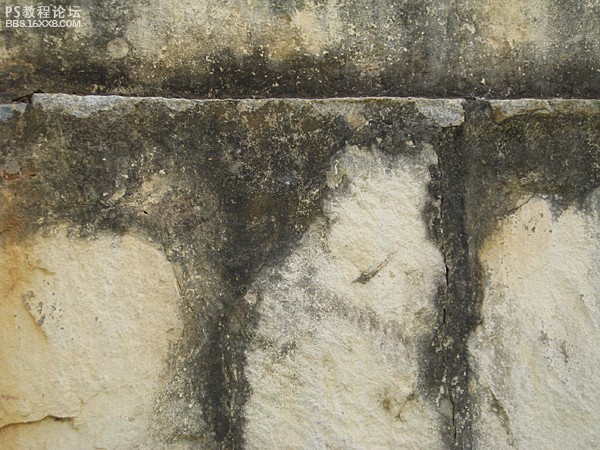
素材1:
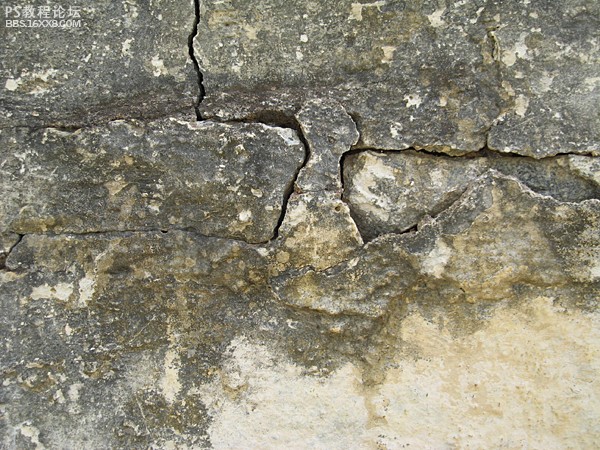
素材2:
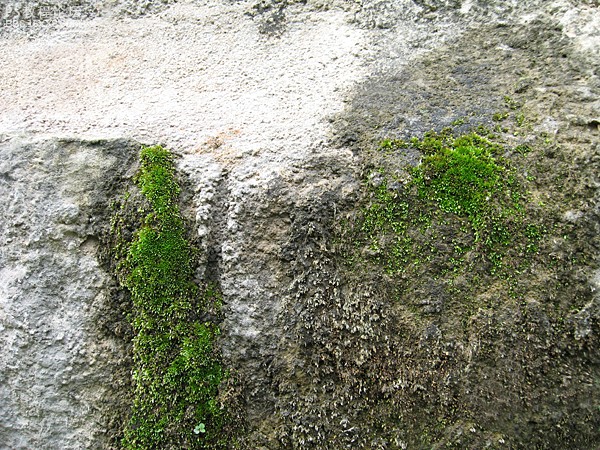
素材3:
以下是详细的photoshop教程步骤:
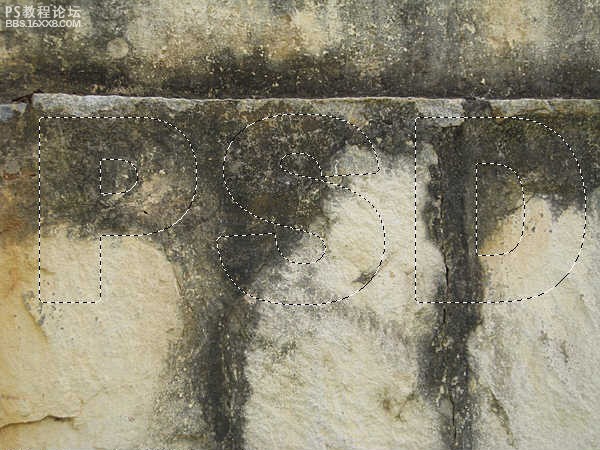
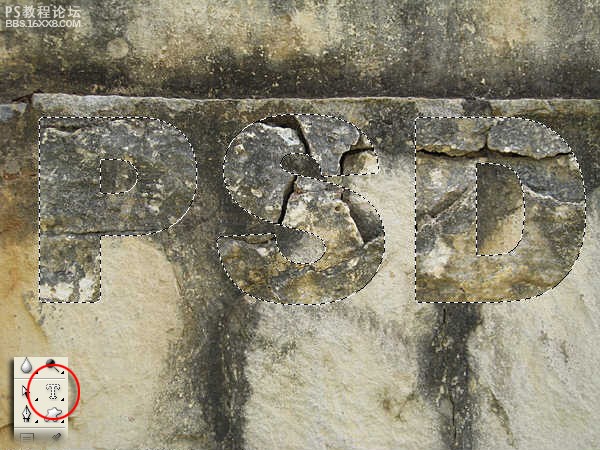
步骤 1、打开素材1,新建图层,使用“横排文字蒙版工具”写入需要的文字。
注:建议使用比较粗的字体。
步骤 2、打开素材2,全选(Ctrl + A),复制(Ctrl + C),返回素材1,使用贴入命令(Ctrl + Shift + V)将素材2复制到之前建立的文字蒙版中,调整素材位置得到如下效果。
,步骤 3、设置图层样式。
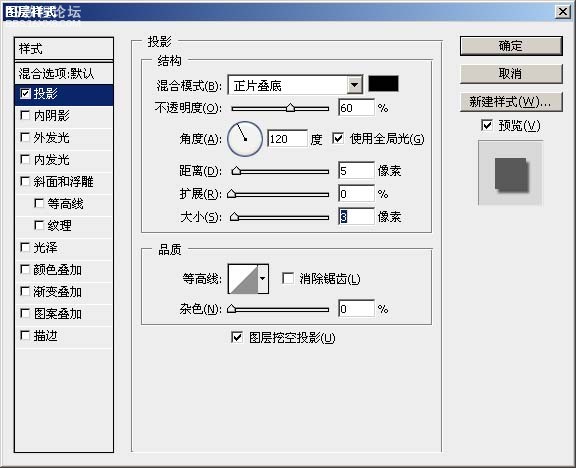
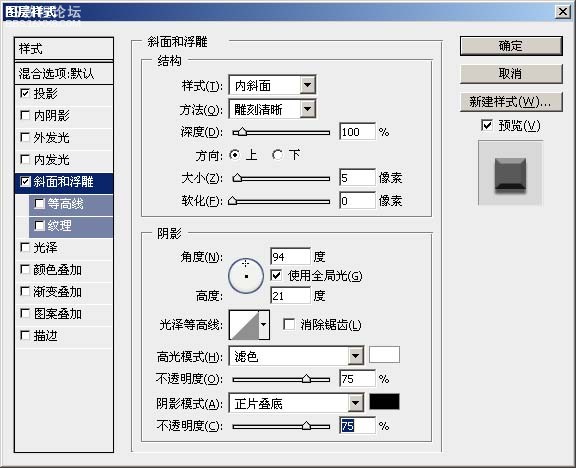
得到如下效果:
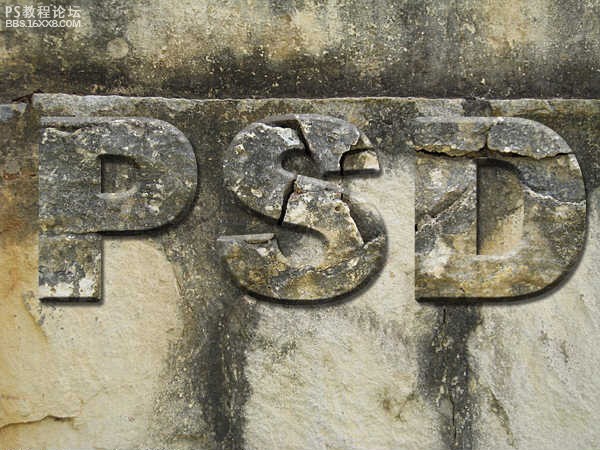
步骤 4、打开素材3,复制并粘贴到画布顶层,将图层混合模式设为“叠加”。
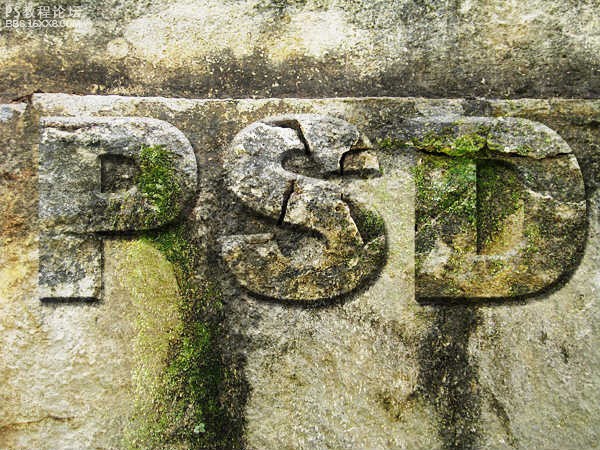
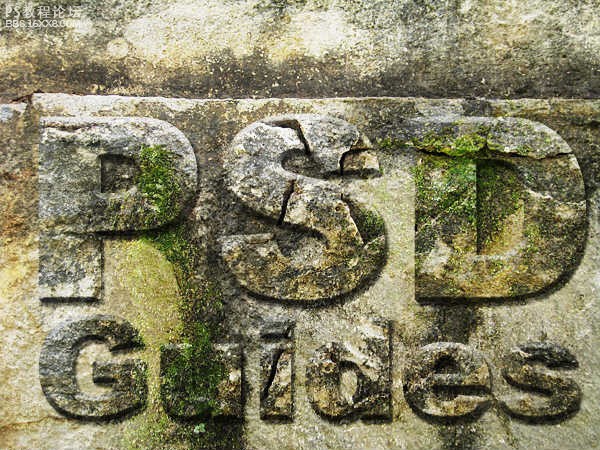
步骤 5、采用同样的方法添加其余文字得到最终效果。
素材1:
素材2:
素材3:
以下是详细的photoshop教程步骤:
步骤 1、打开素材1,新建图层,使用“横排文字蒙版工具”写入需要的文字。
注:建议使用比较粗的字体。
步骤 2、打开素材2,全选(Ctrl + A),复制(Ctrl + C),返回素材1,使用贴入命令(Ctrl + Shift + V)将素材2复制到之前建立的文字蒙版中,调整素材位置得到如下效果。
,步骤 3、设置图层样式。
得到如下效果:
步骤 4、打开素材3,复制并粘贴到画布顶层,将图层混合模式设为“叠加”。
步骤 5、采用同样的方法添加其余文字得到最终效果。
上一篇:ps制作光滑的彩带立体字
下一篇:用ps制作鹅卵石字效
相关推荐

ps设计立体卡通风格岩石字

岩石字,设计裂开的裂纹字教程

岩石字,设计立体的岩浆效果文字教程

岩石字,设计具有游戏感觉的复古石头

彩绘艺术字, PS液化工具制作彩绘背景设计教程

Photoshop制作非常流行的金沙立体字,细腻的金沙字体,金粉字。

Photoshop制作金色的海报标题文字教程

Photoshop使用笔刷制作书法艺术字教程


