ps制作炮竹贺年贺卡
2022-12-26 05:30:05
来源/作者: /
己有:55人学习过
6、设计前景色为深红色,然后按Ctrl+Del键填充前景色给选区,接着按Ctrl+D取消选择,如图6所示。
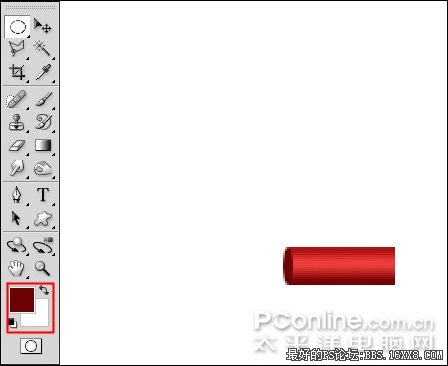
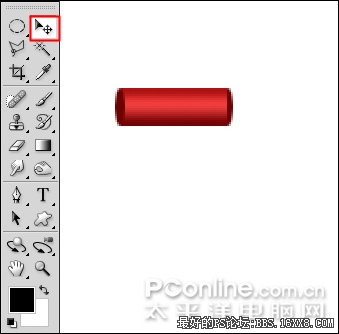
图6 7、选择工具箱中的移动工具,按住Alt键不放拖动深红色图形,将其复制一个并移动到右边的位置,如图7所示。
|图7 8、选择工具箱中的椭圆选框工具,绘制一个如图8所示的选区。
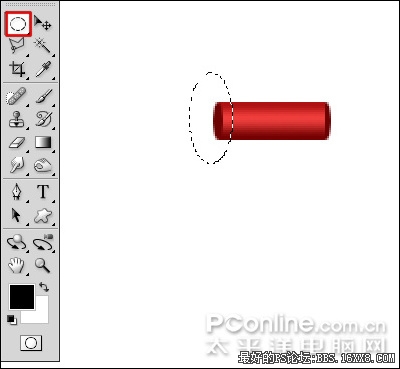
图8 9、执行菜单:“编辑”/“描边”,弹出描边对话框,设置宽度为5px,颜色为黄色,如图9所示。
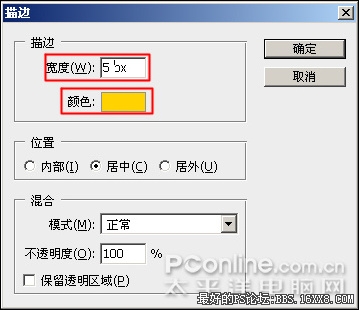
图9 10、点击确定后的描边效果如图10所示。
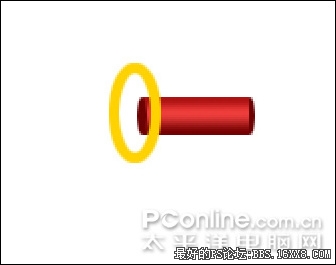
图10
图6 7、选择工具箱中的移动工具,按住Alt键不放拖动深红色图形,将其复制一个并移动到右边的位置,如图7所示。
|图7 8、选择工具箱中的椭圆选框工具,绘制一个如图8所示的选区。
图8 9、执行菜单:“编辑”/“描边”,弹出描边对话框,设置宽度为5px,颜色为黄色,如图9所示。
图9 10、点击确定后的描边效果如图10所示。
图10
标签(TAG) 贺卡设计 学photoshop
上一篇:ps cc制作曲别针
下一篇:ps放射线背景
相关推荐

贺卡设计,PS制作精美的端午节贺卡设

零基础学photoshop,18节课从小白到

图片变清晰,使用PS让模糊图片变清晰的方法教程

PS调出晶莹洁白肤色商业人像照片效果

PS调出唯美金黄色树叶背景甜美女生照片

调出高清质感暗色草原风景图片的PS教程


