鼠绘逼真粉色Lumix照相机图片的PS教程
2019-02-18 00:00:00
来源/作者: PS网 / 祜信
己有:1116人学习过
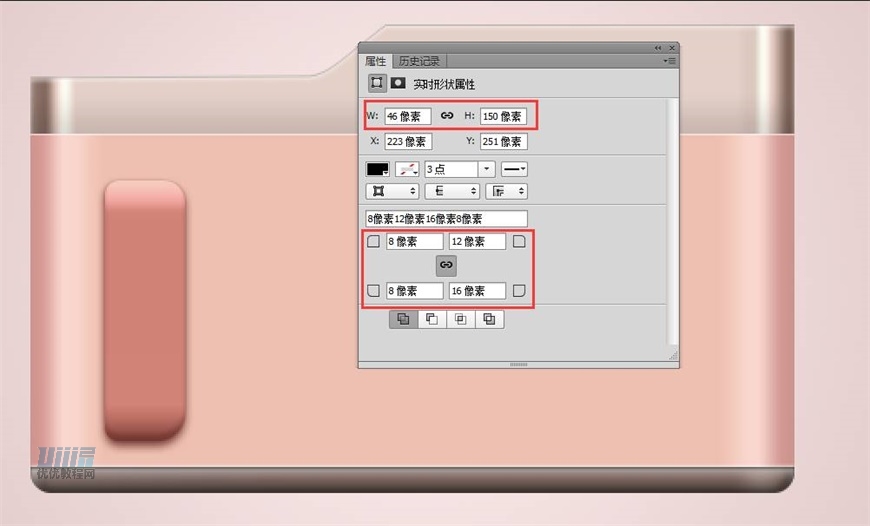
步骤 08
接下来制作把手。
新建矩形,大小为46*150,四个圆角调为8、12、8、16px,命名为【把手1】
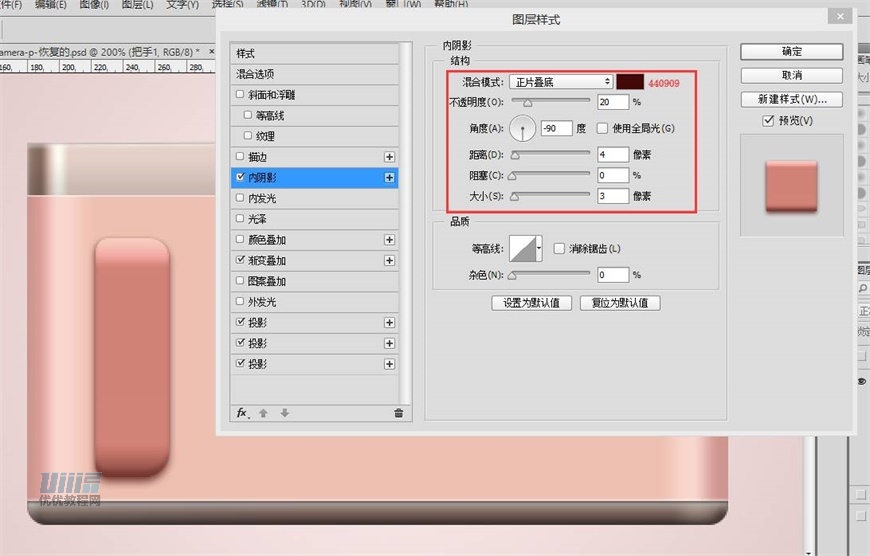
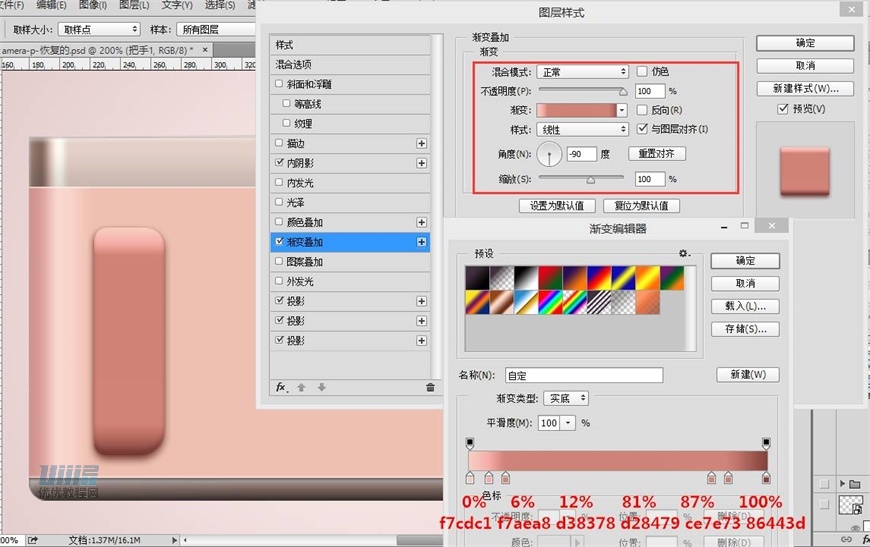
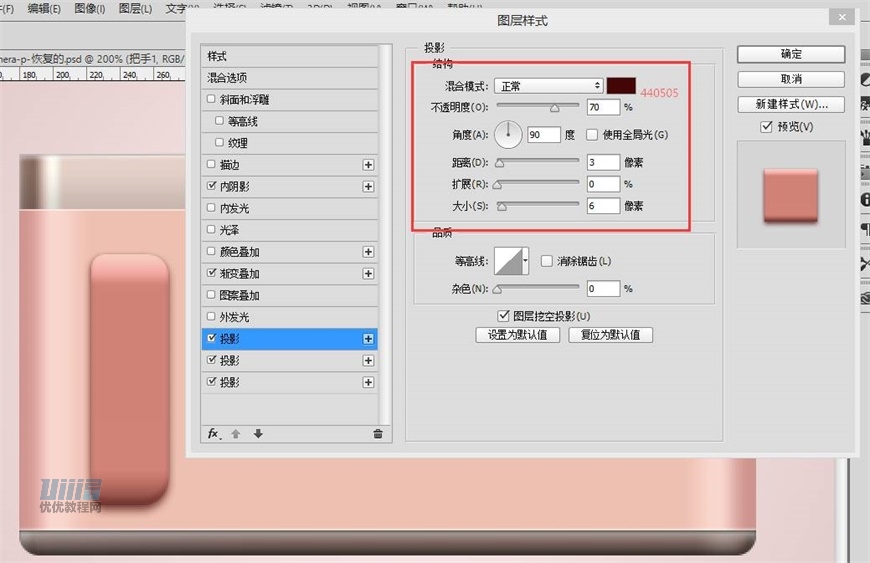
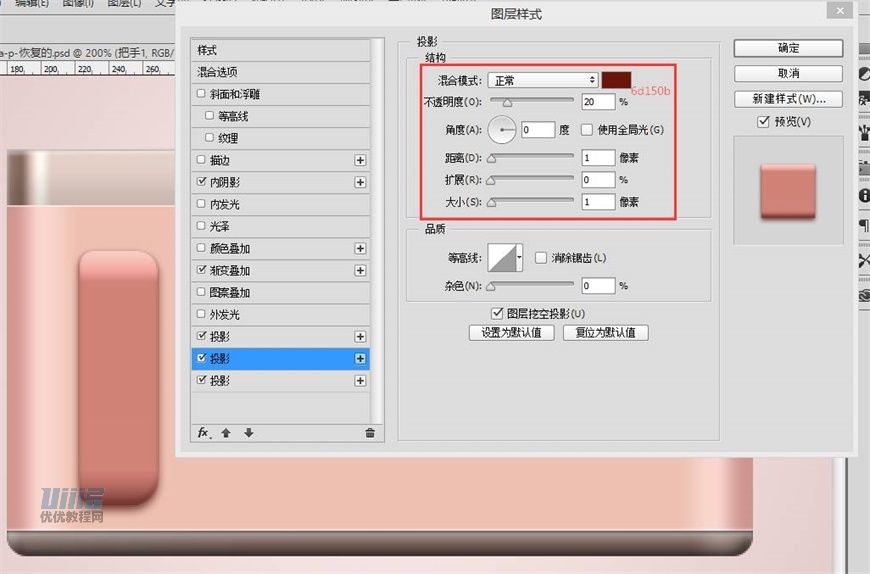
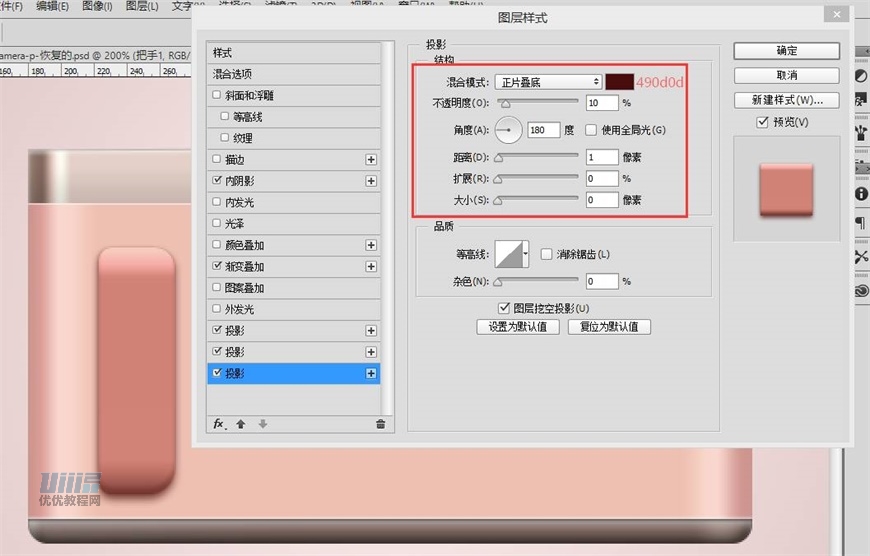
添加图层样式:渐变叠加、内阴影、投影。因为机身是红色,所以投影与内阴影都带有红色倾向。
步骤 09
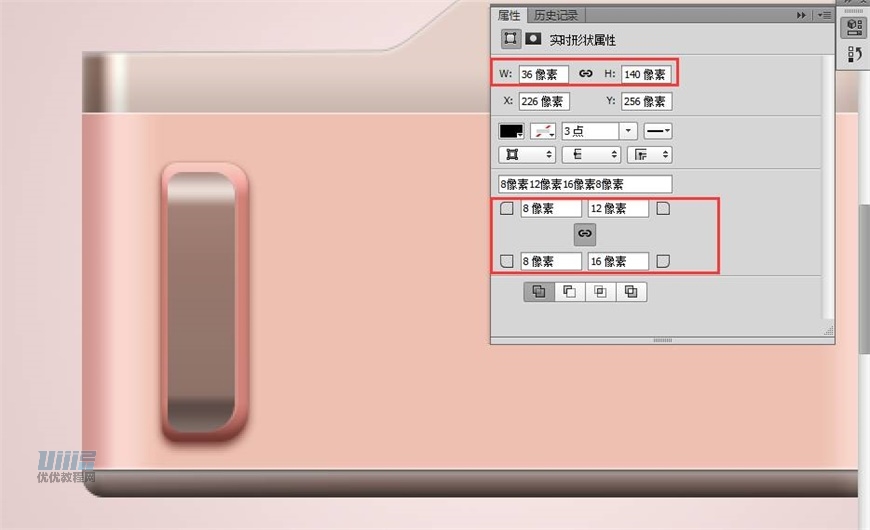
新建矩形,大小为36*140,四个圆角调为8、12、8、16px,命名为【把手2】
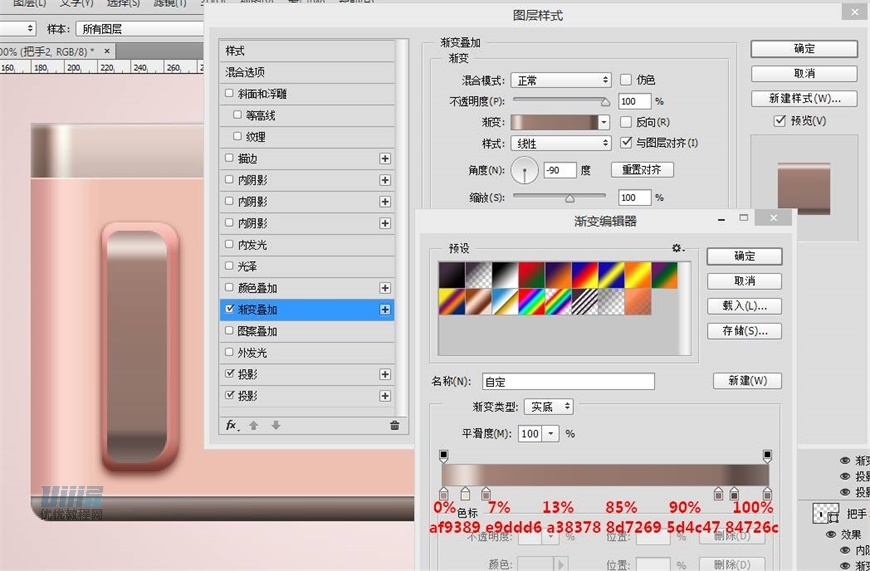
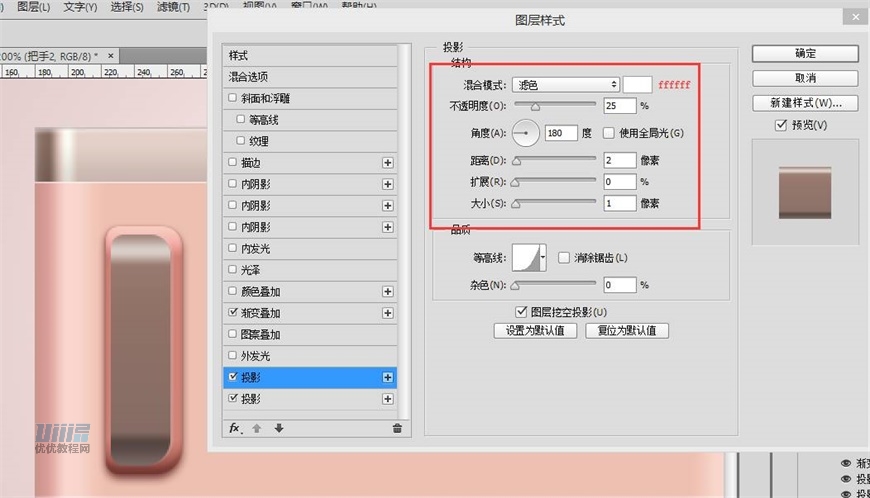
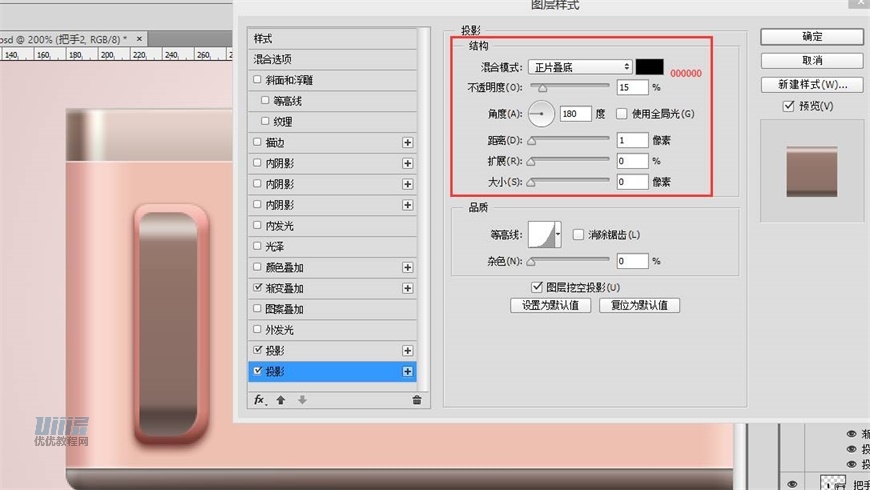
添加图层样式:渐变叠加、投影。
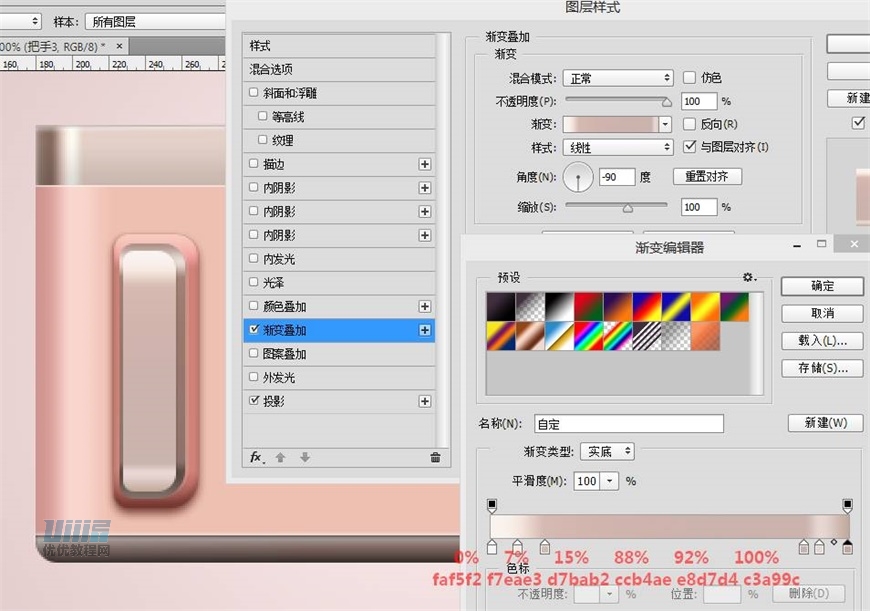
步骤 10
新建矩形,大小为29*132,四个圆角调为6、10、6、10px,命名为【把手3】
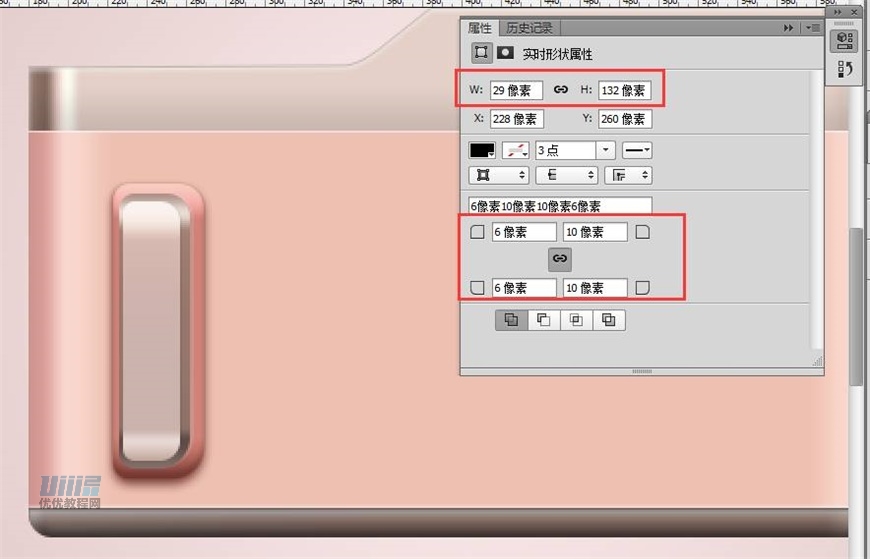
添加图层样式:渐变叠加、投影。

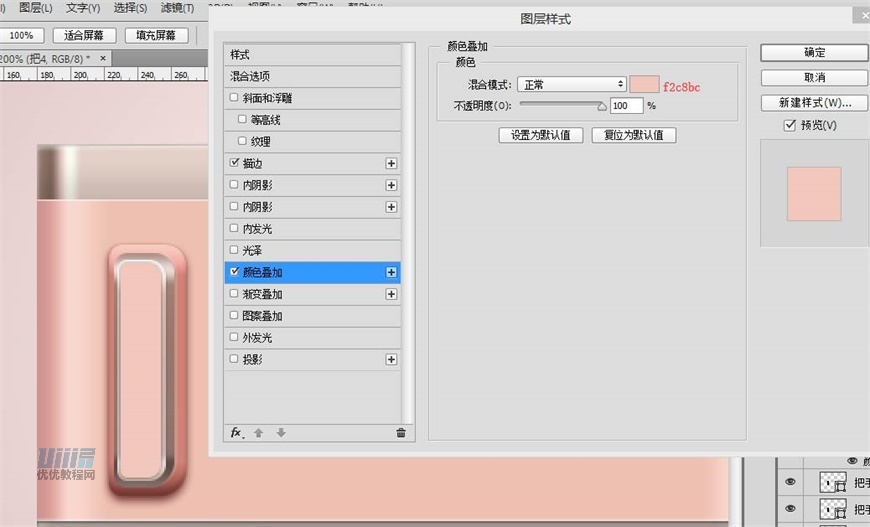
步骤 11
新建矩形,大小为24*128,四个圆角调为4、8、4、8px,命名为【把手4】

添加图层样式:颜色叠加、描边。
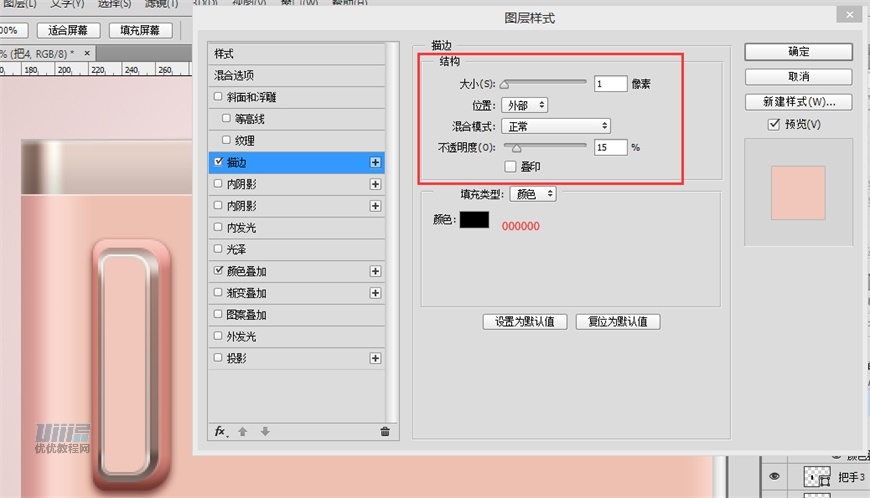
【把手1、2、3、4】建组,命名为【把手】
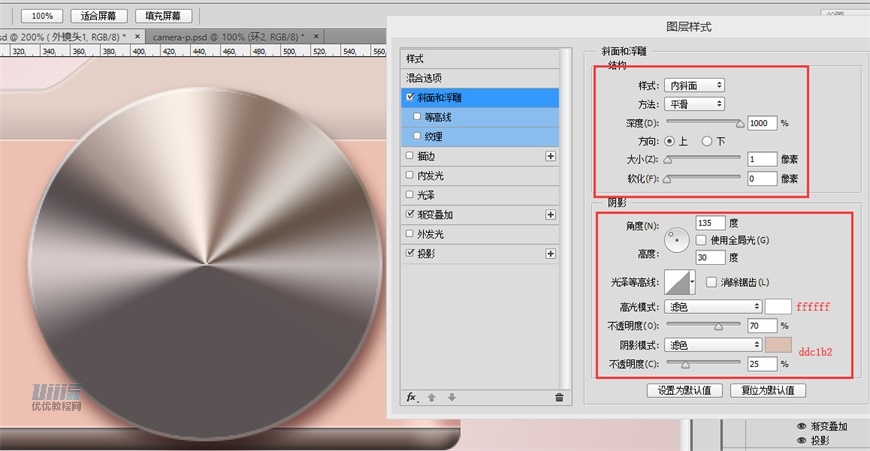
步骤 12
接下来制作镜头。可以通过颜色的逐渐加深和添加内阴影表现镜头的延伸感,同时要注意光影方向的一致。
首先是镜头外部。
新建椭圆,大小为236*236,命名为【外镜头1】添加图层样式:渐变叠加、斜面和浮雕、投影。
相关推荐

设计立体逼真多肉植物图标的PS教程

照片转逼真油画风格效果的PS方法技

PS如何制作人物照片中的逼真影子效

绘制逼真立体智能机器人图片的PS教

摄影后期, PS油画艺术效果人像照片后期处理教程

鼠绘恐怖卖萌绿毛怪头像图片的PS教程

PS钢笔鼠绘:学习绘制常用五金工具图片

PS鼠绘卡通机器人样式的小黄人相机图片


