Photoshop简单快速抠发丝只需37秒
2022-12-25 21:45:18
来源/作者: /
己有:31人学习过
Photoshop简单快速抠发丝只需37秒图1:要把头发从纯色背景分离出来
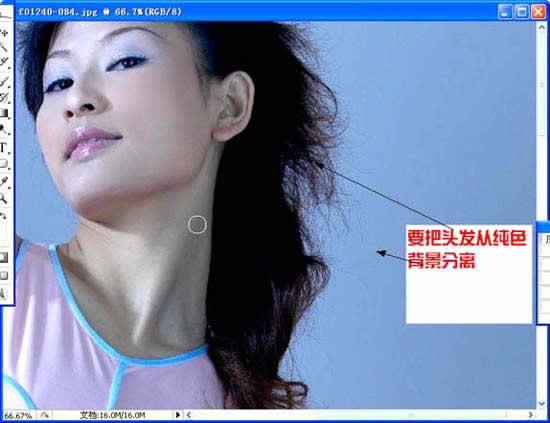
图2:从菜单栏选择“滤镜/抽出”
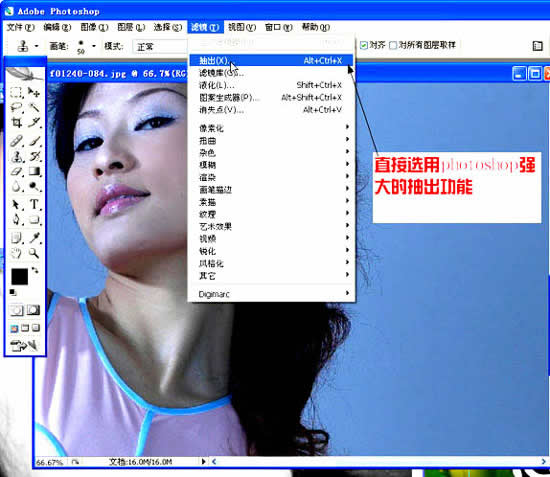
图3:点击“边缘高光器工具”(界面左侧第一个图标,像个笔头)
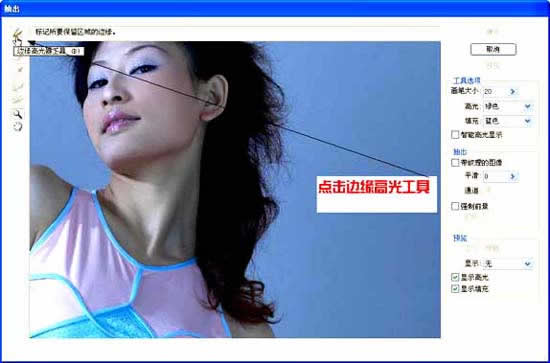
图4:调整画笔大小(点击 > 符号,之后进行调节)
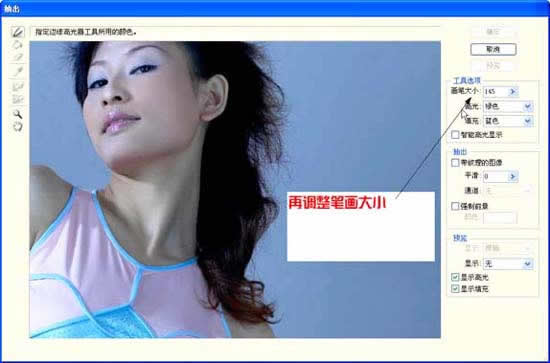
图5:把头发分散的部分全部涂上高光
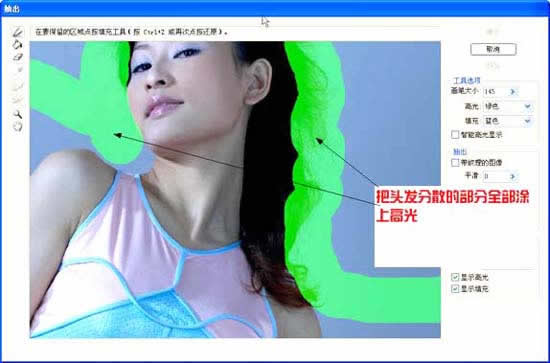 图6:缩小视图,高光一定要达到图片的边缘,这很重要!
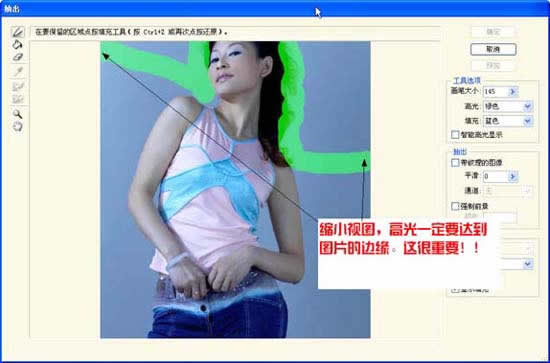
图7:再选择填充工具(油漆桶形状的)
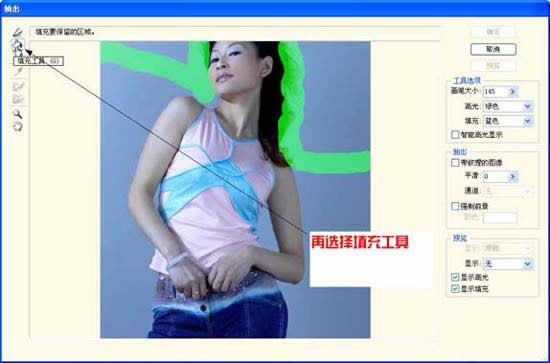
图8:在高光的下部区域任意处用填充工具点击,这个区域就会变成兰色

图9:确定
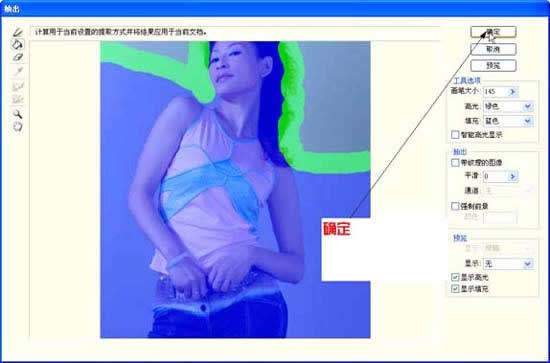
图10:发丝抠出来了!

图11:再用加深工具(像一只半合拢的手)处理一些细节,使分散的发丝颜色深一些

图12:最终效果:丝丝分明
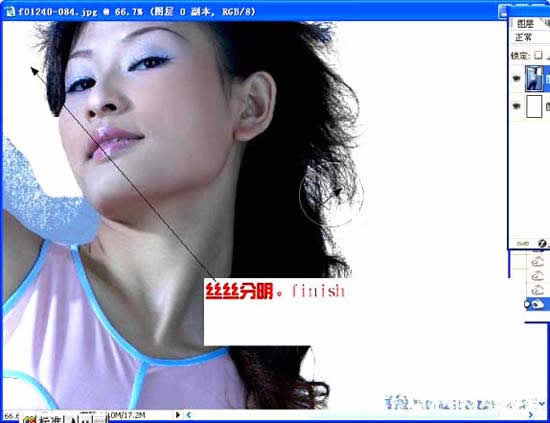
图2:从菜单栏选择“滤镜/抽出”
图3:点击“边缘高光器工具”(界面左侧第一个图标,像个笔头)
图4:调整画笔大小(点击 > 符号,之后进行调节)
图5:把头发分散的部分全部涂上高光
图6:缩小视图,高光一定要达到图片的边缘,这很重要!图7:再选择填充工具(油漆桶形状的)
图8:在高光的下部区域任意处用填充工具点击,这个区域就会变成兰色
图9:确定
图10:发丝抠出来了!
图11:再用加深工具(像一只半合拢的手)处理一些细节,使分散的发丝颜色深一些
图12:最终效果:丝丝分明
搜索更多相关主题的帖子:Photoshop 发丝 头发 高光 纯色
简单的,我们教你,深奥的,你来分享上一篇:抠植物,快速抠取书画中梅花图片
相关推荐

抠黑头发的方法-较实用

工具抠图,ps钢笔工具抠图视频教程

抠图基础,抠图工具使用基本教程

利用Photoshop蒙板轻松简单抠头发

用Photoshop去除图片中的锯齿

PS如何把与背景颜色相近带反光的头发抠出

Photoshop抠图教程:抠出发丝并去除环境色技巧

去除修复杂乱头发丝的PS人像修图教程


