photoshop翅膀笔刷的使用教程
2022-12-25 22:04:31
来源/作者: /
己有:33人学习过
2、选择笔刷工具

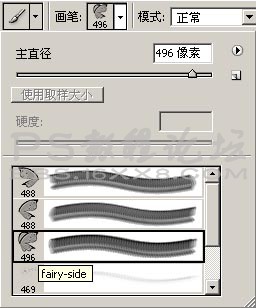
根据需要选择如下笔刷
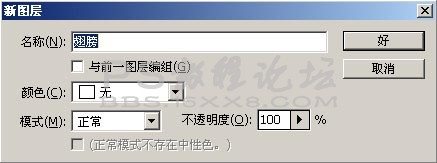
创建新图层(CTRL + SHIFT + N ),并命名为“翅膀”
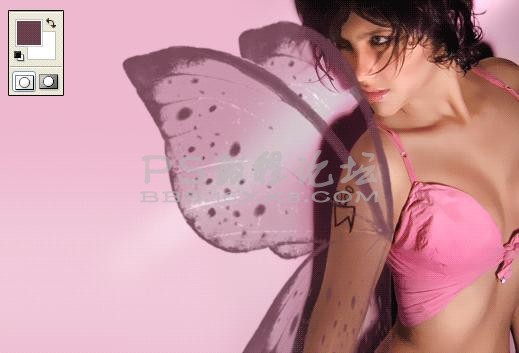
设置前景色为#6c3d4e,利用笔刷在翅膀层绘制如下效果
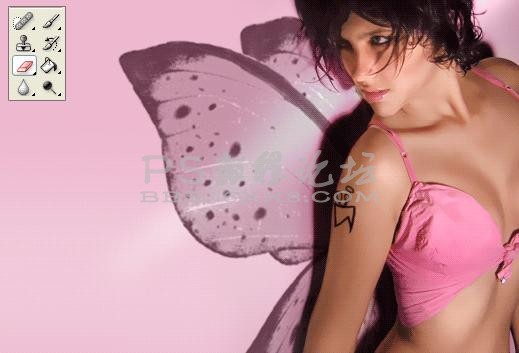
选择橡皮擦工具,擦除覆盖于人像上方的翅膀部分
根据需要选择如下笔刷
创建新图层(CTRL + SHIFT + N ),并命名为“翅膀”
设置前景色为#6c3d4e,利用笔刷在翅膀层绘制如下效果
选择橡皮擦工具,擦除覆盖于人像上方的翅膀部分
标签(TAG) 效果教程 学photoshop
相关推荐

ps合成水人效果教程

ps合成火炎人像效果教程

ps人像合成艺术作品效果教程

ps合成奇幻冰火面效果教程

如何用PS把浑浊的风景照片调出通透清晰

PS商业修图师对人物头发进行精修教程

如何用PS打造出明亮而有神的眼睛效果

PS商业修图给人像增强光影质感的方法介绍


