如何用photoshop给物品加光线教程
2022-12-25 18:03:43
来源/作者: /
己有:49人学习过
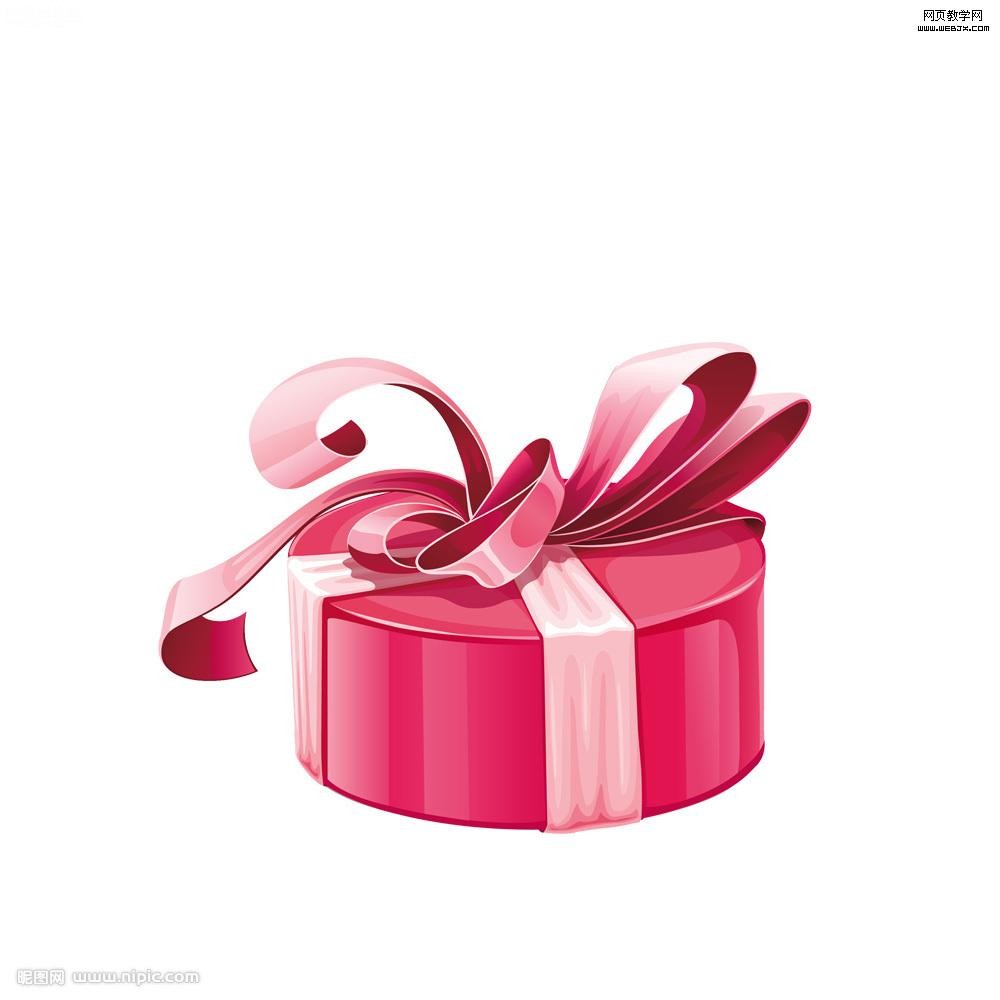
素材
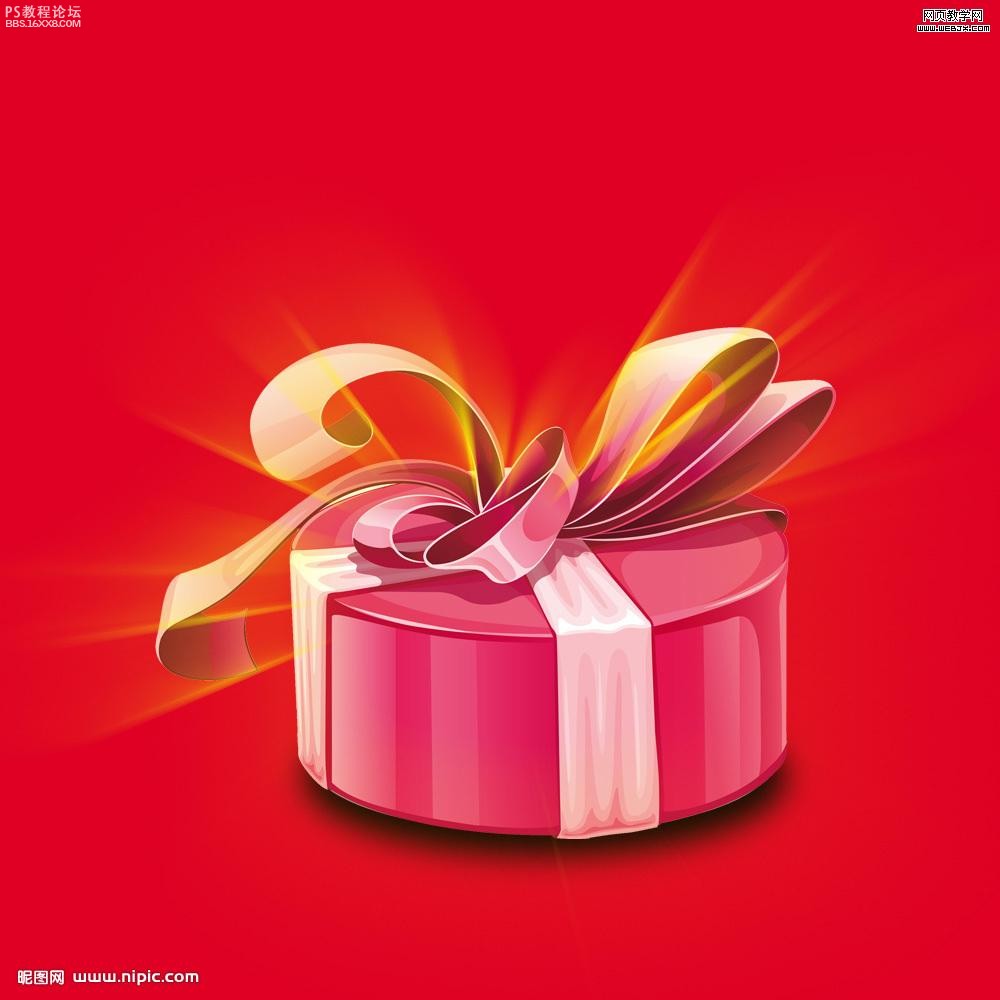
效果图
, 首先用photoshop把素材扣出来 把底色填充红色(为了能够看清放光效果,当然如果是白色背景可以放光为黑色)
然后在图层面板按ctrl+右键
画出蚁行线

新建一个图层(ctrl+shift+n) 然后选择描边(alt+e+s)
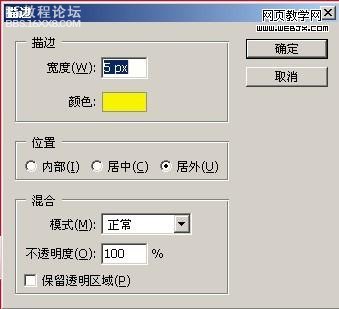
根据图片的大小调像素····(废话)
确定 以下效果

, 蚁行线不要取消 然后(altm+e)扩展
扩展100像素 选择两次,也就是扩展200像素(当然,按照图片大小调)

然后 滤镜-模糊-径向模糊
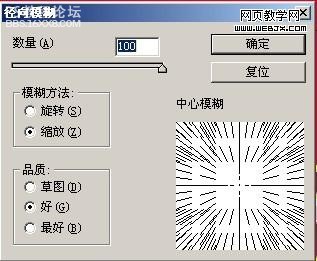
一次效果不是很理想, 在此选择ctrl+f 效果会更好一些
出来单层颜色不是太明显

那就复制一层ctrl+j
很简单就出来这个效果了···

简单的方法 可以应用到很多地方 自己研究吧
效果图
, 首先用photoshop把素材扣出来 把底色填充红色(为了能够看清放光效果,当然如果是白色背景可以放光为黑色)
然后在图层面板按ctrl+右键
画出蚁行线
新建一个图层(ctrl+shift+n) 然后选择描边(alt+e+s)
根据图片的大小调像素····(废话)
确定 以下效果
, 蚁行线不要取消 然后(altm+e)扩展
扩展100像素 选择两次,也就是扩展200像素(当然,按照图片大小调)
然后 滤镜-模糊-径向模糊
一次效果不是很理想, 在此选择ctrl+f 效果会更好一些
出来单层颜色不是太明显
那就复制一层ctrl+j
很简单就出来这个效果了···
简单的方法 可以应用到很多地方 自己研究吧
相关推荐

ps cc制作放射光效教程

如何用PS把浑浊的风景照片调出通透清晰

PS商业修图师对人物头发进行精修教程

如何用PS打造出明亮而有神的眼睛效果

PS商业修图给人像增强光影质感的方法介绍


