常用的ps美化脸部彩妆教程
2022-12-25 12:49:56
来源/作者: /
己有:5人学习过
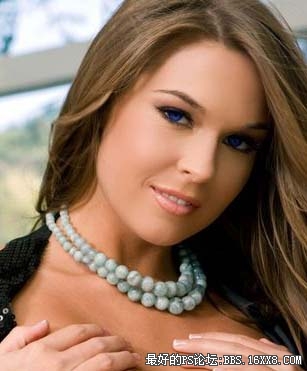
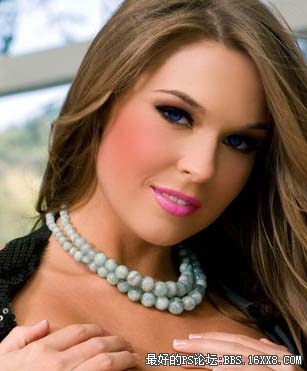
打开人像素材。
 [b]调整眼睛颜色[/b]
创建新图层,并用笔刷描绘眼睛。
 滤镜 模糊 高斯模糊,模糊半径设为1.5,将图层混合模式设为“柔光”,不透明度设为70%。
,
[b]变换口红颜色[/b]
创建新图层,选择自己喜爱的颜色笔刷描会嘴唇。
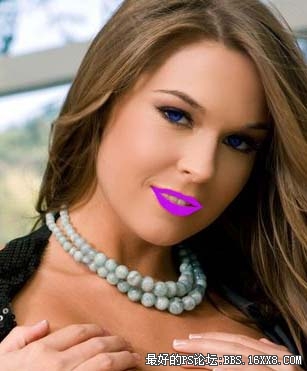 滤镜 模糊 高斯模糊,模糊半径1.5。
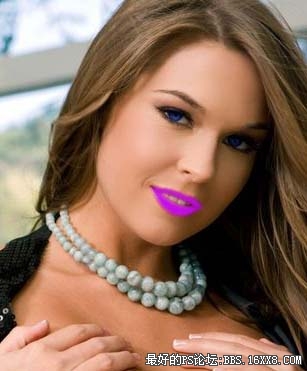 将图层混合模式设为“柔光”,不透明度设为70%。

,
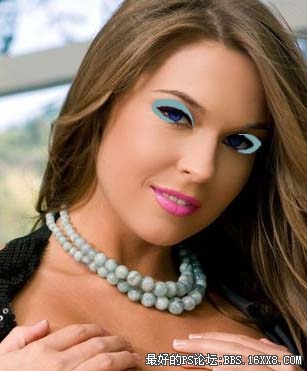
[b]眼睛修饰[/b]
创建新图层,首先描绘眼睫毛。
 同样的高斯模糊,并将图层混合模式设为“柔光”。
 换一种颜色制作眼影效果。
,
滤镜 模糊 高斯模糊,模糊半径设为4,将图层混合模式设为“颜色加深”。
 [b]腮红制作[/b]
选择嫣红色涂抹脸部。
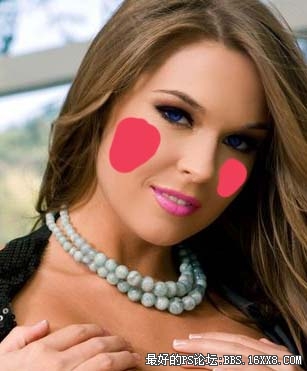 滤镜 模糊 高斯模糊,模糊半径设为20,将图层混合模式设为“线性加深”,不透明度设为40%,得到最终效果。
[b]调整眼睛颜色[/b]创建新图层,并用笔刷描绘眼睛。
滤镜 模糊 高斯模糊,模糊半径设为1.5,将图层混合模式设为“柔光”,不透明度设为70%。,
[b]变换口红颜色[/b]
创建新图层,选择自己喜爱的颜色笔刷描会嘴唇。
滤镜 模糊 高斯模糊,模糊半径1.5。将图层混合模式设为“柔光”,不透明度设为70%。,
[b]眼睛修饰[/b]
创建新图层,首先描绘眼睫毛。
同样的高斯模糊,并将图层混合模式设为“柔光”。换一种颜色制作眼影效果。,
滤镜 模糊 高斯模糊,模糊半径设为4,将图层混合模式设为“颜色加深”。
[b]腮红制作[/b]选择嫣红色涂抹脸部。
滤镜 模糊 高斯模糊,模糊半径设为20,将图层混合模式设为“线性加深”,不透明度设为40%,得到最终效果。标签(TAG) 磨皮教程 彩妆教程 学photoshop
上一篇:美腿教程,教你怎样修大长腿
相关推荐

ps18步给美女图片磨皮教程

psCS5滤镜磨皮教程

Photoshop为美女和加彩色眼影和磨

简单效果好的磨皮教程《QC、糖》

如何用PS把浑浊的风景照片调出通透清晰

PS商业修图师对人物头发进行精修教程

如何用PS打造出明亮而有神的眼睛效果

PS商业修图给人像增强光影质感的方法介绍


