photoshop合成实例:童话故事场景
2022-12-26 01:07:34
来源/作者: /
己有:43人学习过
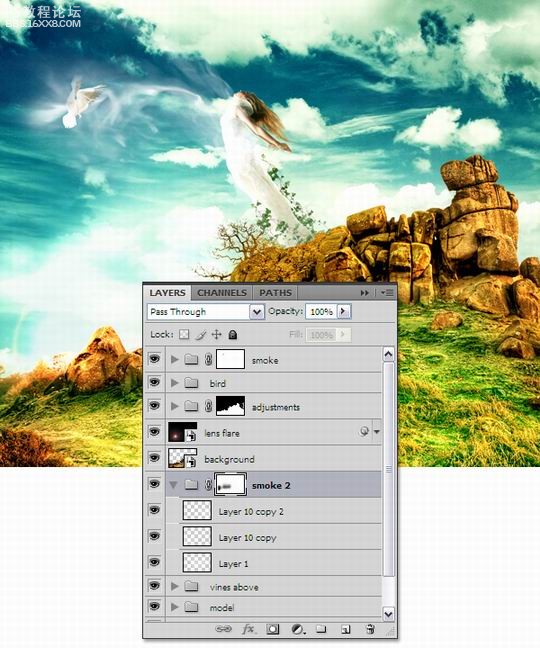
第二十七步:
现在我们要把一些树上的花放在图像的右边。用钢笔工具(P)减去一些花,使用移动工具(V)把它们移到你的文档。
按你的想法安排花的位置,编辑 自由变换,然后按你意愿缩放并旋转它们。

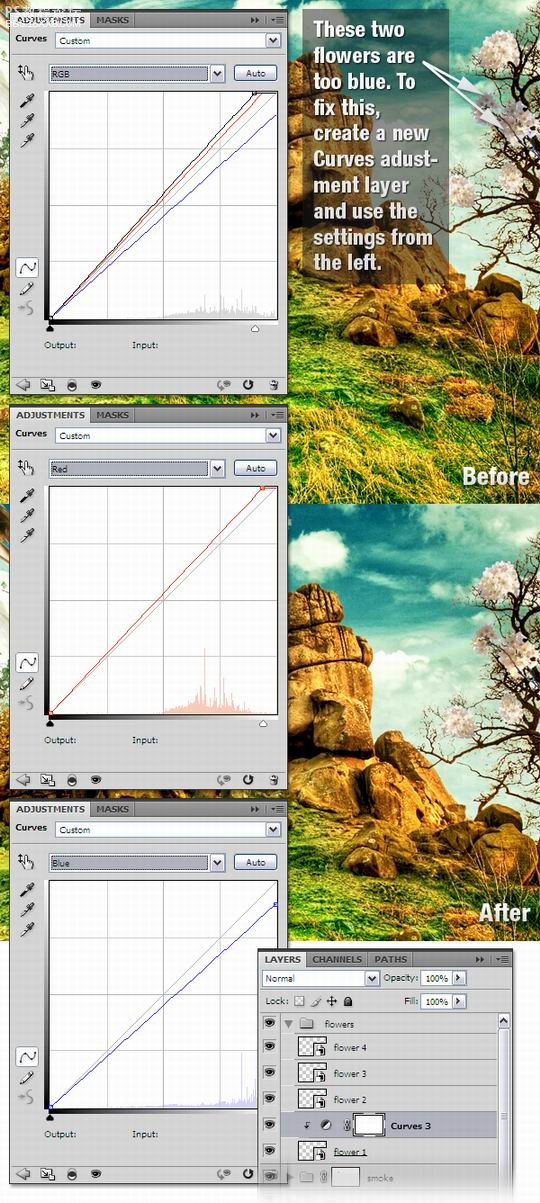
第二十八步:
因为阴影的缘故我的两朵花的颜色偏蓝。如果你也是处在相同的情况下你可以用曲线调整层来解决这一问题。
选择花的图层,图层 新调整图层 曲线,选择之前使用的层来创建剪裁蒙版选项,设置如下。
第二十九步:
添加瀑布。下载图像在PS中打开它并使用移动工具把它移到你的文档中。然后图像 层蒙版 显示全部,选择一个
黑色软笔刷蒙住图层的一部分。我们只需要水。看一看下图吧。
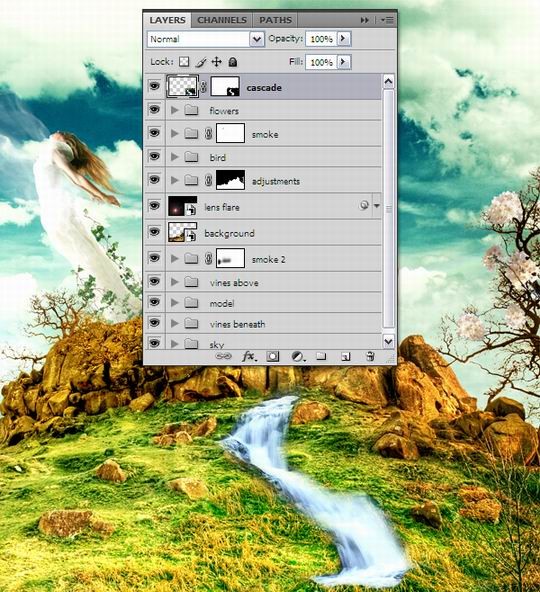
第三十步:
现在你要在瀑布层上加一些调整层。首先进入层 调整 曲线,使用下面的设置。然后图像 调整 色彩平衡,
使用如下设置。合并“瀑布”层和两个调整层,命名为“瀑布”。
,
第三十一步:
选择“背景”层,使用钢笔工具(P)减少一些岩石。把所有这些岩石图层放到所有其他层之上,把它们转换为
智能物体。命名为“石头”。

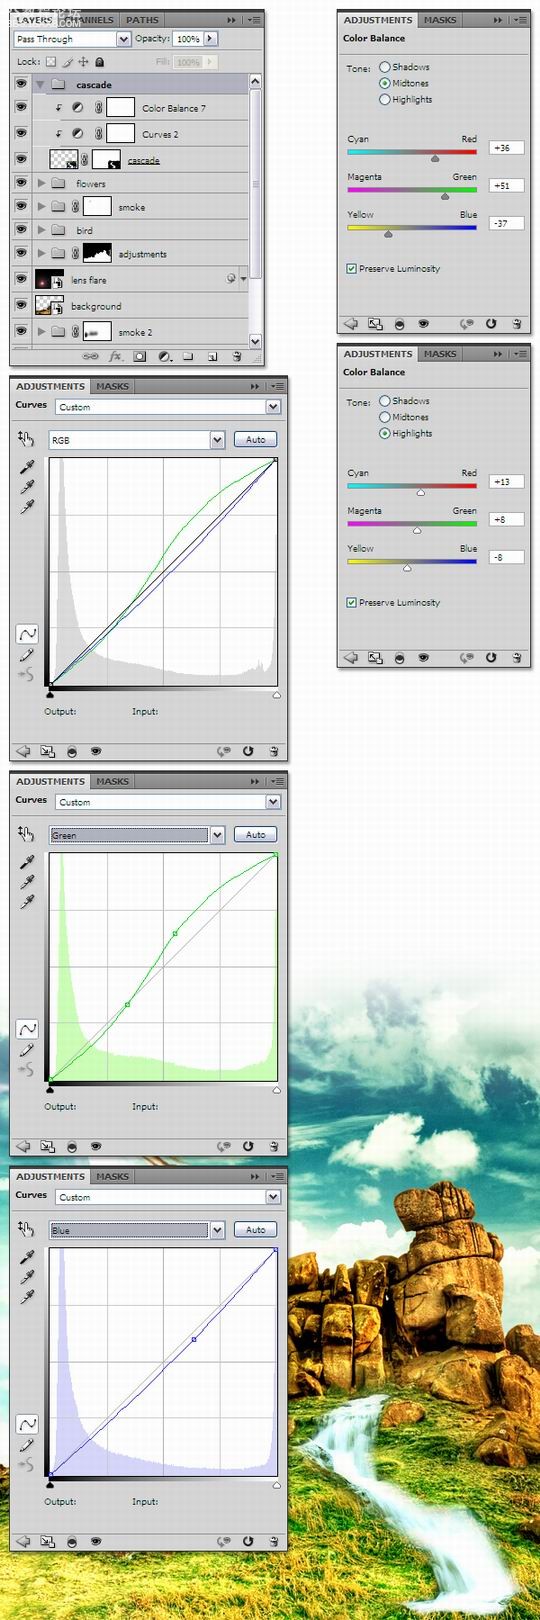
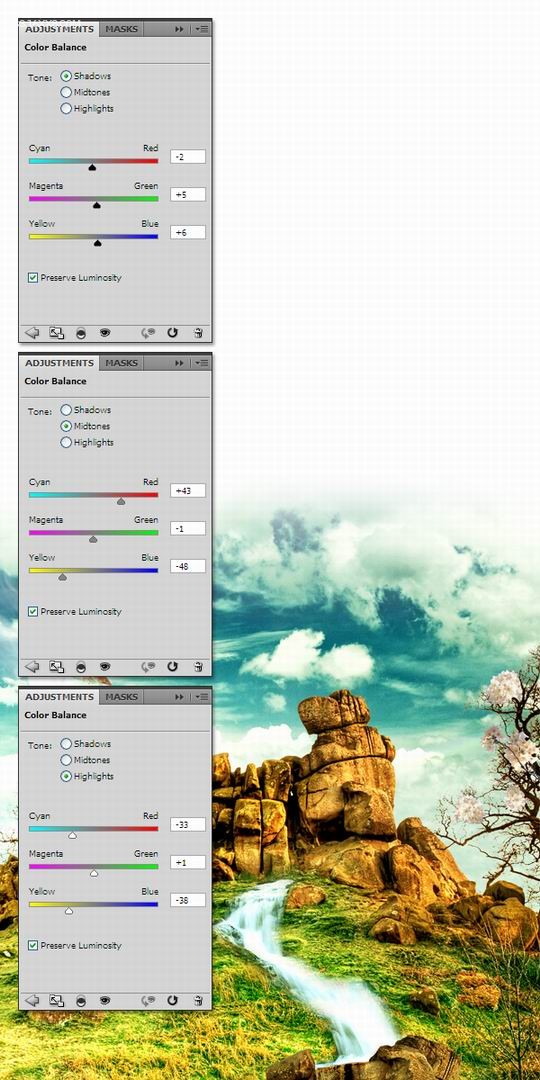
第三十二步:
图像 调整 色彩平衡,使用之前层来创建剪裁蒙版,使用下图设置。
第三十三步:
选择“瀑布”层,选择套索工具(L),设置羽化10px,选择瀑布的一部分。然后编辑 复制,在所有层之上创建一个
新层,再编辑 粘贴。

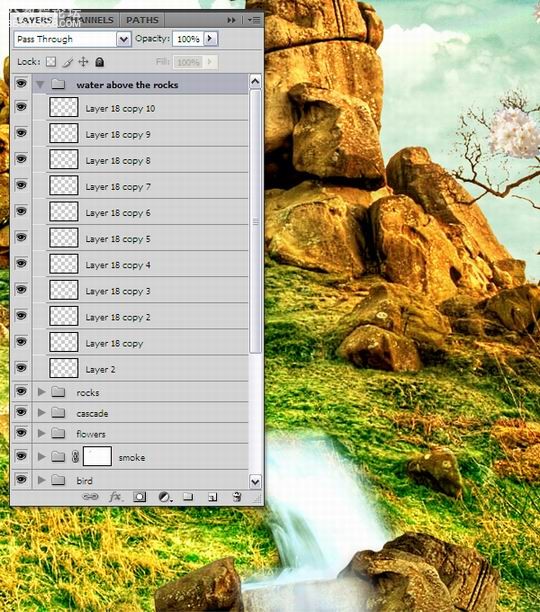
第三十四步:
设置前一层的透明度为30%。然后复制这层10次,使用移动工具(V)安排层次。然后组合层,命名层为“水在岩石
上流淌”。参考下图。
,
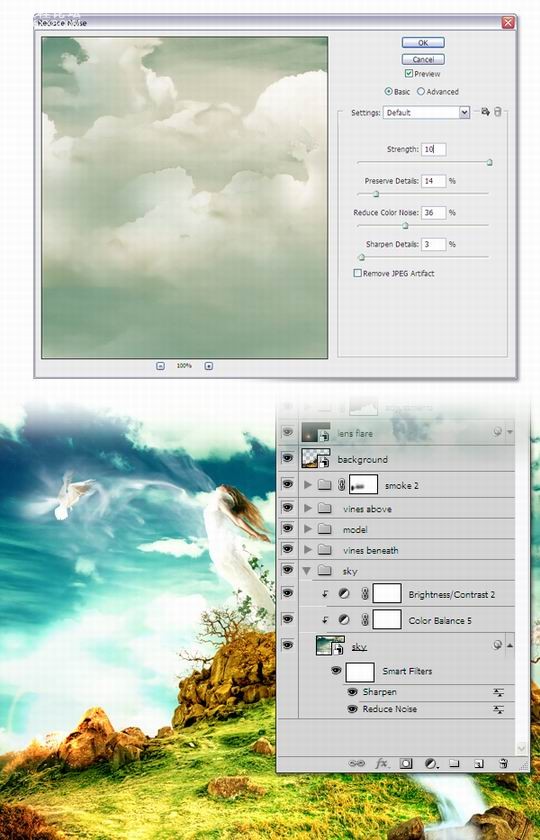
第三十五步:
现在我们需要做的是添加一组调整。首先,选择“天空”图层,滤镜 杂色 减少杂色。使用下图的设置。然后滤镜
锐化 锐化。
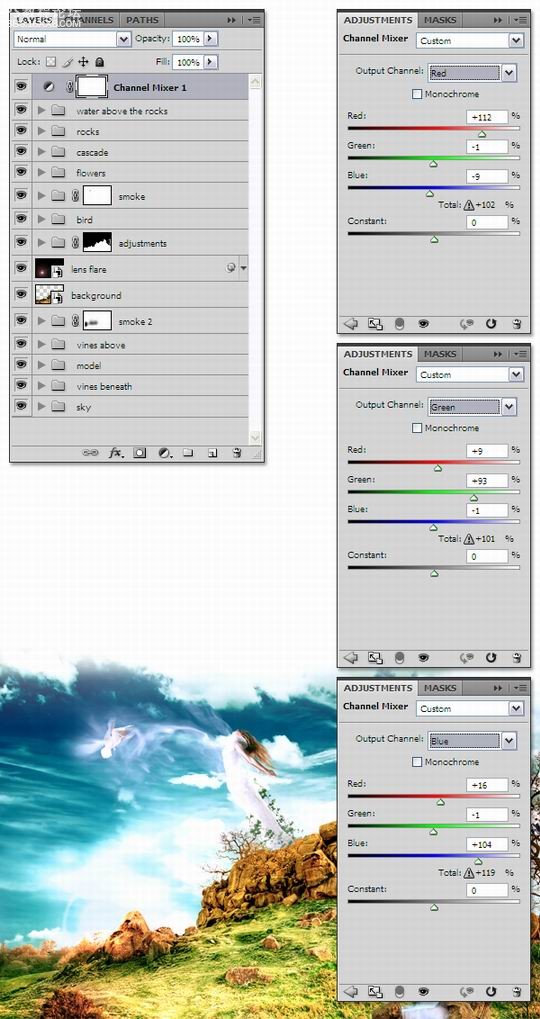
第三十六步:
图像 调整 混合通道,把这个层放在其他所有层之上,使用下图的设置。
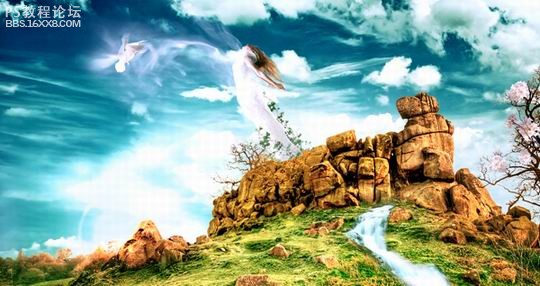
完成最终效果!希望你学到了一些新技术,在这个过程中玩得愉快。
上一篇:PS用镜像合成可怕公鸡
下一篇:用ps合成等爱的玫瑰
相关推荐

Photoshop照片合成教程:打造云端舞

ps海边照片合成教程

PS教程:照片合成实例好看的吉他英

ps多张照片合成一张美女抱小孩场景

合成行驶在梦幻森林中火车照片的PS教程

合成恐怖灵异双重曝光头像照片的PS教程

PS合成明亮夜色下的天使白狼场景图片

战争海报,PS合成战争电影主题海报图片设计教程


