photoshop合成教程:海底沉船
2022-12-26 01:39:07
来源/作者: /
己有:24人学习过
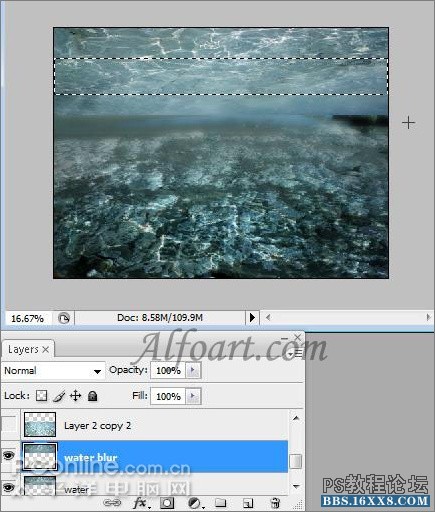
·把这个图层移动到“海底”图层之上,把图像拉伸至合适的大小(刚好覆盖海底)
·图像-调整-色阶,把中间的灰色滑块移向右边,白色滑块移向左边,增强画面对比度
·选择图层混合模式为正片叠底,透明度80-90%
·建立一个黑白渐变的蒙版

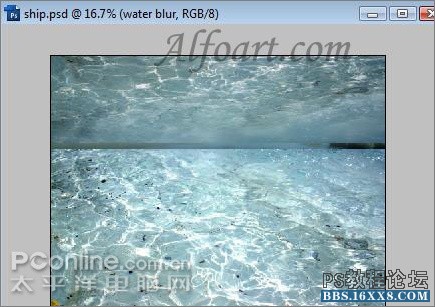
·回到海面图层
·使用矩形选框工具建立一个长方形选区(如图所示)
·复制并粘贴到一个新的图层,位于水面反射层之上
·滤镜-模糊-高斯模糊(25)
·滤镜-模糊-动态模糊(0,400)
·垂直拉大这块区域

·图像-调整-色阶,把中间的灰色滑块移向右边,白色滑块移向左边,增强画面对比度
·选择图层混合模式为正片叠底,透明度80-90%
·建立一个黑白渐变的蒙版
·回到海面图层
·使用矩形选框工具建立一个长方形选区(如图所示)
·复制并粘贴到一个新的图层,位于水面反射层之上
·滤镜-模糊-高斯模糊(25)
·滤镜-模糊-动态模糊(0,400)
·垂直拉大这块区域
标签(TAG) 照片合成 学photoshop
相关推荐

Photoshop照片合成教程:打造云端舞

ps多张照片合成一张美女抱小孩场景

ps多张数码照片合成一个场景教程

PS照片合成孤独女孩场景

合成行驶在梦幻森林中火车照片的PS教程

合成恐怖灵异双重曝光头像照片的PS教程

PS合成明亮夜色下的天使白狼场景图片

战争海报,PS合成战争电影主题海报图片设计教程


