photoshop调色教程:商业化暗调视觉效果
2022-12-25 14:32:41
来源/作者: /
己有:15人学习过
本教程主要用photoshop来调整一张商业化暗调视觉效果的片子,整体的色彩给人的感觉有点复古,然后用TOPAZ给照片锐化了一下,整体的效果就出来了.
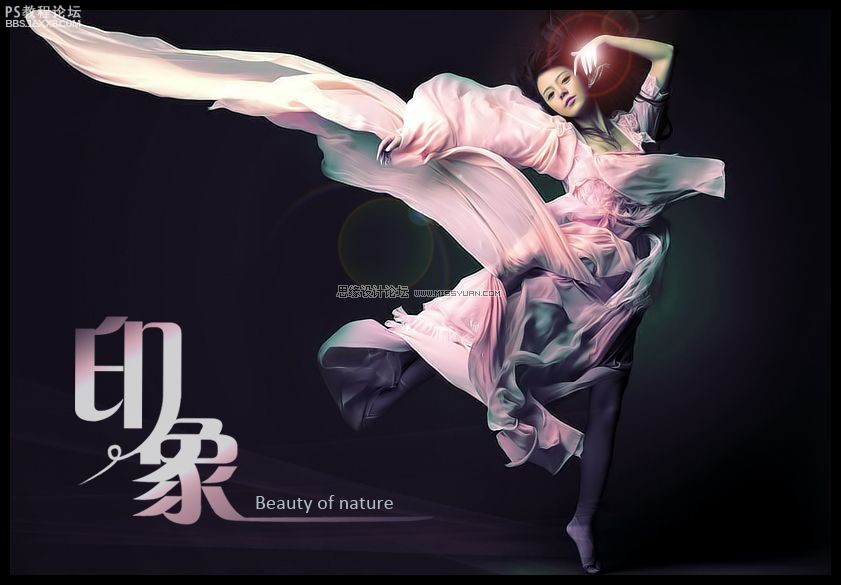
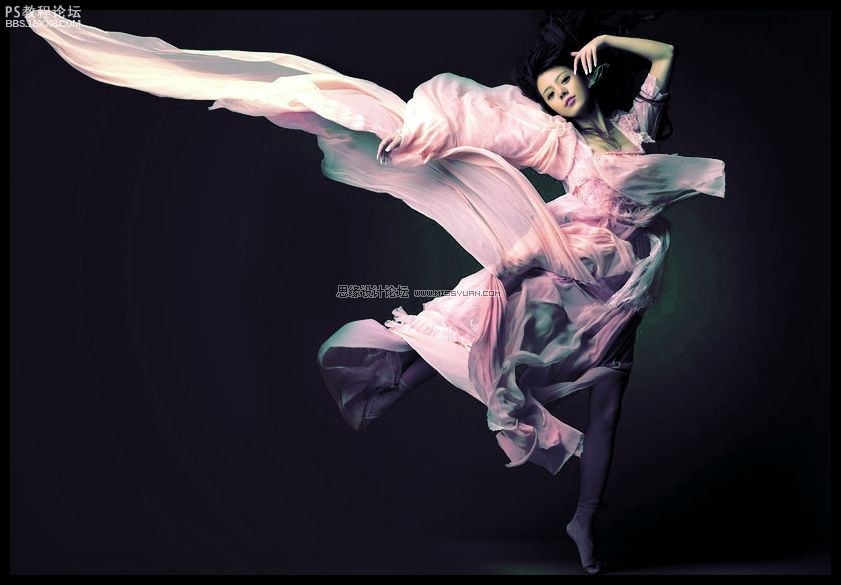
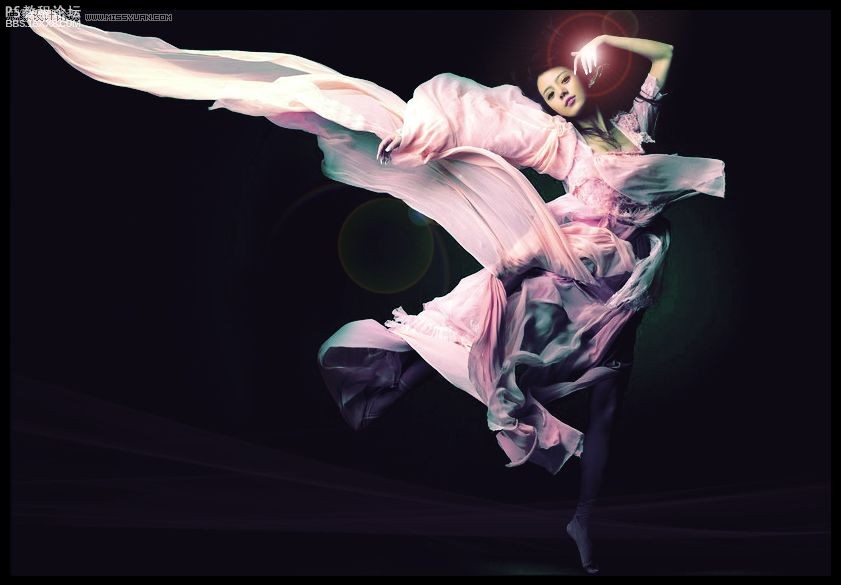
1)先看看效果图
2)素材图片
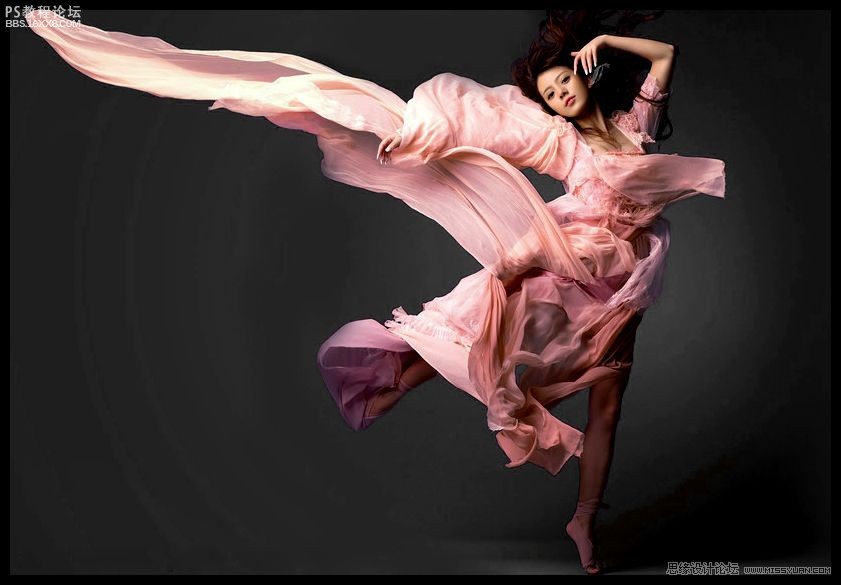

,
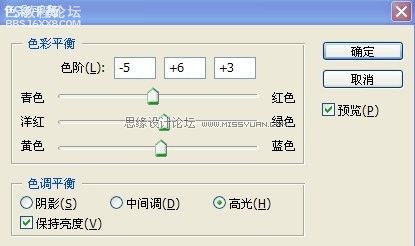
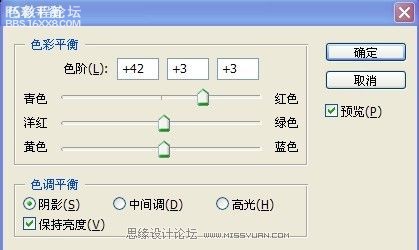
3)打开美女图片。点击图层调板中的 前天 19:28,创建色彩平衡和可选颜色调整层。 (1)色彩平衡中的阴影和高光设置,而中间调不变 (2)可选颜色对一些颜色进行设置。 (3)设置后效果图为下图
3)打开美女图片。点击图层调板中的

前天 19:28,创建色彩平衡和可选颜色调整层。
(1)色彩平衡中的阴影和高光设置,而中间调不变
(2)可选颜色对一些颜色进行设置。
(3)设置后效果图为下图
,
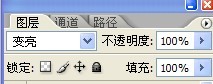
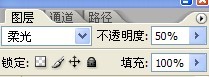
4)把素材图片导入为图层2,ctrl+t,调整大?=疾隳J缴栉淞痢H缓笮陆ㄍ疾阄疾?.ctrl+alt+shfit+e。合并图层,在复制图层3.把图层模式改为柔光,不透明度为50% 最终效果为: 5)新建图层4,填充黑色。滤镜--
4)把素材图片导入为图层2,ctrl+t,调整大小。将图层模式设为“变亮”。然后新建图层为图层3.ctrl+alt+shfit+e。合并图层,在复制图层3.把图层模式改为“柔光”,不透明度为50%
最终效果为:

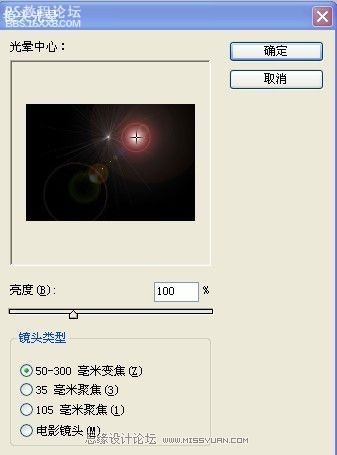
5)新建图层4,填充黑色。滤镜--渲染--镜头光晕。并将其图层模式设为“滤色”.ctrl+t并对其调整,效果如下图:
,
6)写上文字印象,并栅格化文字,删掉不好的部分。 7)新建图层。用钢笔工具勾画如下图的效果。并ctrl+enter转化为选区。填充白色。最后的效果为下图: 8)合并所有与文字有关的图层。双击,添加图层样式。 9)新建图层
6)写上文字“印象”,并栅格化文字,删掉不好的部分。


7)新建图层。用钢笔工具勾画如下图的效果。并ctrl+enter转化为选区。填充白色。最后的效果为下图:


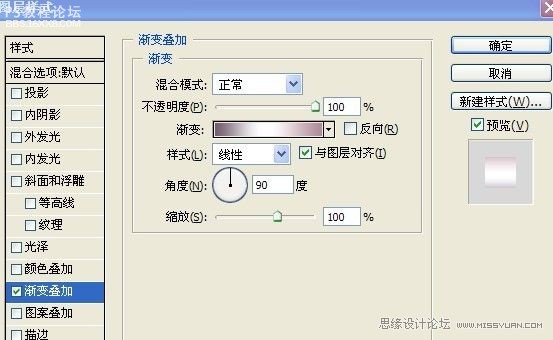
8)合并所有与文字有关的图层。双击,添加图层样式。
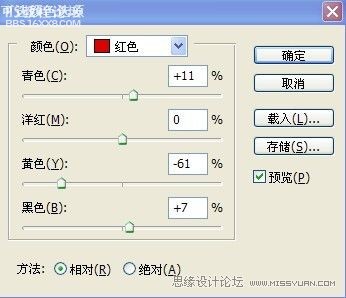
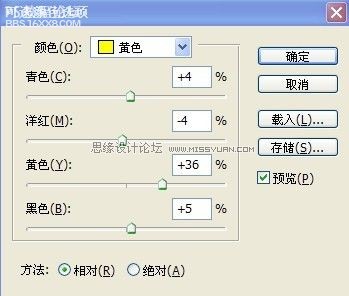
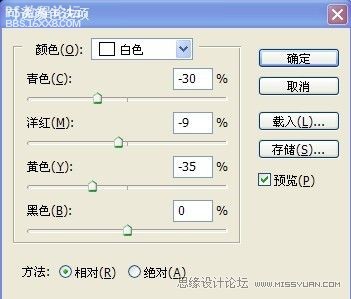
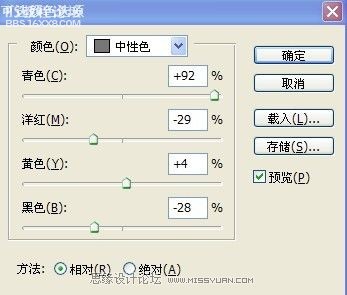
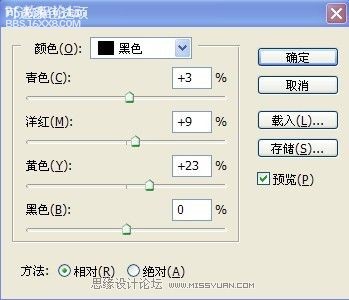
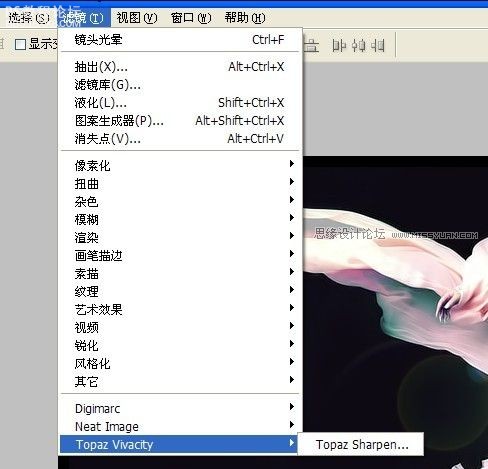
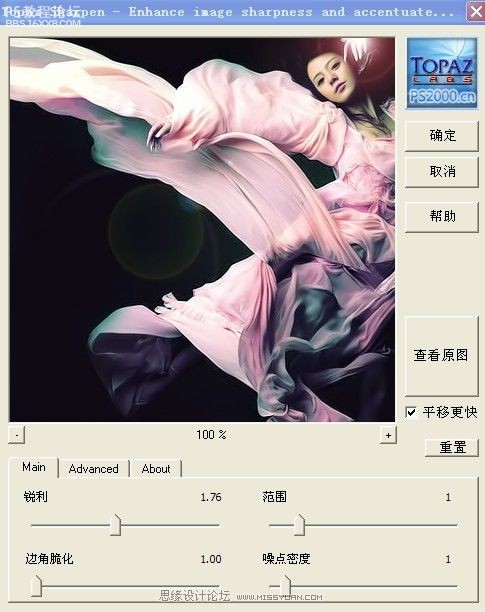
9)新建图层。ctrl+alt+shfit+e。合并图层,如果你没有下载“topaz滤镜”请下载。
对其设置参数:
1)先看看效果图
2)素材图片
,
3)打开美女图片。点击图层调板中的 前天 19:28,创建色彩平衡和可选颜色调整层。 (1)色彩平衡中的阴影和高光设置,而中间调不变 (2)可选颜色对一些颜色进行设置。 (3)设置后效果图为下图
3)打开美女图片。点击图层调板中的
前天 19:28,创建色彩平衡和可选颜色调整层。
(1)色彩平衡中的阴影和高光设置,而中间调不变
(2)可选颜色对一些颜色进行设置。
(3)设置后效果图为下图
,
4)把素材图片导入为图层2,ctrl+t,调整大?=疾隳J缴栉淞痢H缓笮陆ㄍ疾阄疾?.ctrl+alt+shfit+e。合并图层,在复制图层3.把图层模式改为柔光,不透明度为50% 最终效果为: 5)新建图层4,填充黑色。滤镜--
4)把素材图片导入为图层2,ctrl+t,调整大小。将图层模式设为“变亮”。然后新建图层为图层3.ctrl+alt+shfit+e。合并图层,在复制图层3.把图层模式改为“柔光”,不透明度为50%
最终效果为:
5)新建图层4,填充黑色。滤镜--渲染--镜头光晕。并将其图层模式设为“滤色”.ctrl+t并对其调整,效果如下图:
,
6)写上文字印象,并栅格化文字,删掉不好的部分。 7)新建图层。用钢笔工具勾画如下图的效果。并ctrl+enter转化为选区。填充白色。最后的效果为下图: 8)合并所有与文字有关的图层。双击,添加图层样式。 9)新建图层
6)写上文字“印象”,并栅格化文字,删掉不好的部分。
7)新建图层。用钢笔工具勾画如下图的效果。并ctrl+enter转化为选区。填充白色。最后的效果为下图:
8)合并所有与文字有关的图层。双击,添加图层样式。
9)新建图层。ctrl+alt+shfit+e。合并图层,如果你没有下载“topaz滤镜”请下载。
对其设置参数:
上一篇:ps调出人物暗调金属质感
下一篇:暗黑系,森林写真暗黑系调色教程
相关推荐

情侣写真,调出复古小清新色调情侣影

ps调出高级复古欧美色调教程

PS夜景美化:调出唯美蓝色夜景灯光照片效果

调出绚丽蓝天白云山水风景图片的PS教程

调出金色晨曦森林儿童背影照片的PS教程


