ps刮痕效果
2022-12-26 18:28:00
来源/作者: /
己有:60人学习过
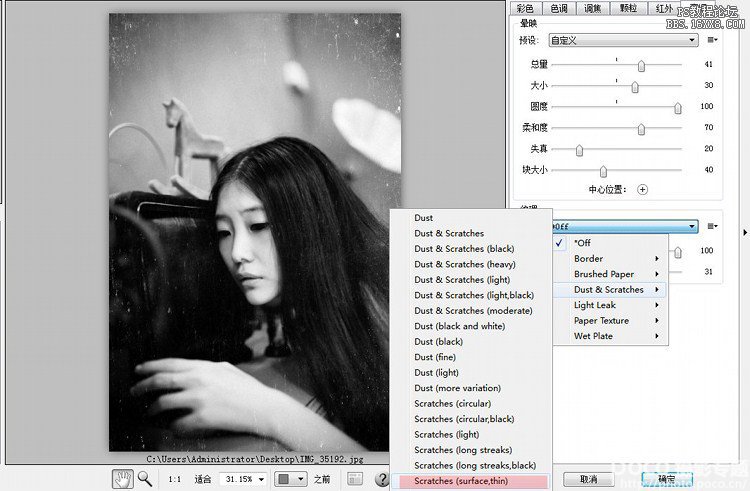
继续找到Scratches(surface,thin)的效果,按确定键,退出,然后继续分析接下来的图片效果。
因为我们想营造阴暗,残破的效果,所以首先,拉低亮度,拉高对比。

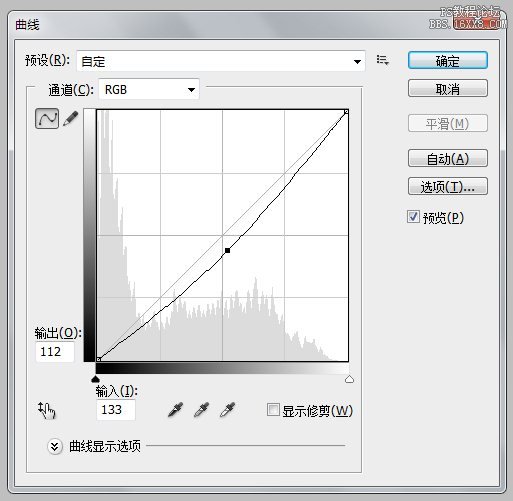
然后我们想图片不要有通透感,稍微实体感一点,所以选择拉地曲线。
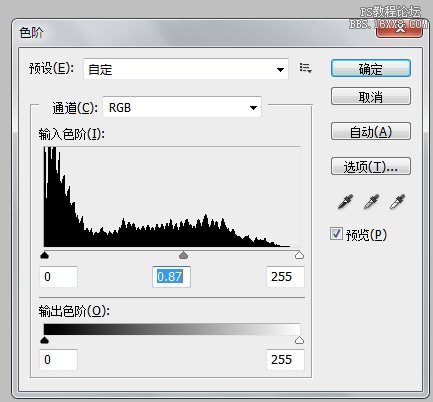
最后让为了让图片的立体感出来,选择了色阶调节,设置如下:
最后的成品效果出来了,添加了灰尘刮痕的做旧感觉。

上一篇:明星赵丽颖合成图片教程
相关推荐

快捷键,photoshop常用快捷键大全

快捷键,2015photoshop cc快捷键大全

实用技巧,怎么预览PSD文件?psd预览的

使用技巧,那些可能会忘记的PC小技巧

明星赵丽颖合成图片教程

ps调出金黄色色调教程

ps刘亦菲和成龙明星合成教程

功能介绍,PS CC 2015画板工具


