ps制作颓废的彩色水晶字
2022-12-25 15:54:28
来源/作者: /
己有:14人学习过
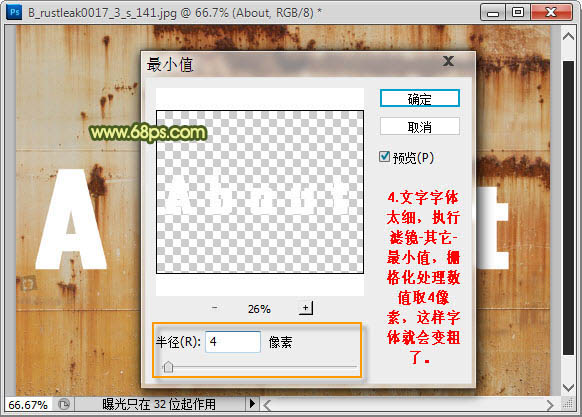
4、把文字栅格化处理,再执行:滤镜 > 其它 > 最小值,半径为4,这样字体就会变粗。
![](https://img.lvups.com/d/file/bigpic/2022/12/25/marche0hof3.jpg)
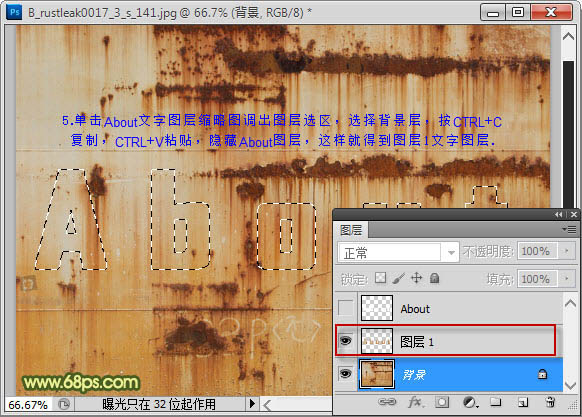
5、调出文字选区,回到背景图层,按Ctrl + C 复制,按Ctrl + V 粘贴,把原文字图层隐藏,效果如下图。
![](https://img.lvups.com/d/file/bigpic/2022/12/25/dkcijxblrqh.jpg)
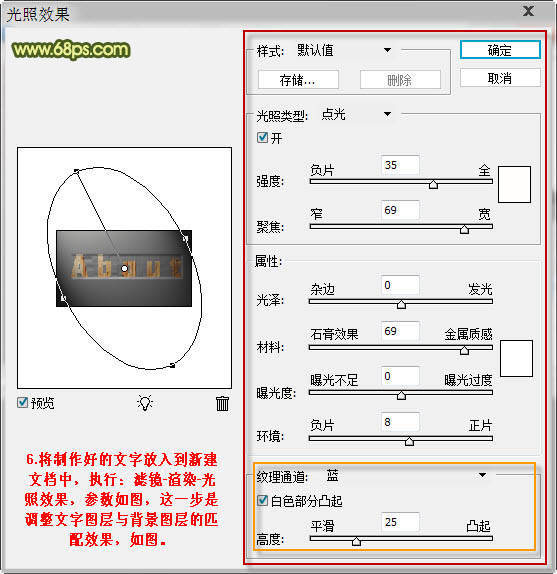
6、将制作好的文字放入到新建文档中,执行:滤镜 > 渲染 > 光照效果,参数设置如下图。这一步是调整文字图层与背景图层的匹配效果。
![](https://img.lvups.com/d/file/bigpic/2022/12/25/kfagrsrn5bp.jpg)
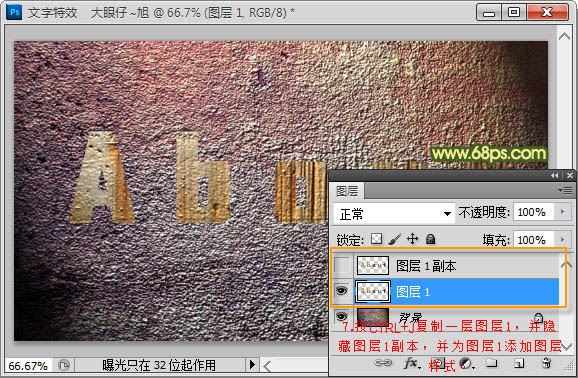
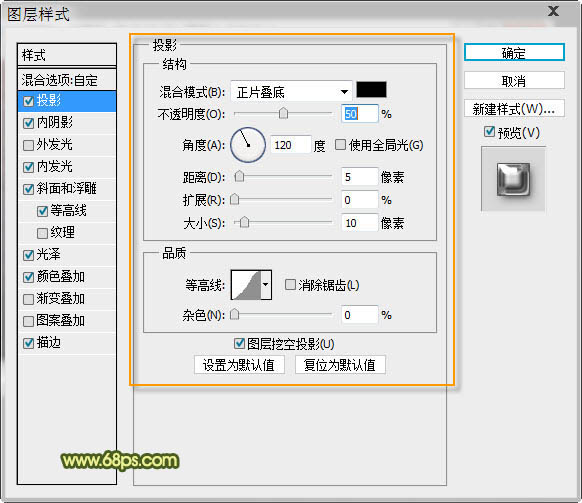
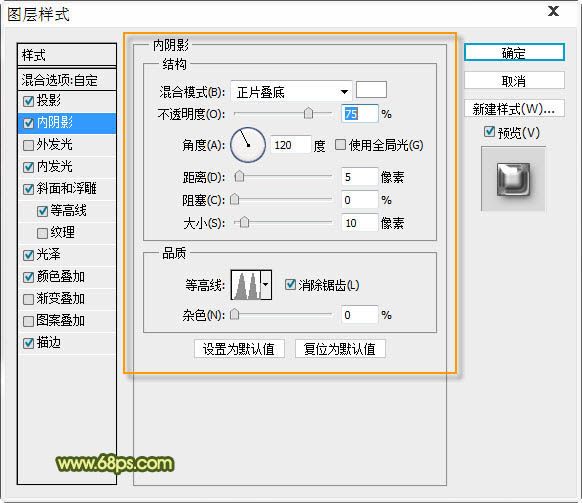
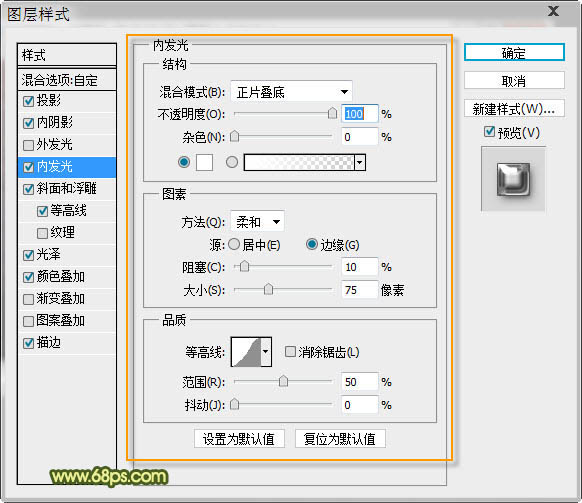
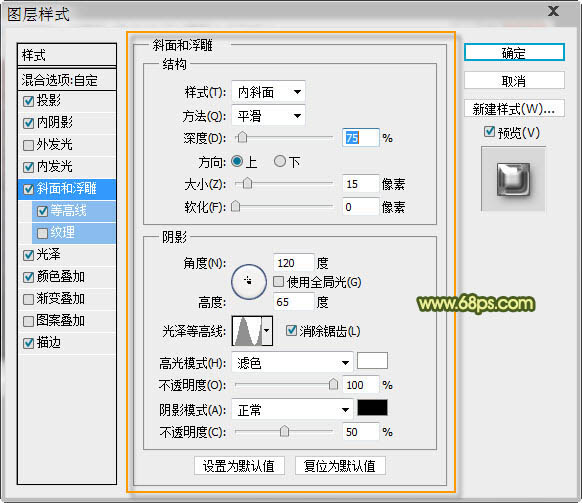
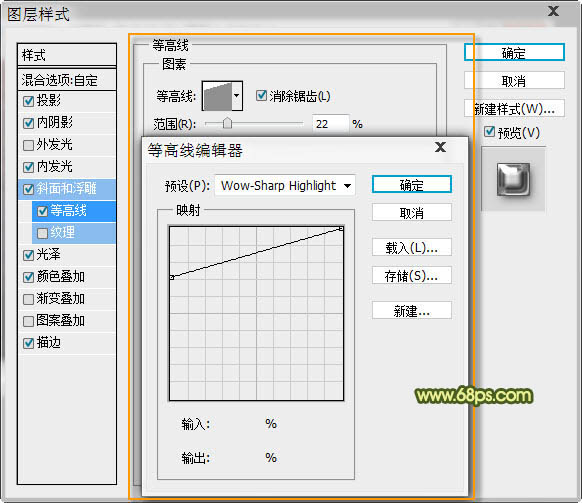
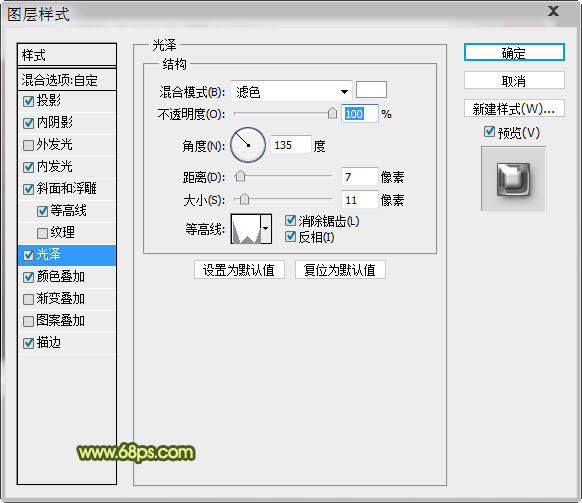
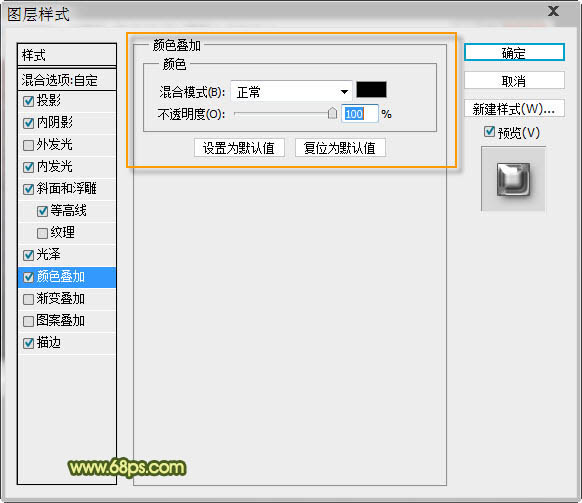
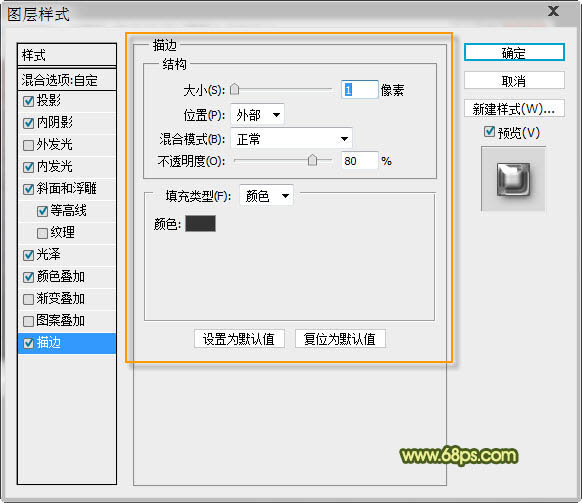
7、按Ctrl + J 把文字复制一层,并隐藏图层1副本,再给图层1添加图层样式。
![](https://img.lvups.com/d/file/bigpic/2022/12/25/izaahdumk21.jpg)
![](https://img.lvups.com/d/file/bigpic/2022/12/25/vlduqokgit4.jpg)
![](https://img.lvups.com/d/file/bigpic/2022/12/25/kzcfkglzur2.jpg)
![](https://img.lvups.com/d/file/bigpic/2022/12/25/0eplo5lwrvk.jpg)
![](https://img.lvups.com/d/file/bigpic/2022/12/25/w3z30ytaata.jpg)
![](https://img.lvups.com/d/file/bigpic/2022/12/25/ruw1ocmz1eq.jpg)
![](https://img.lvups.com/d/file/bigpic/2022/12/25/l1s1wnain50.jpg)
![](https://img.lvups.com/d/file/bigpic/2022/12/25/aqzshdedoem.jpg)
![](https://img.lvups.com/d/file/bigpic/2022/12/25/0cwrnl2ehku.jpg)
上一篇:ps高光艺术字教程
下一篇:ps制作变形金刚质感文字效果教程