PS教程:黄金立体效果的文字制作教程
2022-12-25 13:43:46
来源/作者: /
己有:44人学习过
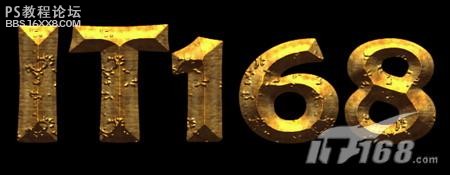
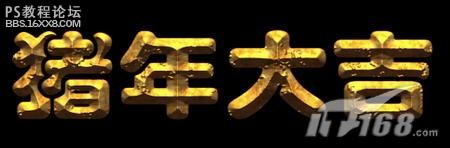
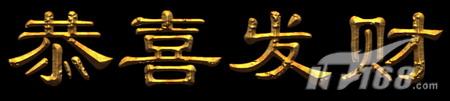
效果:
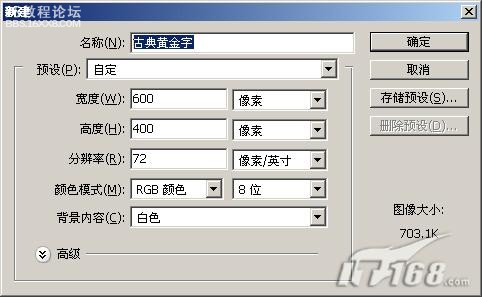
一、用photoshop创建一个宽度及高度自定,其它为默认的图像。
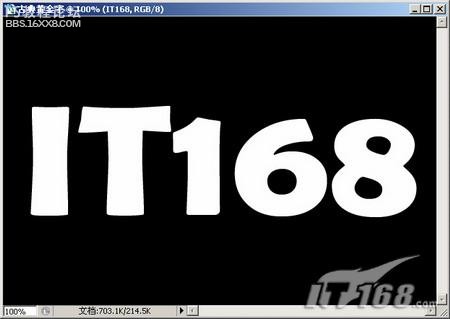
二、先用黑色填充背景图层,然后在图像中间输入需要的白色文字,字体及字号自定,最后对文字再加粗一下。
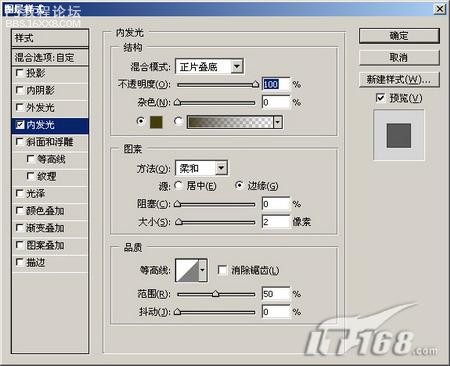
三、接着再双击文字图层,打开该层的图层样式,选择内发光样式,把内发光的颜色设为#473902,不透明度为100%。
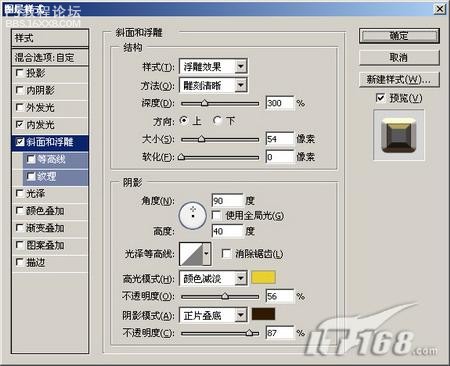
四、接着再来到斜面和浮雕样式面板来设置,高光模式的颜色值为#f2ce02,阴影模式的颜色值为#2e1201,样式为浮雕效果,方法为雕刻清晰,深度为300%,大小为54像素。
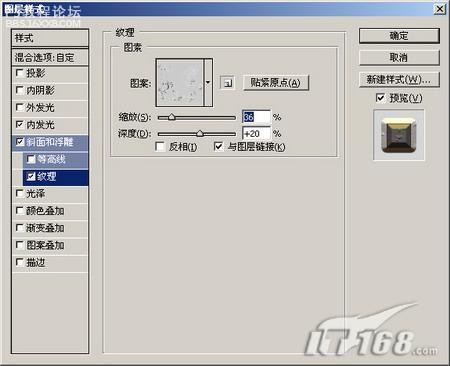
,五、勾选余面和浮雕下面的纹理,选择图案,缩放为36%,深度为+20%,勾选与图层链接。
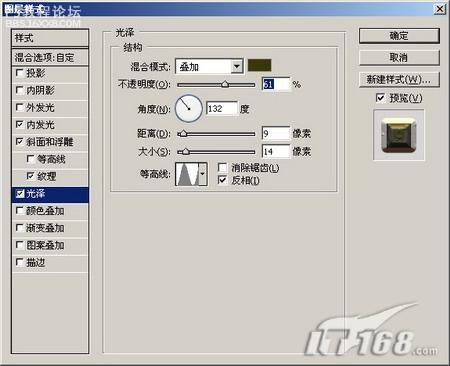
六、接着再设置光泽样式,混合模式为叠加,颜色值为#3c3301,不透明度为61%,角度为132度,距离为9像素,大小为14像素,再设置等高线等参数。
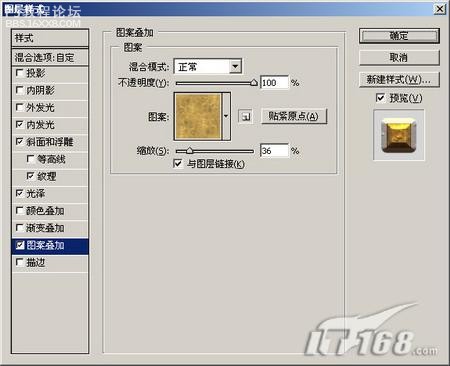
七、来到图案叠加样式面板来设置,详细参数见下图。

当这样样式都设置完成以后,就可以得到最终的效果图。
作者:佚名 出处:IT168
一、用photoshop创建一个宽度及高度自定,其它为默认的图像。
二、先用黑色填充背景图层,然后在图像中间输入需要的白色文字,字体及字号自定,最后对文字再加粗一下。
三、接着再双击文字图层,打开该层的图层样式,选择内发光样式,把内发光的颜色设为#473902,不透明度为100%。
四、接着再来到斜面和浮雕样式面板来设置,高光模式的颜色值为#f2ce02,阴影模式的颜色值为#2e1201,样式为浮雕效果,方法为雕刻清晰,深度为300%,大小为54像素。
,五、勾选余面和浮雕下面的纹理,选择图案,缩放为36%,深度为+20%,勾选与图层链接。
六、接着再设置光泽样式,混合模式为叠加,颜色值为#3c3301,不透明度为61%,角度为132度,距离为9像素,大小为14像素,再设置等高线等参数。
七、来到图案叠加样式面板来设置,详细参数见下图。
当这样样式都设置完成以后,就可以得到最终的效果图。
作者:佚名 出处:IT168
相关推荐

用ps制作3D立体字

用psCS5制作新年3D立体字

用xara3D和ps制作3D立体字

ps金属纹理3D立体字教程

彩绘艺术字, PS液化工具制作彩绘背景设计教程

Photoshop制作非常流行的金沙立体字,细腻的金沙字体,金粉字。

Photoshop制作金色的海报标题文字教程

Photoshop使用笔刷制作书法艺术字教程


