photoshop制作logo教程:钢盔
2022-12-26 14:50:43
来源/作者: /
己有:66人学习过
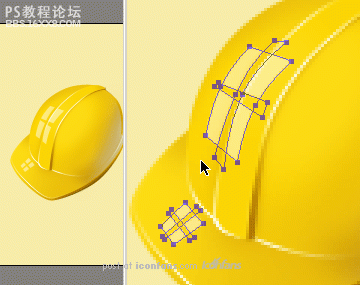
Step 16
Adda layer mask to this layer and fill it with black color. This waynothing is visible. Then select a big soft white brush and draw intothe mask where the light should shine. The outline will be visible onlywhere the white area is in the mask.
第十六步
添加一个图层蒙版并填充为黑色。这样任何东西都不可见。然后选择一个大的软的白色笔刷在光线会照到的地方对应的蒙版位置绘制一小片白色。只有蒙版上的白色区域会让轮廓可见。
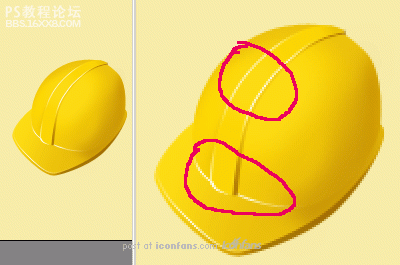
Step 17
Use the same method for the other shapes. The icon is really starting to take shape now!
第十七步
用同样的方法来对付其他的部分,图标开始真的出现立体感了!
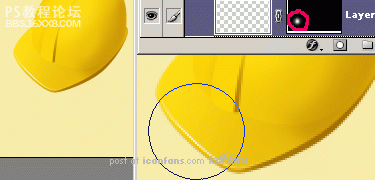
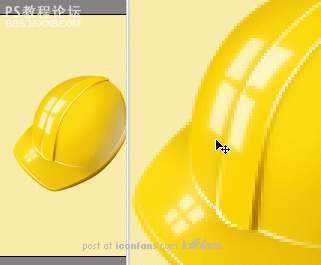
Step 18
Continue with another darkening in selected areas (shown) where the contrast between the helmet parts is too low.
第十八步
在下面标记的对比度太低的头盔部分继续调整。
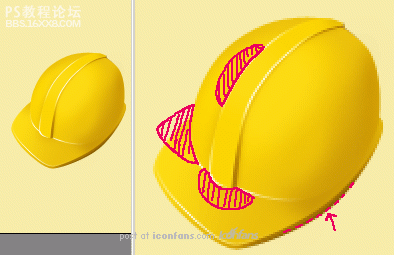
, Step 19
Tomake the icon even better, you can add backlight with another color.This will help a lot because icons with only one color tend to look alittle dull.
Firstly, load the selection of all shape layers(Ctrl + Shift – click on the layers), create new layer, contract theselection of 1 pixel (Select Modify Contract), and use a bigsoft brush to draw the backlight, as the arrow shows. Use whatevercolor you like, light blue or violet work well.
第十九步
为了让图标更好看,你可以用另外一个颜色添加一个背光。这将很有效果因为图标只有一个颜色将看起来比较不鲜明。
首先,选择所有形状图层的选区(Ctrl+Shift+点击所有图层),创建新图层,缩小选区1像素(选择 修改 收缩),并用大软笔刷来画背光,就像箭头所示,用任何你喜欢的颜色,亮蓝或紫罗兰效果很好。
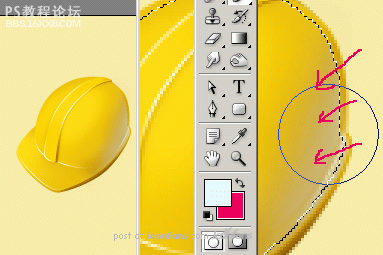
Step 20
Thelast thing you will be adding is the very big highlight. As in thetutorial iMouse — Creating an Apple Mouse (which I also wrote!), startwith Pen Tool and draw the window shapes:
第二十步
最后的事情就是添加大型高光。照图做吧,用钢笔画出窗户的形状开始。(原作者说的是他之前在另外一个教程讲过方法,所以这里大家各自发挥想象力,或者照着图里面的做,依葫芦画勺吧)
Step 21
Copy this layer (Ctrl + J) and blur it with Gaussian Blur filter (set the Radius to some low number).
第二十一步
复制图层并高斯模糊(数值低一点)
Step 22
Nowdraw with big soft white Brush over the highlights, to make it evenmore shiny. Don´t worry about the window shapes, it´s not necessary tosee them completely.
相关推荐

ps cs6设计龙主题LOGO教程

photoshop制作国外彩虹Logo教程

火焰Logo教程

ps制作漂亮清新的LOGO教程

Photoshop制作清凉的水中展示网页

Photoshop制作大气的网页设计主页

阴影教程,超详细的各种阴影的制作方法

Photoshop制作炫酷的PK类网站Banner


