Photoshop制作好看的三维特效水晶标志
2022-12-26 14:18:09
来源/作者: /
己有:24人学习过
步骤 6、创建新图层,并命名为底层,将其置于上述两层下方;
重复步骤 2,使用#00F5FF填充,并调整图像到如下位置。

步骤 7、复制底层,并命名为阴影层,将阴影层置于底层下方;
滤镜 >> 模糊 >> 高斯模糊,模糊半径设为10。

步骤 8、在所有层上方创建图层,并使用椭圆选框工具建立如下选区,使用300px柔角笔刷在圆形选区底部轻轻扫过,图层不透明度“60%”。
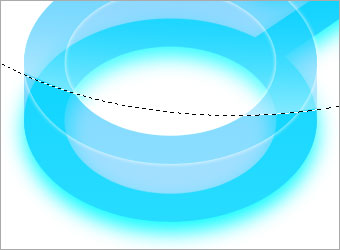
步骤 9、采用与步骤 8类似的方法为箭头添加高光效果。

标签(TAG) logo教程 Photoshop三维特效 ps水晶标志
上一篇:简单绘制玻璃样式RSS图标
下一篇:PS制作大众标志
相关推荐

ps cs6设计龙主题LOGO教程

火焰Logo教程

用ps制作蘑菇logo教程

ps两步制作Google Logo教程

Photoshop制作清凉的水中展示网页

Photoshop制作大气的网页设计主页

阴影教程,超详细的各种阴影的制作方法

Photoshop制作炫酷的PK类网站Banner


