photoshop制作水墨画
2022-12-26 07:52:22
来源/作者: /
己有:133人学习过
14、选择"色相/饱和度1",新建一个图层得到"图层10",选择画笔工具,在其工具选项栏中选择"柔角",大小35像素,按F5调出画笔调板,设置调板参数如图24所示,设置前景色的值为#33312f,在画布的右侧绘制图像,得到如图25所示。
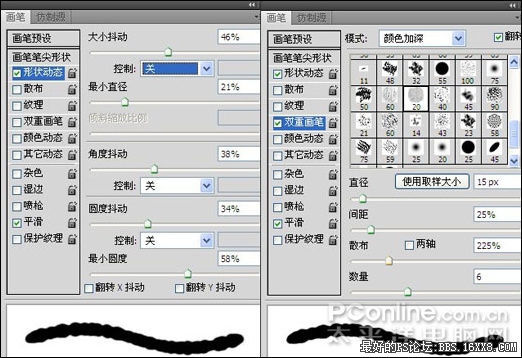
图24
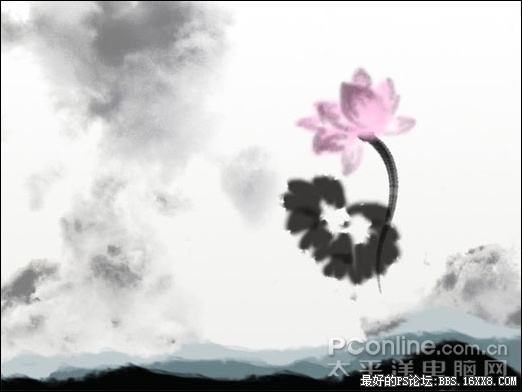
图25 15、新建一个图层得到"图层11",更改前景色的值为#7a6f4a,在工具选项栏上更改不同明度为80%,其它参数保持前设置,在图像上继续涂抹,得到如图26所示效果。复制"图层11"得到"图层11副本",设置11副本的混合模式为"正片叠底","不透明度"为60%,得到如图27所示。
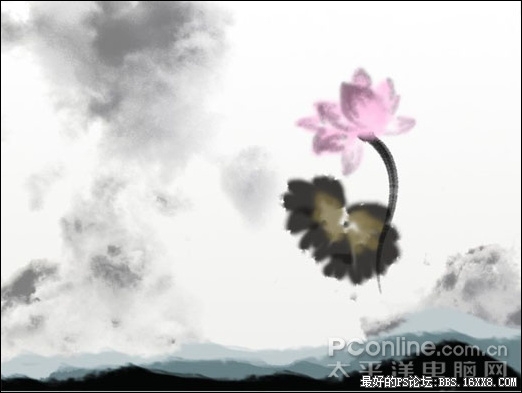
图24
图25 15、新建一个图层得到"图层11",更改前景色的值为#7a6f4a,在工具选项栏上更改不同明度为80%,其它参数保持前设置,在图像上继续涂抹,得到如图26所示效果。复制"图层11"得到"图层11副本",设置11副本的混合模式为"正片叠底","不透明度"为60%,得到如图27所示。
标签(TAG) 制作实例 学photoshop
上一篇:Photoshop制作爱心巧克力
下一篇:ps利用几何图形设计海报教程
相关推荐

新手学Photoshop的批处理的快捷操

photoshop教程:百事可口可乐LOGO制

logo制作实例:金属凤凰logo

虚线移动的友情链接logo图片制作实

图片变清晰,使用PS让模糊图片变清晰的方法教程

PS调出晶莹洁白肤色商业人像照片效果

PS调出唯美金黄色树叶背景甜美女生照片

调出高清质感暗色草原风景图片的PS教程


