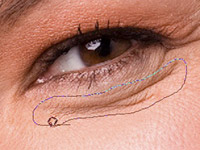
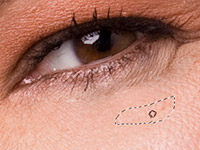
photoshop怎样去眼袋
2022-12-25 12:39:07
来源/作者: /
己有:16人学习过
步骤 1、打开素材图片,并放大眼睛部分。
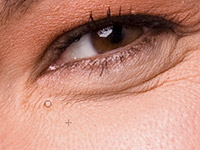
![](https://img.lvups.com/d/file/bigpic/2022/12/25/5cntnzv0jxc.jpg)
步骤 2、选择修补工具()选择眼袋区域。
![](https://img.lvups.com/d/file/bigpic/2022/12/25/cy1bfo5qg4n.jpg)
步骤 3、在眼袋区内按下鼠标左键,并向下拖动鼠标,眼袋处即被下方光滑皮肤覆盖。
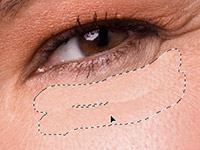
![](https://img.lvups.com/d/file/bigpic/2022/12/25/udsrn4vagiw.jpg)
步骤 4、重复步骤 3修复斑点。
![](https://img.lvups.com/d/file/bigpic/2022/12/25/f4w4f0o45vb.jpg)
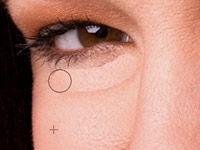
步骤 5、选择修复笔刷工具(),按住 Alt 并点击鼠标选择一处光滑皮肤,释放Alt 和鼠标左键,利用鼠标涂抹眼睛下方的细纹。
![](https://img.lvups.com/d/file/bigpic/2022/12/25/dfqi0eeqmdr.jpg)
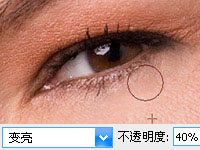
步骤 6、选择仿制图章工具(),模式设为“变亮”,不透明度“40%”,对细节进行修复。
![](https://img.lvups.com/d/file/bigpic/2022/12/25/fdmhzf0443y.jpg)
最终对比效果如下:
![](https://img.lvups.com/d/file/bigpic/2022/12/25/a23utthz0ww.jpg)
![](https://img.lvups.com/d/file/bigpic/2022/12/25/5cntnzv0jxc.jpg)
步骤 2、选择修补工具()选择眼袋区域。
![](https://img.lvups.com/d/file/bigpic/2022/12/25/cy1bfo5qg4n.jpg)
步骤 3、在眼袋区内按下鼠标左键,并向下拖动鼠标,眼袋处即被下方光滑皮肤覆盖。
![](https://img.lvups.com/d/file/bigpic/2022/12/25/udsrn4vagiw.jpg)
步骤 4、重复步骤 3修复斑点。
![](https://img.lvups.com/d/file/bigpic/2022/12/25/f4w4f0o45vb.jpg)
步骤 5、选择修复笔刷工具(),按住 Alt 并点击鼠标选择一处光滑皮肤,释放Alt 和鼠标左键,利用鼠标涂抹眼睛下方的细纹。
![](https://img.lvups.com/d/file/bigpic/2022/12/25/dfqi0eeqmdr.jpg)
步骤 6、选择仿制图章工具(),模式设为“变亮”,不透明度“40%”,对细节进行修复。
![](https://img.lvups.com/d/file/bigpic/2022/12/25/fdmhzf0443y.jpg)
最终对比效果如下:
![](https://img.lvups.com/d/file/bigpic/2022/12/25/a23utthz0ww.jpg)
标签(TAG) 化妆美容 去眼袋 去除眼袋 学photoshop
上一篇:PS磨皮修饰皮肤教程
下一篇:用Photoshop上眼睛彩妆