ps金属上色教程
2022-12-25 10:57:58
来源/作者: /
己有:30人学习过
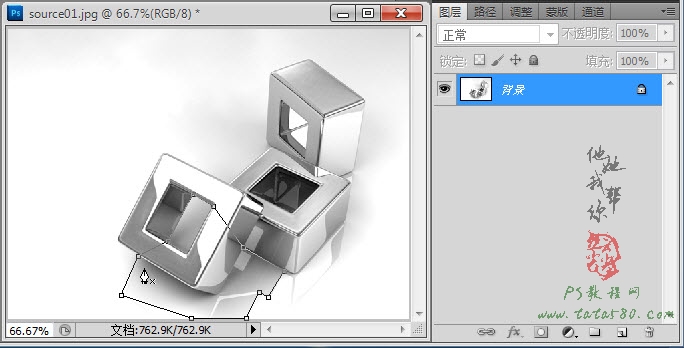
5、本例中有三个金属块,我们以最下方的一个金属块为例进行讲述,首先处理倒影部分,利用钢笔工具将属于最下方金属块的倒影部分勾选中,
如下图所示:
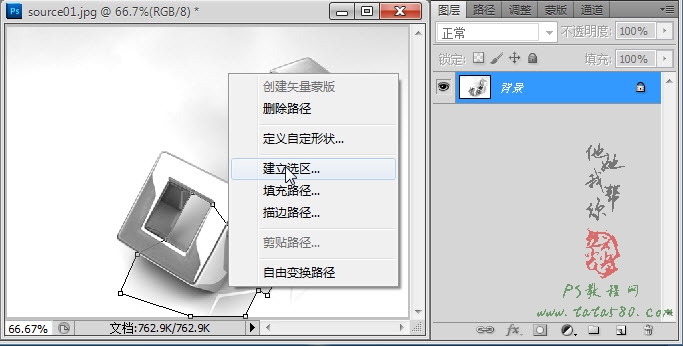
6、在路径上单击右键,在弹出的菜单中选择“建立选区”,如下图所示:
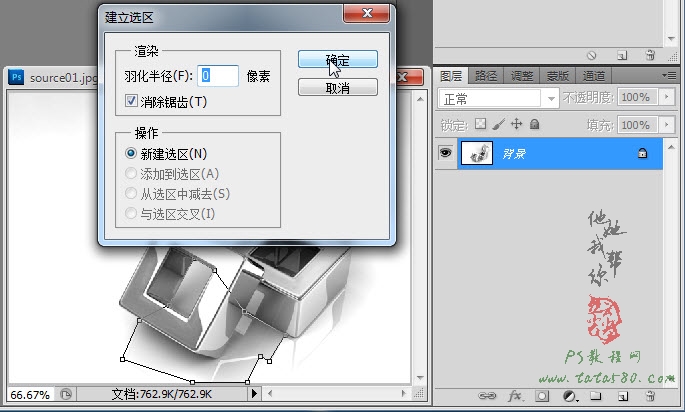
7、在弹出的“建立选区”设置框中,设置羽化半径为0,然后单击确定即可,如下图所示:
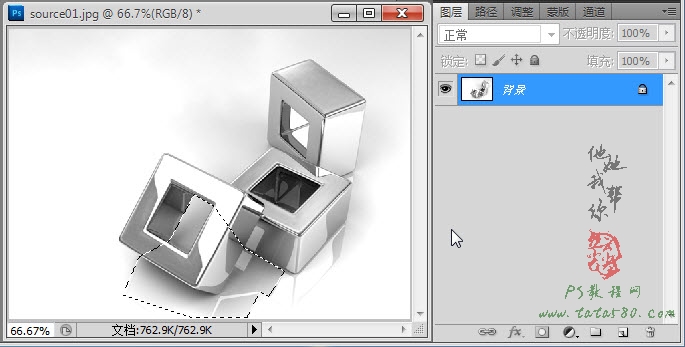
8、这样即可得到最下方金属块的倒影部分,其中可能包含部分非倒影内容,这没有关系,因为在做金属块上色时会覆盖住,如下图所示:
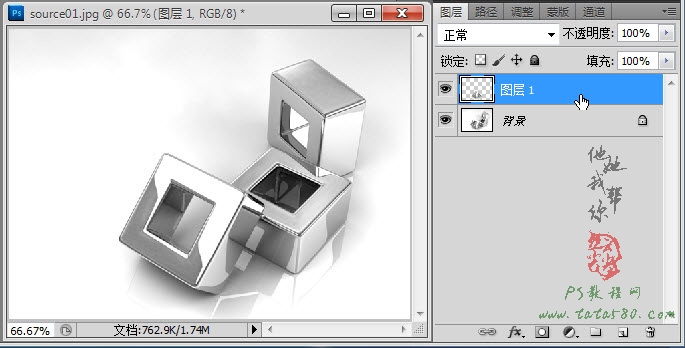
9、按住Ctrl+J键将选区部分生成图层1,如下图所示:
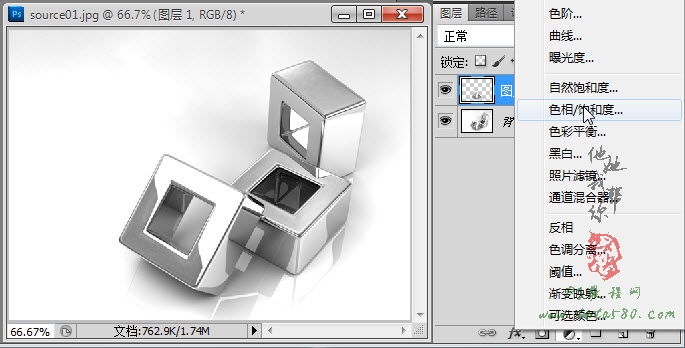
10、单击图层面板下方的“创建新的填充或调整图层”按钮,在弹出的菜单中选择“色相/饱和度”,如下图所示:
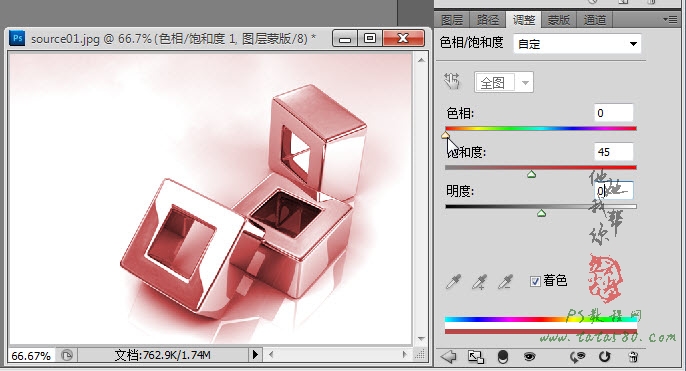
11、在弹出的调整窗口中进行相应的设置,勾选“着色”,适当升高饱和度,选择相应的色相值,本例设置如下图所示:
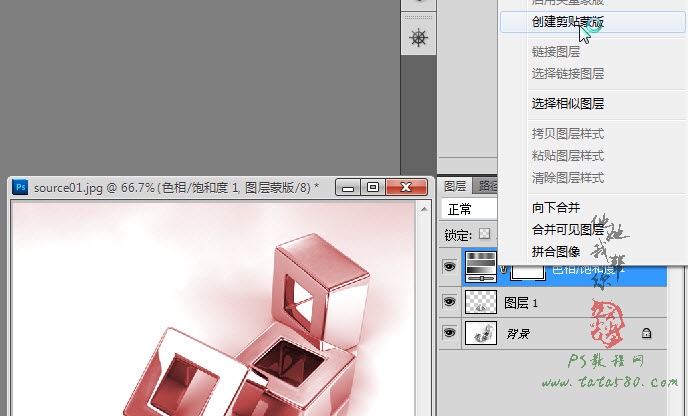
12、返回图层面板,右键单击“色相/饱和度1”图层,在弹出的菜单中选择“创建剪贴蒙版”,如下图所示:
相关推荐

照片处理 Photoshop使人像照片皮肤

Photoshop修照片之面部光洁篇

调整肤色教程

PS照片靓肤技巧教程

如何用PS把浑浊的风景照片调出通透清晰

PS商业修图师对人物头发进行精修教程

如何用PS打造出明亮而有神的眼睛效果

PS商业修图给人像增强光影质感的方法介绍


