photoshop为MM制作美白娇嫩的肤色
2022-12-25 10:56:32
来源/作者: /
己有:32人学习过
本phtoshop教程介绍了如何把美女照片打造成娇嫩美白肤色的方法,希望大家喜欢!
先看看原图和效果图:
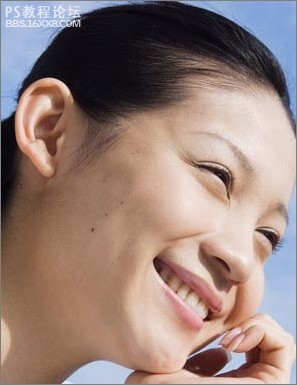
原图

效果图
过程和步骤:
1、打开原图,复制一层,用图章工具去掉脸上的点点和疙瘩,图章不透明度30%左右,(我的32%)。
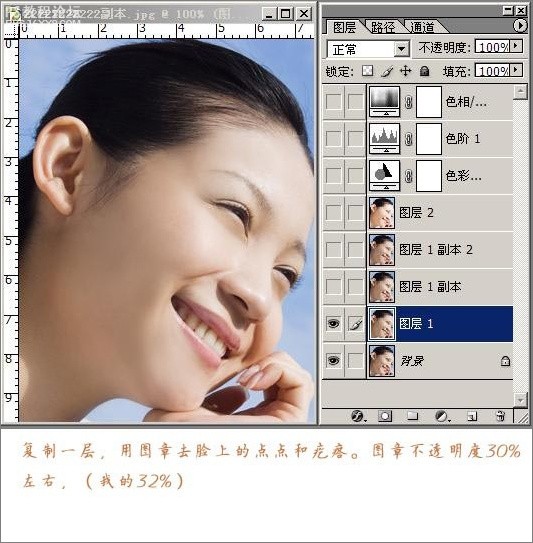
图1
2、再复制一层,把图层的混合模式改为滤色,不透明度改为50%。

图2
3、再复制一层,把图层的混合模式改为柔光,不透明度改为46%。
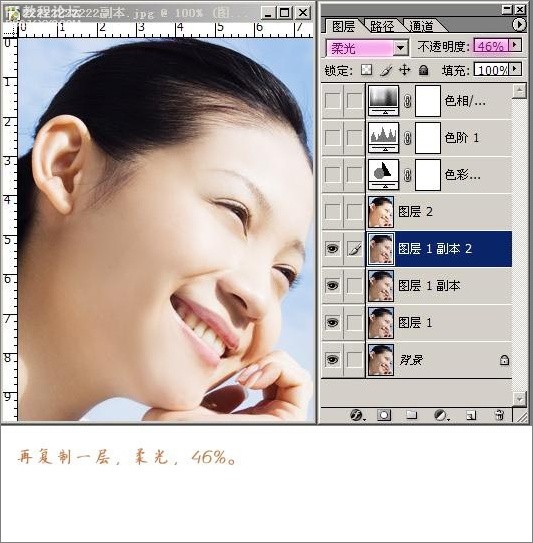
图3
4、新建一层,盖印按(CTRL+ALT+SHIFT+E),在菜栏中的图像——模式——转为LAB模式,执行图像——应用图像命令,通道:a,模式:柔光,不透明度:80%。再转回RBG模式。

图4
5、在菜栏中的图像——新调图层——色彩平衡,色阶:+7,-11,+5。
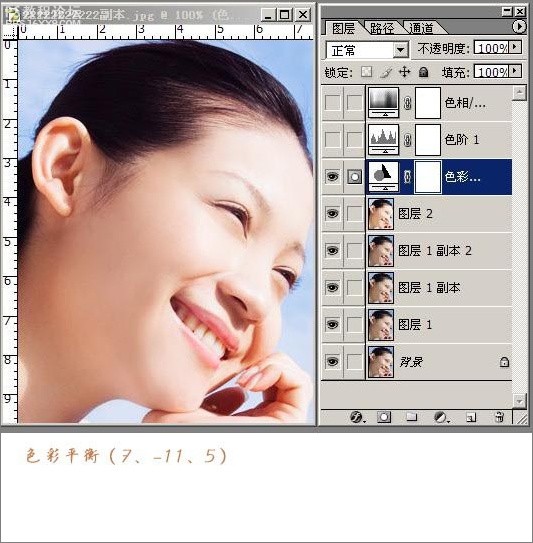
图5
6、在菜栏中的图像——新调图层——色阶,通道:蓝,输入色阶:0,1.03,253。

图6
7、在菜栏中的图像——新调图层——色相饱和度,这个自定义。
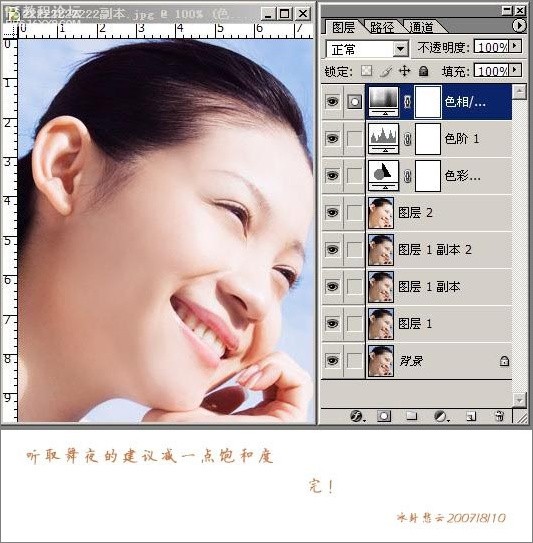
图7
最终效果:

图8
作者:设计坊
先看看原图和效果图:
原图
效果图
过程和步骤:
1、打开原图,复制一层,用图章工具去掉脸上的点点和疙瘩,图章不透明度30%左右,(我的32%)。
图1
2、再复制一层,把图层的混合模式改为滤色,不透明度改为50%。
图2
3、再复制一层,把图层的混合模式改为柔光,不透明度改为46%。
图3
4、新建一层,盖印按(CTRL+ALT+SHIFT+E),在菜栏中的图像——模式——转为LAB模式,执行图像——应用图像命令,通道:a,模式:柔光,不透明度:80%。再转回RBG模式。
图4
5、在菜栏中的图像——新调图层——色彩平衡,色阶:+7,-11,+5。
图5
6、在菜栏中的图像——新调图层——色阶,通道:蓝,输入色阶:0,1.03,253。
图6
7、在菜栏中的图像——新调图层——色相饱和度,这个自定义。
图7
最终效果:
图8
作者:设计坊
上一篇:ps为MM照片美白入门教程
相关推荐

PS照片美白教程:人物头部图片的磨

ps范冰冰快速磨皮美白教程

ps肤色美白教程

曝光不足照片美白教程

如何用PS把浑浊的风景照片调出通透清晰

PS商业修图师对人物头发进行精修教程

如何用PS打造出明亮而有神的眼睛效果

PS商业修图给人像增强光影质感的方法介绍


