photoshop滤镜特效:制作彩色冰裂纹
2022-12-25 12:23:45
来源/作者: /
己有:113人学习过
作者:赵鹏
效果:
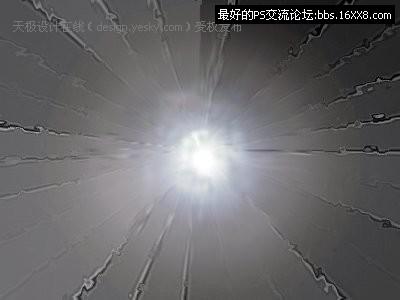
1、photoshop中,按D,将前景色和背景色 调整为默认黑白,执行【滤镜_渲染_云彩】,效果如下图。

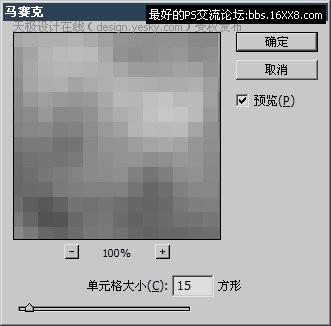
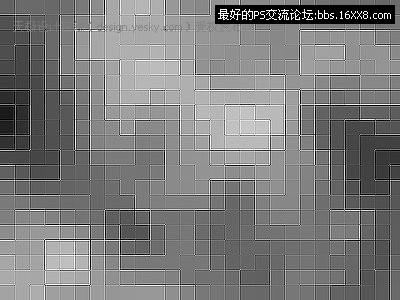
2、执行【滤镜_像素化_马赛克】,设定和图像效果分别如下两图。
效果:
1、photoshop中,按D,将前景色和背景色 调整为默认黑白,执行【滤镜_渲染_云彩】,效果如下图。
2、执行【滤镜_像素化_马赛克】,设定和图像效果分别如下两图。
标签(TAG) 滤镜做图 ps滤镜特效 photoshop教程
相关推荐

完美消除雀斑的photoshop教程
保留细节清除雀斑photoshop教程

Photoshop教程:教你怎样调出健康肤

Photoshop教程:教你怎样调出黝黑质

photoshop教你利用滤镜打造小清新镜头光晕

用抽出滤镜对毛发抠图的PS教程

用PS抽出滤镜对毛毛虫图片抠图换背景

用抽出滤镜抠图的几种方法


