Photoshop鼠标计算器教程
2024-01-21 17:40:44
来源/作者: /
己有:1人学习过
Photoshop鼠标计算器教程 作者:王伟光 教程来源:iT168
计算器是一种广泛应用在日常生活当中的小型电子设备,它使用简单、携带方便,用来满足人们随时计算的需求。下面用Photoshop来绘制一款常见的计算器。
1、新建一个文件。在图层面板中新建一个图层组“计算器”,在里面新建图层“底层”。
2、选择工具箱中的“圆角矩形工具”,画一个圆角矩形,效果如图01所示。
图1
设置前景色为灰色,填充选区效果02所示
图2
本新闻共10
3、将该层复制一层,保持选区,执行菜单栏中的“滤镜”“杂色”“添加杂色”滤镜,在弹出的添加杂色对话框中设置数量为10.72,高斯分布,单色,如图03所示,图像效果如图04所示。
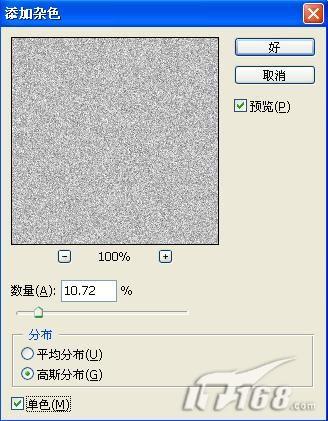
图3
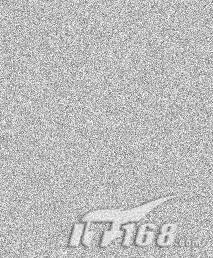
图4
本新闻共10
4、接着执行菜单栏中的“滤镜”“风格化”“风”滤镜,设置方法为风,方向为从右,如图05所示,按Ctrl F键2-3次重复使用刚才的风滤镜,图像效果如图06所示。
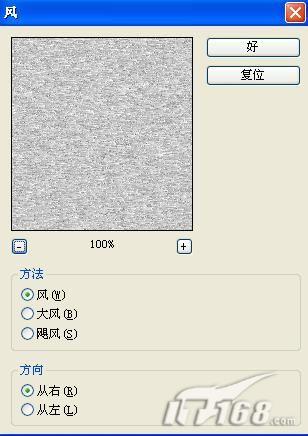
图5
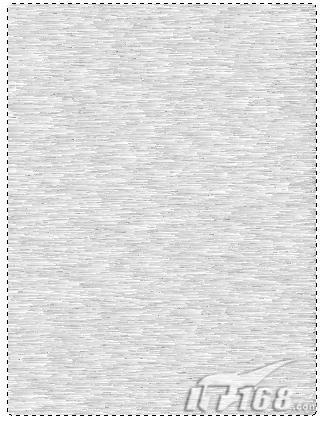
图6
本新闻共10
5、接着再次执行菜单栏中的“滤镜”“风格化”“风”滤镜,设置方法为风,方向为从左,如图07所示,按Ctrl F键2-3次重复使用刚才的风滤镜,并将该图层的图层混合模式设置为“正片叠底”,图像效果如图08所示。
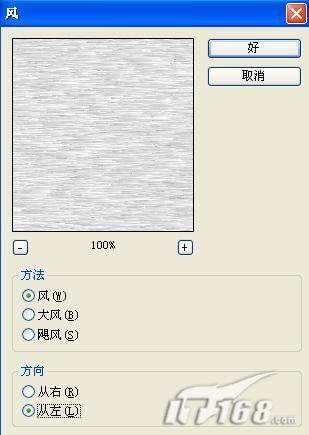
图7
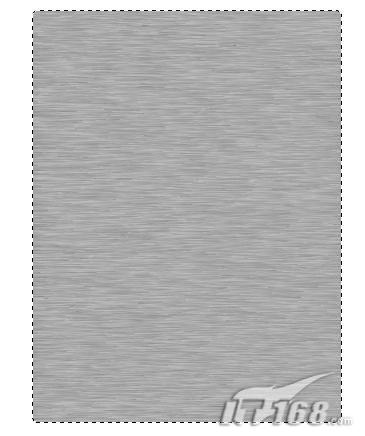
图8
本新闻共10
6、双击该图层为图层添加图层样式,在图层样式对话框中选择投影、斜面和浮雕、渐变叠加、图案叠加,设置参数如图09-12所示,图像效果如图13所示。
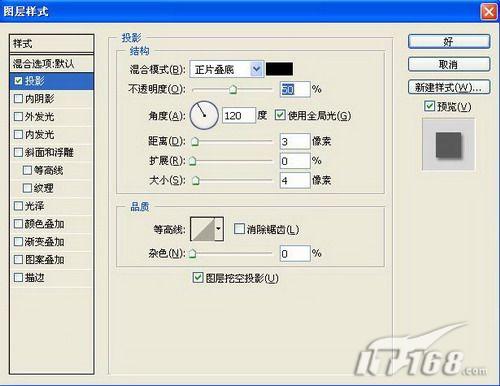
图9
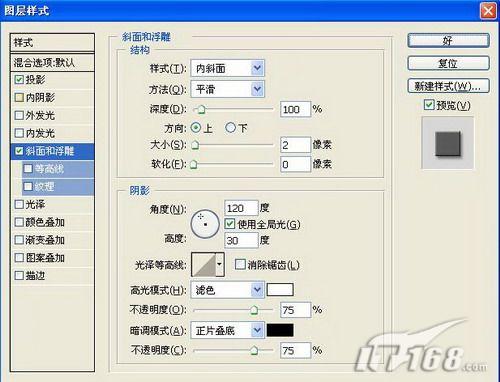
图10
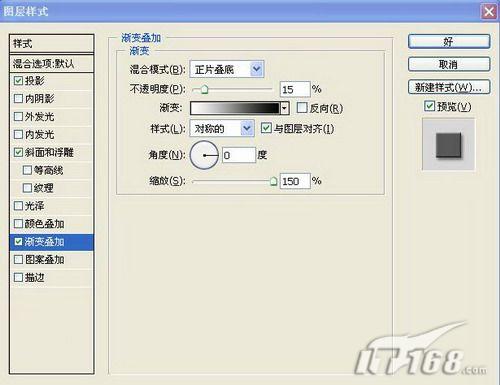
图11
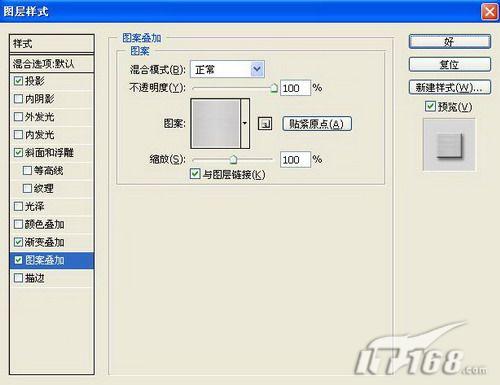
图12
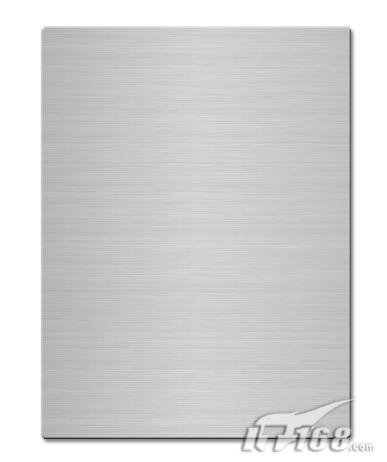
图13
本新闻共10
7、新建一层命名为“屏幕”,选择工具箱中的“圆角矩形工具”在上端中央绘制一个矩形,双击该图层设置图层样式,选择内阴影、渐变叠加,设置参数如图14-15所示,渐变颜色设置RGB分别为252、254、232和191、195、170,图像效果如图16所示。
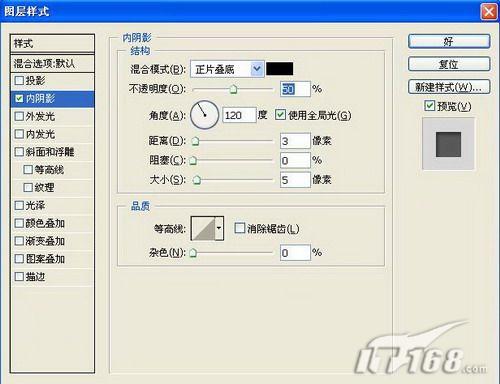
图14

图15

图16
本新闻共10
8、接着做计算器按钮,在计算器的图层组下在新建一个图层组,命名为“按钮”。选择工具箱中的“圆角矩形工具”,画一个圆角矩形,双击该图层设置图层样式,选择投影、内阴影、内发光、斜面和浮雕、渐变叠加、描边,设置参数如图17-21所示,图像效果如图22所示。
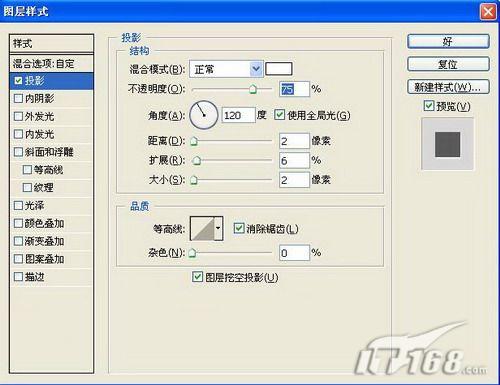
图17
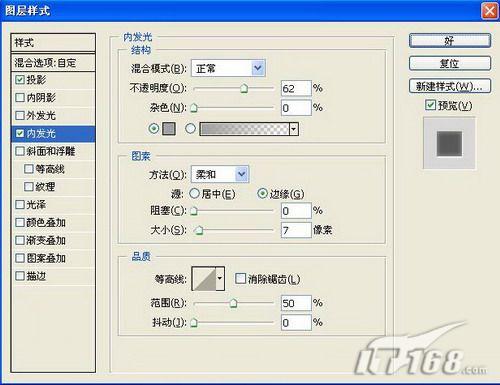
图18
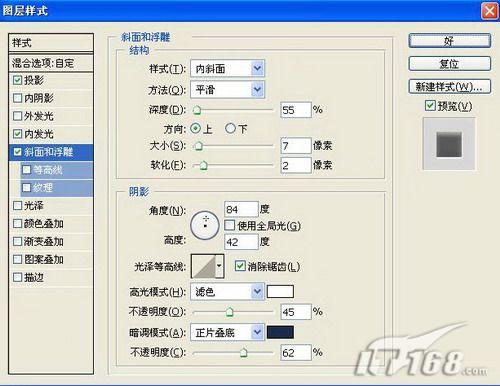
图19
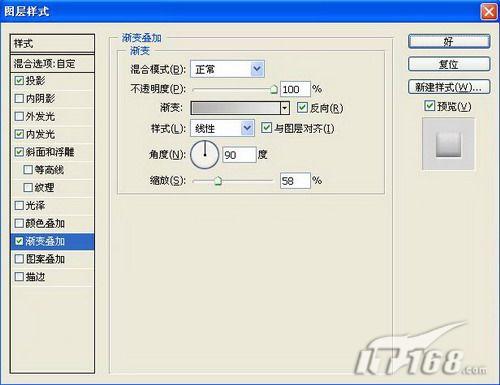
图20
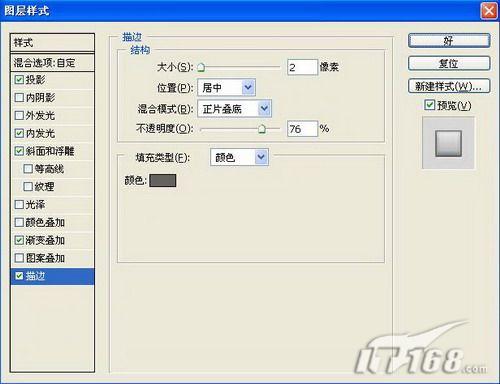
图21

图22
本新闻共10
9、将该按钮复制3份,等距离排列,如图23所示。继续复制,排列效果如图24所示。
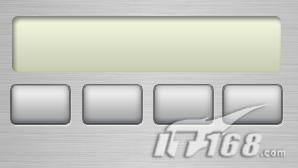
图23
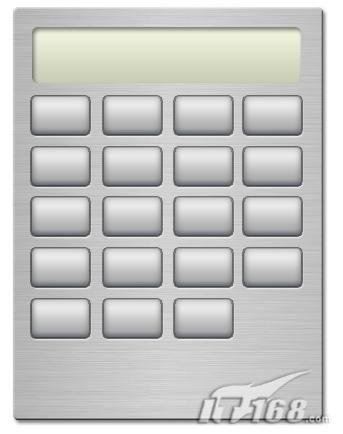
图24
本新闻共10
10、用同样的方法绘制其他按钮,效果如图25所示。

图25
11、选择工具箱中的“文字工具”,设置Arial字体,大小自定,在按钮上打出数字,效果如图26所示。然后双击添加图层样式,选择斜面和浮雕样式,设置参数如图27所示,图像效果如图28所示。

图26
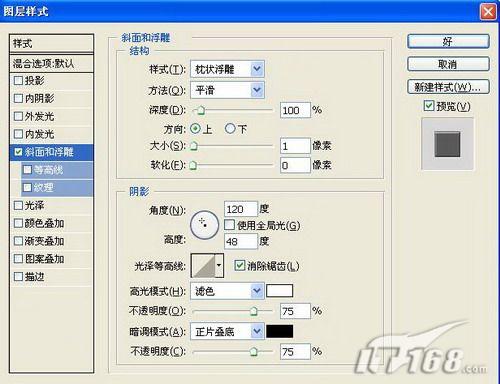
图27
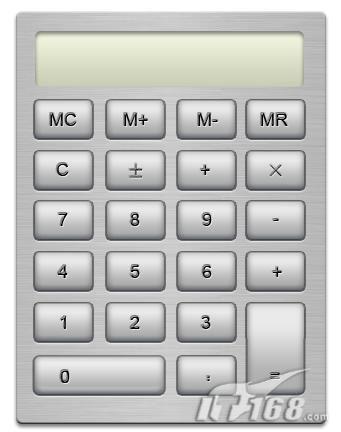
图28
本新闻共10
12、选择工具箱中的“椭圆选框工具”,按住Shift键画出一个小圆,然后添加图层样式,作为装饰。输入文字,效果如图29所示。

图29
13、选择文字工具,在屏幕上输入0,设置该层的图层混合模式为“叠加”,更换背景,最终效果如图30所示。
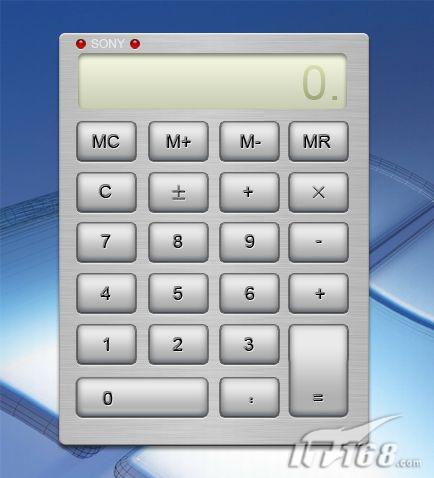
图30简单的,我们教你,深奥的,你来分享,非主流照片|qqkongjian|feizhuliu|tupian|luntan|psjiaocheng|bishua|ruanjian|chajian|xiazai|psxiazai|qqkongjiandaima
计算器是一种广泛应用在日常生活当中的小型电子设备,它使用简单、携带方便,用来满足人们随时计算的需求。下面用Photoshop来绘制一款常见的计算器。
1、新建一个文件。在图层面板中新建一个图层组“计算器”,在里面新建图层“底层”。
2、选择工具箱中的“圆角矩形工具”,画一个圆角矩形,效果如图01所示。
图1
设置前景色为灰色,填充选区效果02所示
图2
本新闻共10
3、将该层复制一层,保持选区,执行菜单栏中的“滤镜”“杂色”“添加杂色”滤镜,在弹出的添加杂色对话框中设置数量为10.72,高斯分布,单色,如图03所示,图像效果如图04所示。
图3
图4
本新闻共10
4、接着执行菜单栏中的“滤镜”“风格化”“风”滤镜,设置方法为风,方向为从右,如图05所示,按Ctrl F键2-3次重复使用刚才的风滤镜,图像效果如图06所示。
图5
图6
本新闻共10
5、接着再次执行菜单栏中的“滤镜”“风格化”“风”滤镜,设置方法为风,方向为从左,如图07所示,按Ctrl F键2-3次重复使用刚才的风滤镜,并将该图层的图层混合模式设置为“正片叠底”,图像效果如图08所示。
图7
图8
本新闻共10
6、双击该图层为图层添加图层样式,在图层样式对话框中选择投影、斜面和浮雕、渐变叠加、图案叠加,设置参数如图09-12所示,图像效果如图13所示。
图9
图10
图11
图12
图13
本新闻共10
7、新建一层命名为“屏幕”,选择工具箱中的“圆角矩形工具”在上端中央绘制一个矩形,双击该图层设置图层样式,选择内阴影、渐变叠加,设置参数如图14-15所示,渐变颜色设置RGB分别为252、254、232和191、195、170,图像效果如图16所示。
图14
图15
图16
本新闻共10
8、接着做计算器按钮,在计算器的图层组下在新建一个图层组,命名为“按钮”。选择工具箱中的“圆角矩形工具”,画一个圆角矩形,双击该图层设置图层样式,选择投影、内阴影、内发光、斜面和浮雕、渐变叠加、描边,设置参数如图17-21所示,图像效果如图22所示。
图17
图18
图19
图20
图21
图22
本新闻共10
9、将该按钮复制3份,等距离排列,如图23所示。继续复制,排列效果如图24所示。
图23
图24
本新闻共10
10、用同样的方法绘制其他按钮,效果如图25所示。
图25
11、选择工具箱中的“文字工具”,设置Arial字体,大小自定,在按钮上打出数字,效果如图26所示。然后双击添加图层样式,选择斜面和浮雕样式,设置参数如图27所示,图像效果如图28所示。
图26
图27
图28
本新闻共10
12、选择工具箱中的“椭圆选框工具”,按住Shift键画出一个小圆,然后添加图层样式,作为装饰。输入文字,效果如图29所示。
图29
13、选择文字工具,在屏幕上输入0,设置该层的图层混合模式为“叠加”,更换背景,最终效果如图30所示。
图30简单的,我们教你,深奥的,你来分享,非主流照片|qqkongjian|feizhuliu|tupian|luntan|psjiaocheng|bishua|ruanjian|chajian|xiazai|psxiazai|qqkongjiandaima
相关推荐

PS图层样式高级运用之制作金钥匙

人像后期,教你调出明亮通透的照片教

艺术海报,设计人像艺术海报教程

图层教程,通过一篇ICON教程讲讲图层

Photoshop钢笔工具绘制逼真的头发教程

鼠绘袋子,绘制一个透明的塑料袋教程

PS绘画变形金刚中的霸天虎

绘画人像,皱纹雀斑疤痕的绘制方法


