Photoshop鼠绘教程:日落美景
2024-01-20 17:34:08
来源/作者: /
己有:2人学习过
Photoshop鼠绘教程:日落美景这个小教程很适合想学Photoshop鼠绘又下不了手的人,用来做起步模仿练习。
通过这个教程你可以学到如何应用简单的工具和技巧绘制一幅日落图画。我们会用到Photoshop笔刷工具、涂抹工具、矩形和椭圆选框工具,还有渐变工具,我们可以看到太阳、日落时天空的、草地和棕榈树的画法和表现技巧。

1.新建一个文件,宽200像素,高300像素,分辨率72像素/英寸,背景黑色。
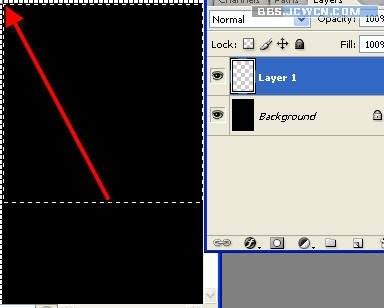
2.选择矩形选框工具(快捷键M)

在文件中画一个矩形选区。单击图层调板底部的新建按钮

,新建一个空白图层。

按G键,选择渐变填充工具

.在属性栏上单击渐变条,设置如下渐变。
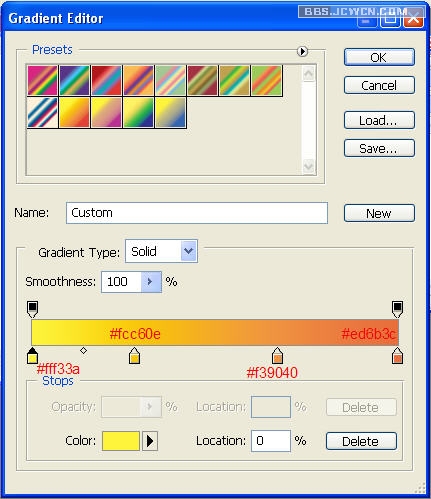
在属性栏上设置渐变模式为"径向渐变"。

将光标放在选区的底部中间位置,向左上或者右上拖出渐变。
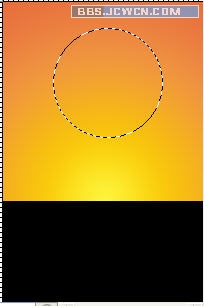
按CTRL D取消选区.现在你的图应该是下面这个样子.为这个图层重命名"bg"。

3.接下来,我们来绘制太阳.选择椭圆选框工具(快捷键M)

在图中画一个圆形选区。
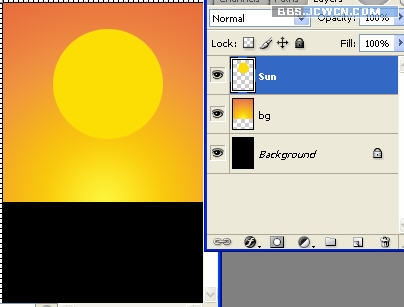
设置前景色为"#ffdc04".单击图层调板底部的新建按钮

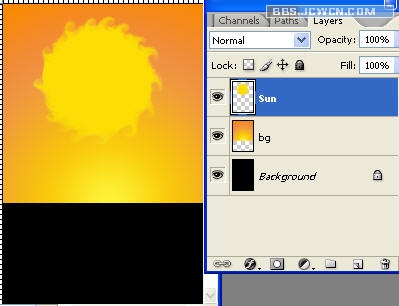
新建一个新的空白图层,然后按Ctrl Backspace给选区填充前景色.按Ctrl D取消选区,并命名这一层为"Sun"。
接下来选择涂抹工具

在太阳的周围涂出光线的效果。如下图。
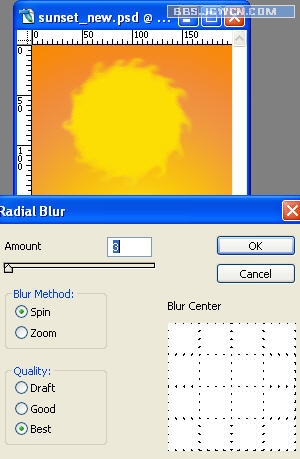
滤镜--模糊--径向模糊.设置数量为"3",方式为"旋转",质量为"高"。
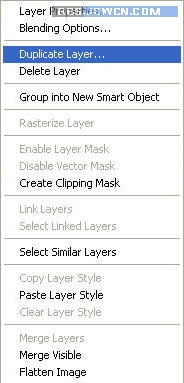
在图层调板中左键单击"Sun"层,选"复制图层"。
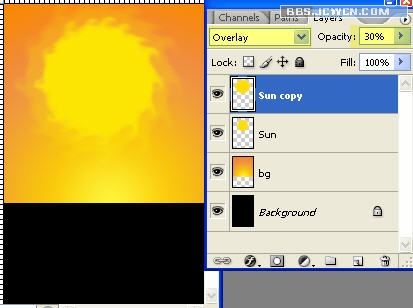
按Ctrl T自由变换,在属性栏中设置宽和高为130%。

在图层调板中设置SUN副本的混合模式为"叠加",透明度为30%
4.接下来我们绘制草地。选择笔刷工具

在属性栏中选择一个羽毛画笔。
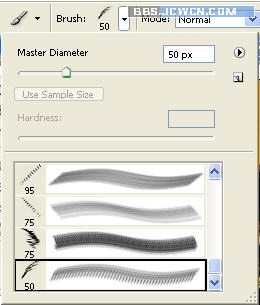
新建一个图层

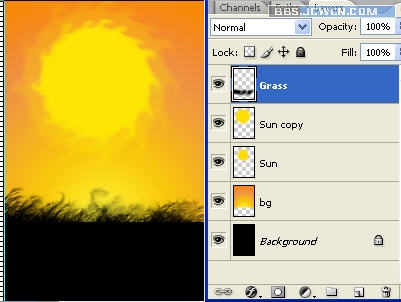
用笔刷在图中刷出草地.并命名"Grass"。

接下来选择涂抹工具

在GRASS层进行圆形涂抹,对其进行平滑。
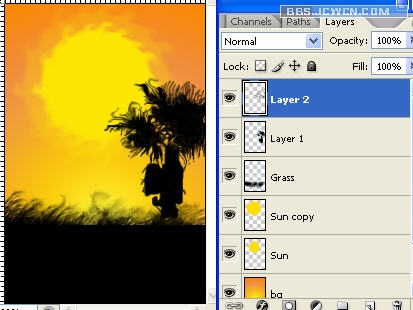
5.下面我们来绘制棕榈树。
选择画笔工具

从属性栏中选择一个直径5像素的笔刷。建一个新图层

用笔刷画出树干的形状。
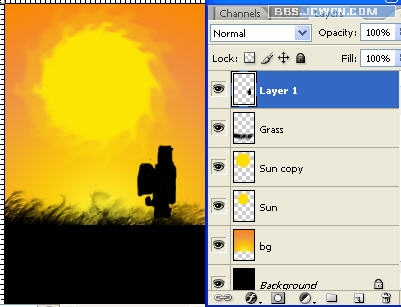
接下来我们来绘制树枝和树叶.新建一个空白图层

用画笔工具

画出树枝和树叶的大致形状
使用涂抹工具

对图层进行涂抹,大致成下图那个样子:

创建一个新图层

,用一个像素的笔刷工具

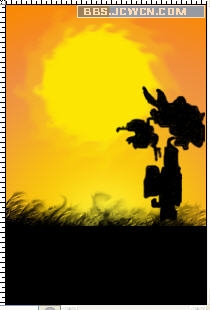
画出棕榈叶

使用涂抹工具

对图层进行平滑处理
最终效果如下:

![]()
通过这个教程你可以学到如何应用简单的工具和技巧绘制一幅日落图画。我们会用到Photoshop笔刷工具、涂抹工具、矩形和椭圆选框工具,还有渐变工具,我们可以看到太阳、日落时天空的、草地和棕榈树的画法和表现技巧。
1.新建一个文件,宽200像素,高300像素,分辨率72像素/英寸,背景黑色。
2.选择矩形选框工具(快捷键M)
在文件中画一个矩形选区。单击图层调板底部的新建按钮
,新建一个空白图层。
按G键,选择渐变填充工具
.在属性栏上单击渐变条,设置如下渐变。
在属性栏上设置渐变模式为"径向渐变"。
将光标放在选区的底部中间位置,向左上或者右上拖出渐变。
按CTRL D取消选区.现在你的图应该是下面这个样子.为这个图层重命名"bg"。
3.接下来,我们来绘制太阳.选择椭圆选框工具(快捷键M)
在图中画一个圆形选区。
设置前景色为"#ffdc04".单击图层调板底部的新建按钮
新建一个新的空白图层,然后按Ctrl Backspace给选区填充前景色.按Ctrl D取消选区,并命名这一层为"Sun"。
接下来选择涂抹工具
在太阳的周围涂出光线的效果。如下图。
滤镜--模糊--径向模糊.设置数量为"3",方式为"旋转",质量为"高"。
在图层调板中左键单击"Sun"层,选"复制图层"。
按Ctrl T自由变换,在属性栏中设置宽和高为130%。
在图层调板中设置SUN副本的混合模式为"叠加",透明度为30%
4.接下来我们绘制草地。选择笔刷工具
在属性栏中选择一个羽毛画笔。
新建一个图层
用笔刷在图中刷出草地.并命名"Grass"。
接下来选择涂抹工具
在GRASS层进行圆形涂抹,对其进行平滑。
5.下面我们来绘制棕榈树。
选择画笔工具
从属性栏中选择一个直径5像素的笔刷。建一个新图层
用笔刷画出树干的形状。
接下来我们来绘制树枝和树叶.新建一个空白图层
用画笔工具
画出树枝和树叶的大致形状
使用涂抹工具
对图层进行涂抹,大致成下图那个样子:
创建一个新图层
,用一个像素的笔刷工具
画出棕榈叶
使用涂抹工具
对图层进行平滑处理
最终效果如下:
上一篇:皮装练习——尝试另一种鼠绘画法
下一篇:ps鼠绘粉红色牡丹
相关推荐

去雀斑,不磨皮给人像去雀斑修饰皮肤

Photoshop教程:鼠绘装牛奶的玻璃杯

ps鼠绘小说封面教程

ps人像妆面修调教程

Photoshop钢笔工具绘制逼真的头发教程

鼠绘袋子,绘制一个透明的塑料袋教程

PS绘画变形金刚中的霸天虎

绘画人像,皱纹雀斑疤痕的绘制方法


