超强:PS体现二维效果——鼠绘概念自行车
2023-12-23 17:35:58
来源/作者: /
己有:1人学习过
超强:PS体现二维效果——鼠绘概念自行车 作者:钟百迪 教程来源:PConline
本例子是关于photoshop鼠绘一辆概念自行车的教程,通过详细的步骤,完整再现了一张二维产品的效果图。在绘制的过程中,笔者综合运用了多种技术,这些技术对于表现产品的外观造型、质感和光感都有很大的作用,也是本例学习重点。
我们先看看效果图
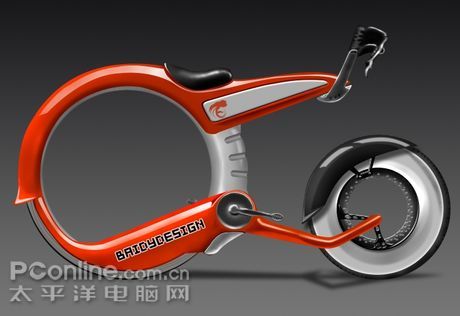
最终效果图
1.按Ctrl N键新建一个文件,设置弹出的对话框如图1所示。设置前景色#19161C如2所示,背景色为白色,选择线性渐变工具,在背景上方到下方绘制一条渐变,得到如3图所示
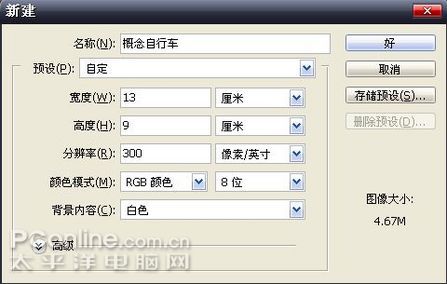
图1
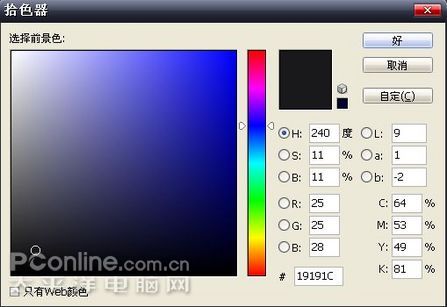
图2
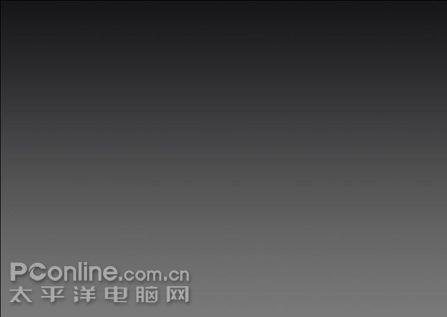
图3
2.用钢笔工具,将自行车的车身画出来,如图4
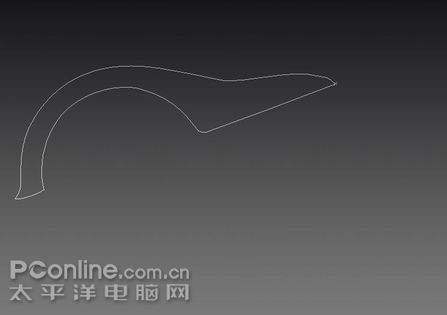
图4
3.按住Ctrl Enter,载入选区,接下来的选区做法都是相同,如图5
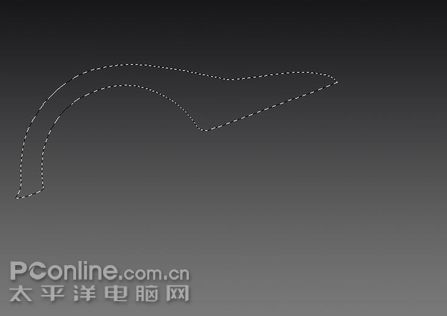
图5
4、新建立一个图层,命名为车身,选择前景色,参数设置如图6,按住Alt Delete填充前景色如图7,接着用圆形选区在车身选出一部分如图8,用加深工具

,加深工具参数设置如

,画出车身下面的暗面如图9
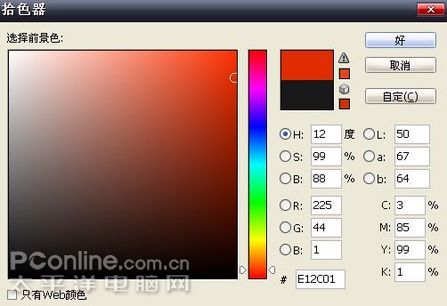
图6
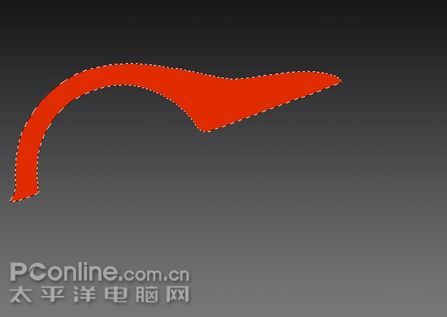
图7
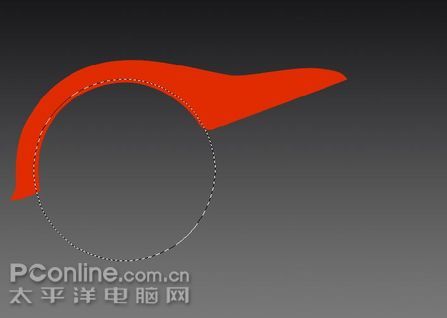
图8
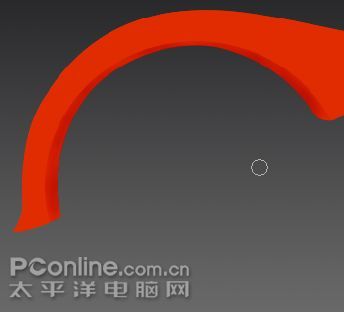
图9
5.新建图层,用钢笔工具在车身前面画如图010所示形状,载入选区,选择前景色#D2D1D0填充,并设置图层样式,图层样式参数
如图11,效果如图12所示,用钢笔工具在车身上方画出车座,如图12
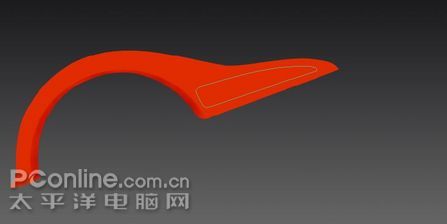
图10
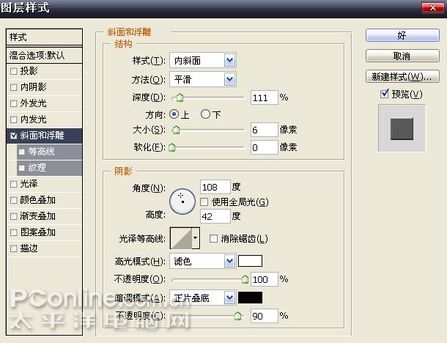
图11
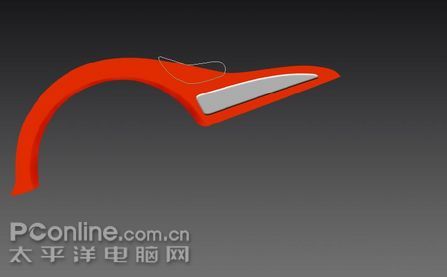
图12 用钢笔工具画出车座
6.新建图层,载入车座选区,选择前景色#565555填充,然后选择加深工具和减淡工具在车座上涂抹,参数设置参考图13和图14

图13

图14
最后车座的高光和暗面如图15和图16所示,最后在车座和车身再用减淡加深工具进行细化处理,如图17
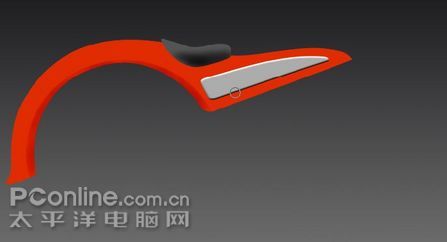
图15
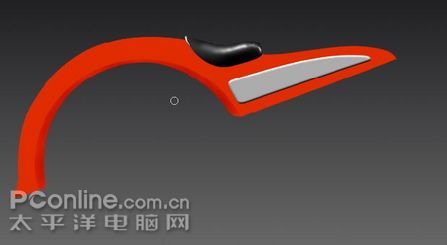
图16画好高光的车座
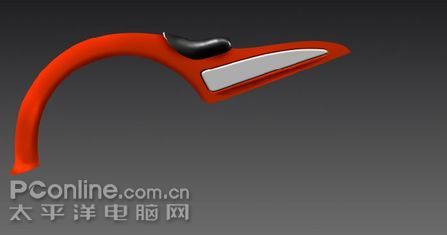
图17
7.绘制车座的高光效果,首先用钢笔工具在车座画出高光范围如图18,新建立一个图层,载入高光选区,填充白色,为高光图层添加图层蒙板如图19,改变高光的透明度,显得高光自然,用同样的方法画出车尾的高光,如图20
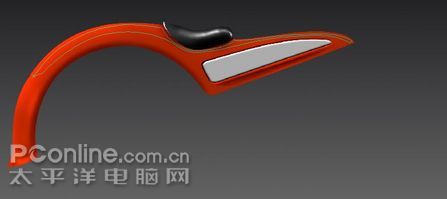
图18
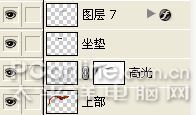
图19
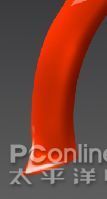
图20
8.新建图层,用钢笔工具绘制车把的形状,如图21,载入选区,填充前景色#7F7F7F,用减淡和加深工具,参数设置如图22和图23,绘制出车把的高光和质感,如图24和图25
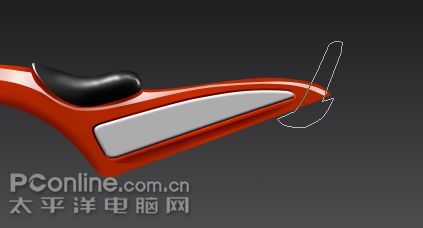
图21

图22

图23
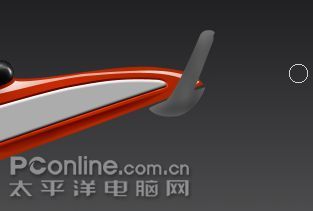
图24
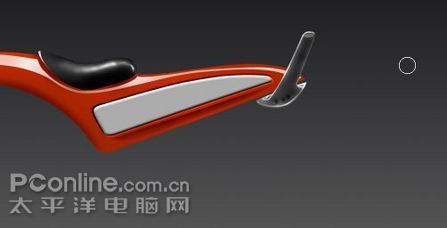
图25
9,新建图层放在车把下面,命名为车闸,载入选取,填充前景色#666666,然后根据前面设置的加深减淡工具,画出车闸的高光
和立体感,过程和效果图可以参照图26到图29,到这步,自行车的上面部分就已经绘制完毕,可以看看效果图30。
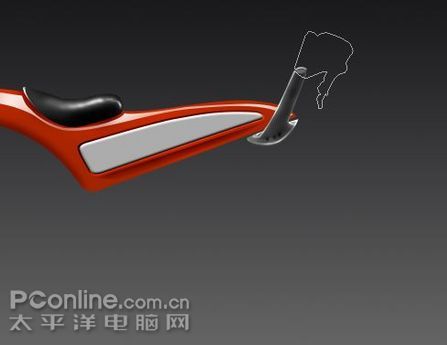
图26
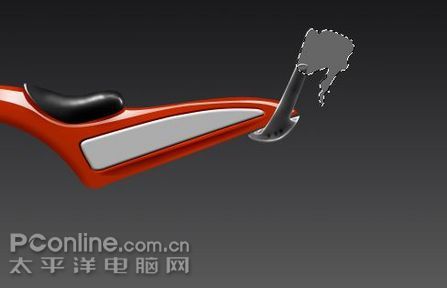
图27
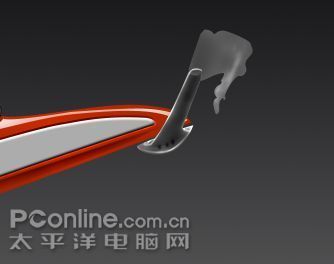
图28
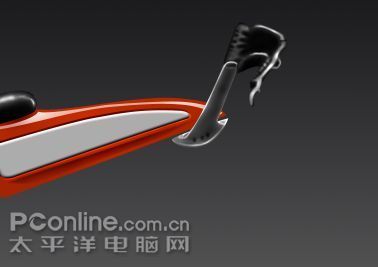
图29
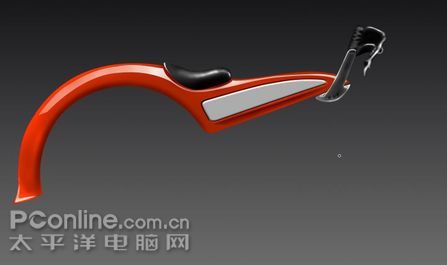
图30
10.新建图层,用钢笔工具绘制出下方的车链盖如图31,用前面的方法选择前景色#DF2F01,然后选择减淡工具以图33参数设置在车链盖
前方画出高光,突出立体感,同时为车链盖添加高光,如图034
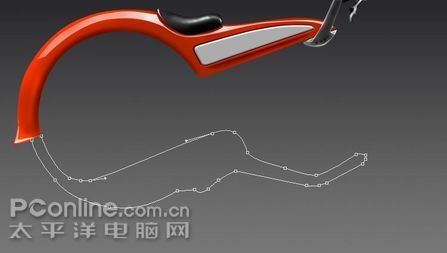
图31
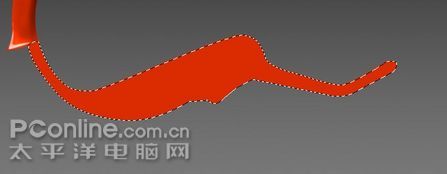
图32

图33
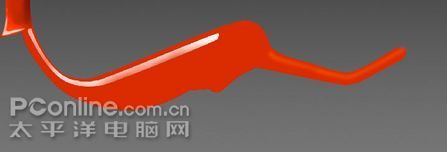
图34
11.制绘车盘,新建图层,用椭圆形工具画出车盘的形状如图35,载入选取,填充前景色如图36,用减淡工具(参数设置如图38)画出车盘的高光如图39,用同样的方法画出车盘下方的托盘和车脚踏如图41和图44
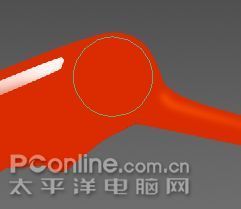
图35
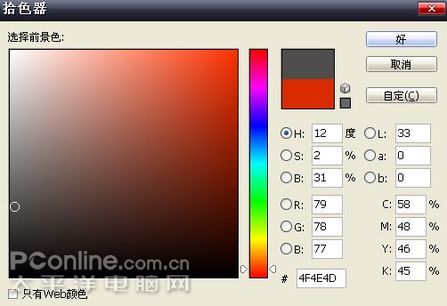
图36
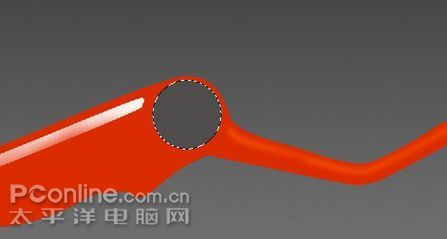
图37

图38
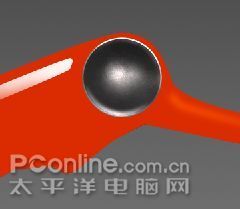
图39画好高光的车盘
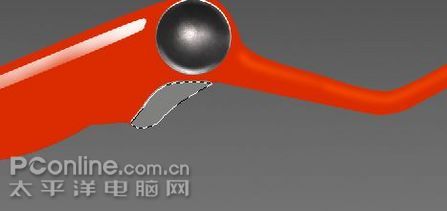
图40
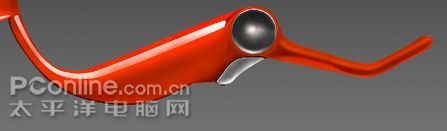
图41
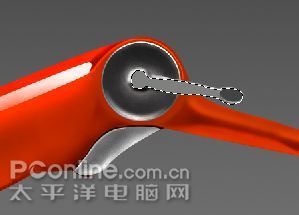
图42
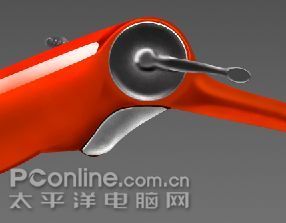
图43
12.绘制后车轮,按住Shift键同时拉出一个正圆形选取,填充灰色,将选取缩小,按键盘上Delete键,删除多余部分,得出车轮
形状如图45,然后用前面 减淡加深工具的设置,涂抹出车轮外框的高光,如图46,绘制完毕后在后车轮外面在画一个外框做车胎如图,如果可以可以加上几条先装饰车轮,后轮绘制完毕
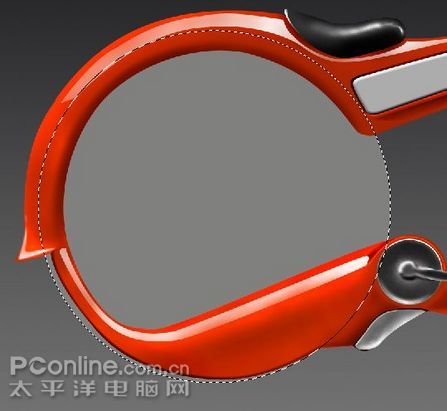
图44
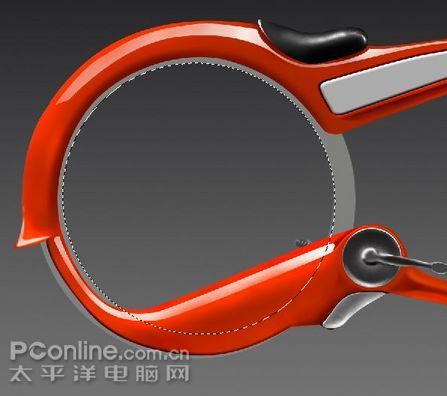
图45
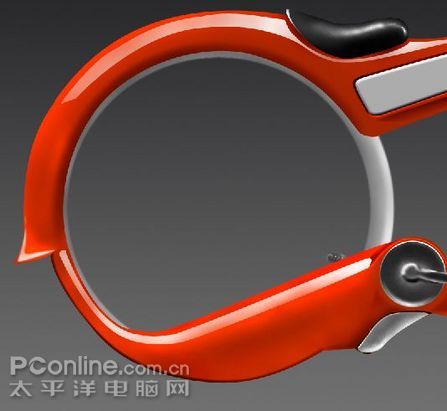
图46
图47

图48
绘制车柱,填充灰色,如图49

图49
选择减淡工具,参数设置如图50,涂抹出车柱的高光。

图50
选择渐变工具,画出车柱的内陷效果如图51

图51
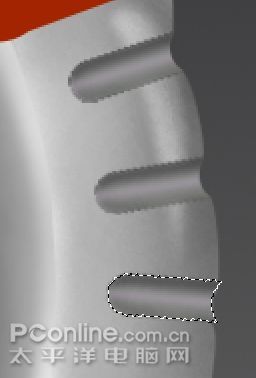
图52 是画好内效果的车柱
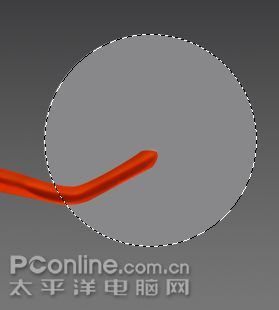
图53 用同样方法拉出一个正方形的选取,填充灰色
本新闻共2
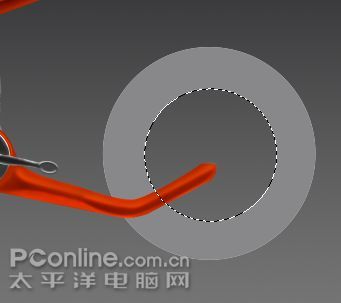
图54 收缩选取,按删除键,得到前轮的外框

图55 选择减淡工具,参数设置如图
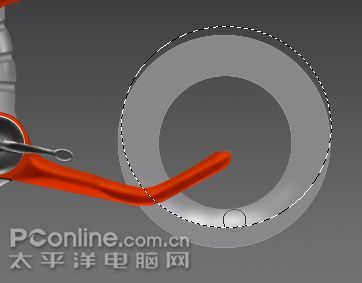
图56 用前面的减淡加深工具画出前轮的高光和暗面的立体感。
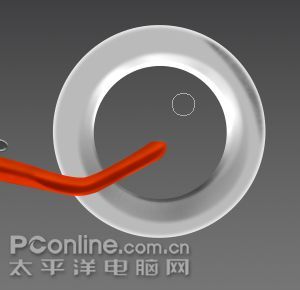
图57 画好高光和立体感的前轮

图58 在前轮的外面画出一个车胎,用加深工具画出车胎的齿轮。
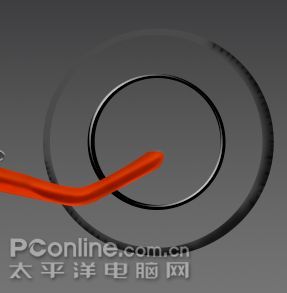
图59 画出前轮内陷的铁矿,铁框的图层样式设置如
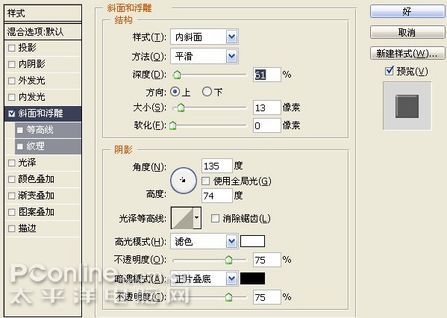
图60
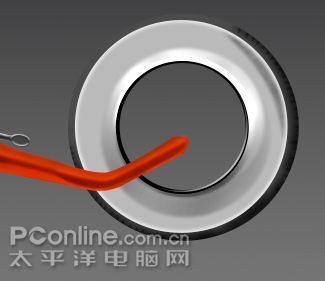
图61 画好内框的前轮
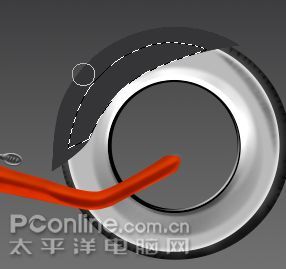
图62 画出前轮的车外壳,用钢笔工具画出如图62的选取
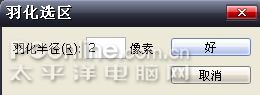
图63 将选取羽化2像素
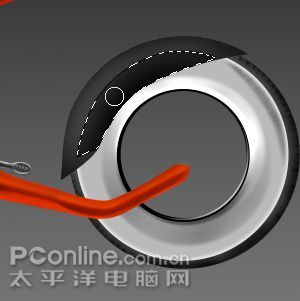
图64 用加深工具画出外壳的暗面
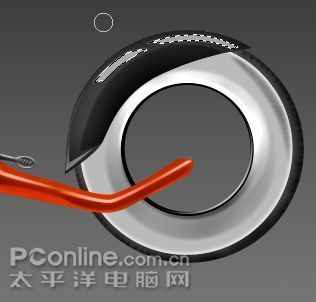
图65 画出外壳的高光
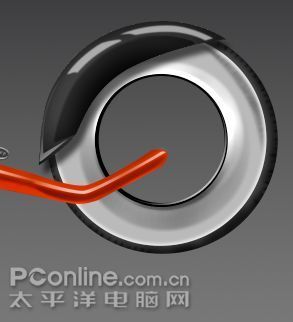
图66 画好高光的前轮,同时为外壳做好投影效果
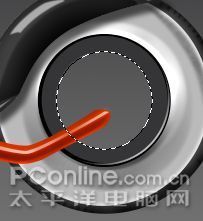
图67 画出前轮里面的孔板,
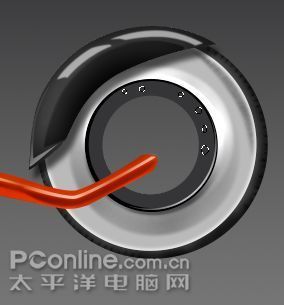
图68 如图,用较小的圆形画出孔的距离和大小
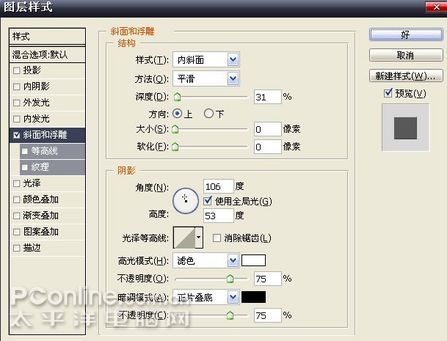
图69 孔板的 图层样式参数
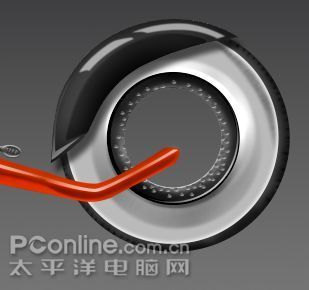
图70 画好孔板的前轮,
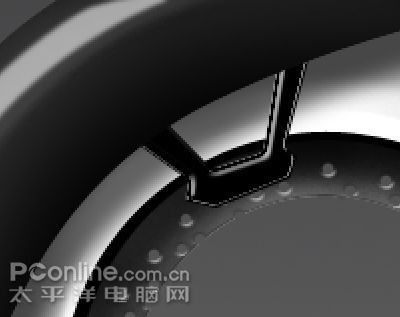
图71 用钢笔工具画出外壳的支柱填充黑色并添加图层样式,图层样式的参数设置如图72和73
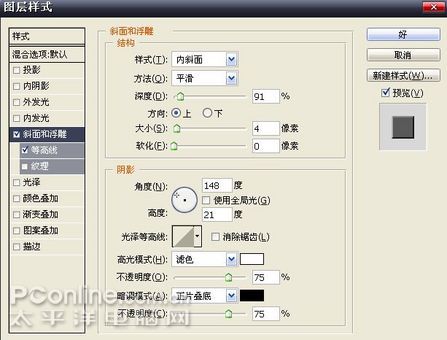
图72
图73
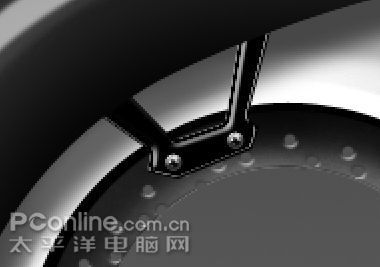
图74用小白色的圆点画出螺丝钉的立体感,螺丝钉的图层样式设置如图75和图76
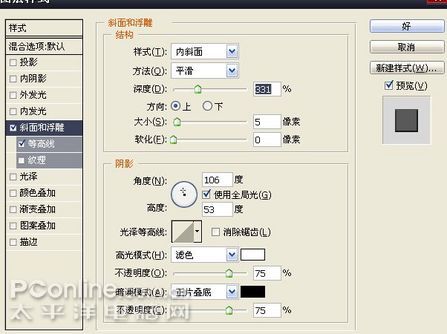
图75
图76
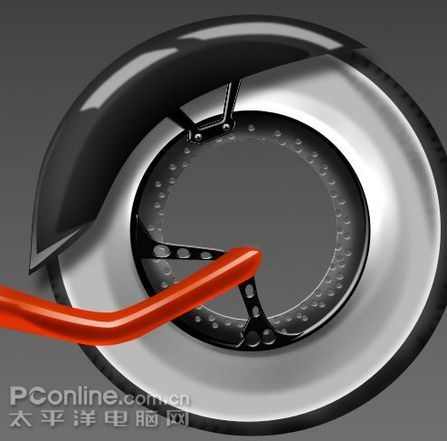
图77 画出另外的支柱杆,图层样式一样的,画好后在中间弄几个孔,这样更逼真些.
图78
最后别忘记画上自行车的投影,这样立体感才出来,至于标志和文字就由个人喜欢和设计了。简单的,我们教你,深奥的,你来分享,非主流照片|qqkongjian|feizhuliu|tupian|luntan|psjiaocheng|bishua|ruanjian|chajian|xiazai|psxiazai|qqkongjiandaima
本例子是关于photoshop鼠绘一辆概念自行车的教程,通过详细的步骤,完整再现了一张二维产品的效果图。在绘制的过程中,笔者综合运用了多种技术,这些技术对于表现产品的外观造型、质感和光感都有很大的作用,也是本例学习重点。
我们先看看效果图
最终效果图
1.按Ctrl N键新建一个文件,设置弹出的对话框如图1所示。设置前景色#19161C如2所示,背景色为白色,选择线性渐变工具,在背景上方到下方绘制一条渐变,得到如3图所示
图1
图2
图3
2.用钢笔工具,将自行车的车身画出来,如图4
图4
3.按住Ctrl Enter,载入选区,接下来的选区做法都是相同,如图5
图5
4、新建立一个图层,命名为车身,选择前景色,参数设置如图6,按住Alt Delete填充前景色如图7,接着用圆形选区在车身选出一部分如图8,用加深工具
,加深工具参数设置如
,画出车身下面的暗面如图9
图6
图7
图8
图9
5.新建图层,用钢笔工具在车身前面画如图010所示形状,载入选区,选择前景色#D2D1D0填充,并设置图层样式,图层样式参数
如图11,效果如图12所示,用钢笔工具在车身上方画出车座,如图12
图10
图11
图12 用钢笔工具画出车座
6.新建图层,载入车座选区,选择前景色#565555填充,然后选择加深工具和减淡工具在车座上涂抹,参数设置参考图13和图14
图13
图14
最后车座的高光和暗面如图15和图16所示,最后在车座和车身再用减淡加深工具进行细化处理,如图17
图15
图16画好高光的车座
图17
7.绘制车座的高光效果,首先用钢笔工具在车座画出高光范围如图18,新建立一个图层,载入高光选区,填充白色,为高光图层添加图层蒙板如图19,改变高光的透明度,显得高光自然,用同样的方法画出车尾的高光,如图20
图18
图19
图20
8.新建图层,用钢笔工具绘制车把的形状,如图21,载入选区,填充前景色#7F7F7F,用减淡和加深工具,参数设置如图22和图23,绘制出车把的高光和质感,如图24和图25
图21
图22
图23
图24
图25
9,新建图层放在车把下面,命名为车闸,载入选取,填充前景色#666666,然后根据前面设置的加深减淡工具,画出车闸的高光
和立体感,过程和效果图可以参照图26到图29,到这步,自行车的上面部分就已经绘制完毕,可以看看效果图30。
图26
图27
图28
图29
图30
10.新建图层,用钢笔工具绘制出下方的车链盖如图31,用前面的方法选择前景色#DF2F01,然后选择减淡工具以图33参数设置在车链盖
前方画出高光,突出立体感,同时为车链盖添加高光,如图034
图31
图32
图33
图34
11.制绘车盘,新建图层,用椭圆形工具画出车盘的形状如图35,载入选取,填充前景色如图36,用减淡工具(参数设置如图38)画出车盘的高光如图39,用同样的方法画出车盘下方的托盘和车脚踏如图41和图44
图35
图36
图37
图38
图39画好高光的车盘
图40
图41
图42
图43
12.绘制后车轮,按住Shift键同时拉出一个正圆形选取,填充灰色,将选取缩小,按键盘上Delete键,删除多余部分,得出车轮
形状如图45,然后用前面 减淡加深工具的设置,涂抹出车轮外框的高光,如图46,绘制完毕后在后车轮外面在画一个外框做车胎如图,如果可以可以加上几条先装饰车轮,后轮绘制完毕
图44
图45
图46
图47
图48
绘制车柱,填充灰色,如图49
图49
选择减淡工具,参数设置如图50,涂抹出车柱的高光。
图50
选择渐变工具,画出车柱的内陷效果如图51
图51
图52 是画好内效果的车柱
图53 用同样方法拉出一个正方形的选取,填充灰色
本新闻共2
图54 收缩选取,按删除键,得到前轮的外框
图55 选择减淡工具,参数设置如图
图56 用前面的减淡加深工具画出前轮的高光和暗面的立体感。
图57 画好高光和立体感的前轮
图58 在前轮的外面画出一个车胎,用加深工具画出车胎的齿轮。
图59 画出前轮内陷的铁矿,铁框的图层样式设置如
图60
图61 画好内框的前轮
图62 画出前轮的车外壳,用钢笔工具画出如图62的选取
图63 将选取羽化2像素
图64 用加深工具画出外壳的暗面
图65 画出外壳的高光
图66 画好高光的前轮,同时为外壳做好投影效果
图67 画出前轮里面的孔板,
图68 如图,用较小的圆形画出孔的距离和大小
图69 孔板的 图层样式参数
图70 画好孔板的前轮,
图71 用钢笔工具画出外壳的支柱填充黑色并添加图层样式,图层样式的参数设置如图72和73
图72
图73
图74用小白色的圆点画出螺丝钉的立体感,螺丝钉的图层样式设置如图75和图76
图75
图76
图77 画出另外的支柱杆,图层样式一样的,画好后在中间弄几个孔,这样更逼真些.
图78
最后别忘记画上自行车的投影,这样立体感才出来,至于标志和文字就由个人喜欢和设计了。简单的,我们教你,深奥的,你来分享,非主流照片|qqkongjian|feizhuliu|tupian|luntan|psjiaocheng|bishua|ruanjian|chajian|xiazai|psxiazai|qqkongjiandaima
上一篇:鼠绘气质美女背影PS海报
下一篇:photoshop绘制逼真蜗牛
相关推荐

文字人像,利用素材快速制作文字人像

裁切工具,讲解透视裁切工具的使用

ps cs6调出风景照片绚丽光彩效果教

photoshop调出MM暗色质感效果

Photoshop钢笔工具绘制逼真的头发教程

鼠绘袋子,绘制一个透明的塑料袋教程

PS绘画变形金刚中的霸天虎

绘画人像,皱纹雀斑疤痕的绘制方法


