Photoshop鼠标清纯邻家MM
2023-11-30 17:27:25
来源/作者: /
己有:2人学习过
Photoshop鼠标清纯邻家MM
![](https://img.lvups.com/d/file/bigpic/2022/12/26/fc51prhds3n.jpg)
![](https://img.lvups.com/d/file/bigpic/2022/12/26/mjodzyrqefr.jpg)
![](https://img.lvups.com/d/file/bigpic/2022/12/26/uzwaogywdgm.jpg)
![](https://img.lvups.com/d/file/bigpic/2022/12/26/wk3au4ynyfm.jpg)
![](https://img.lvups.com/d/file/bigpic/2022/12/26/kqxdyeznvu5.jpg)
作者:似水无痕… 教程来源:eNet
先看一下最终效果:![](https://img.lvups.com/d/file/bigpic/2022/12/26/fc51prhds3n.jpg)
本新闻共6
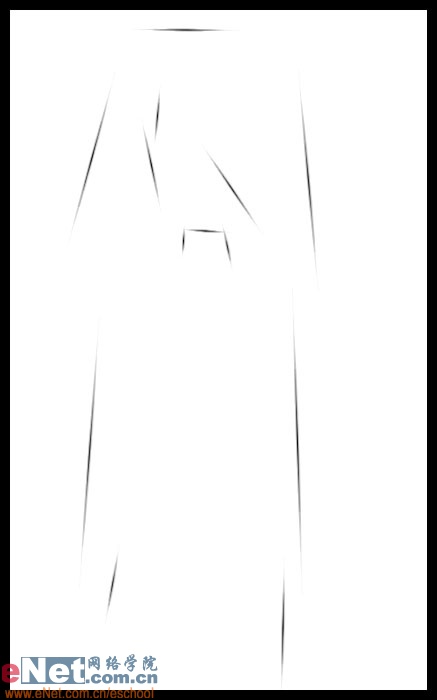
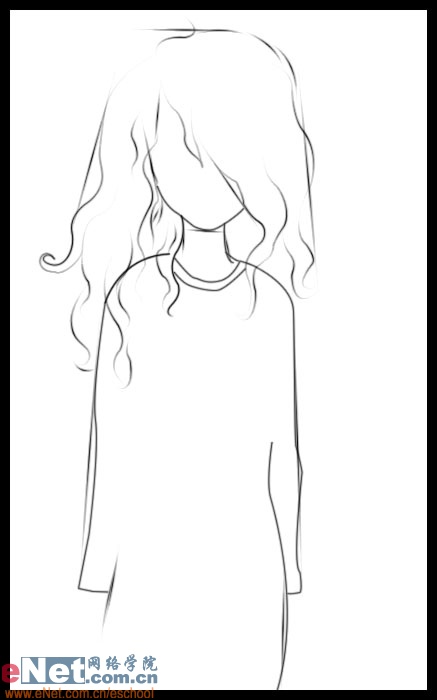
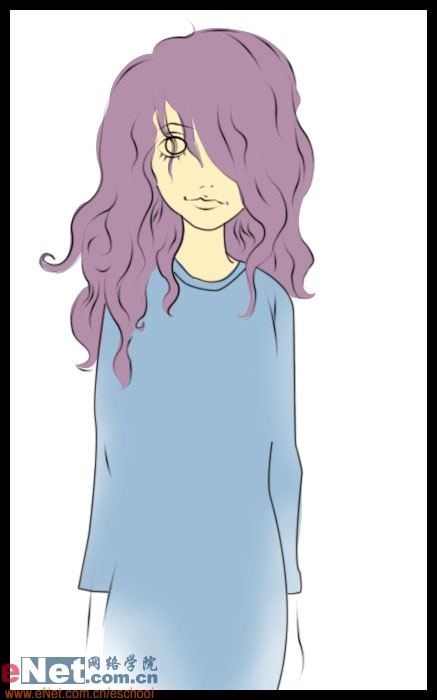
先用钢笔工具勾出MM的轮廓,头发松散,遮挡住半个面部。
![](https://img.lvups.com/d/file/bigpic/2022/12/26/5dp0bcx4x0x.jpg)
接下来进一步勾出MM的卷发,用钢笔的时候别忘勾上“模拟压力”
![](https://img.lvups.com/d/file/bigpic/2022/12/26/mjodzyrqefr.jpg)
本新闻共6
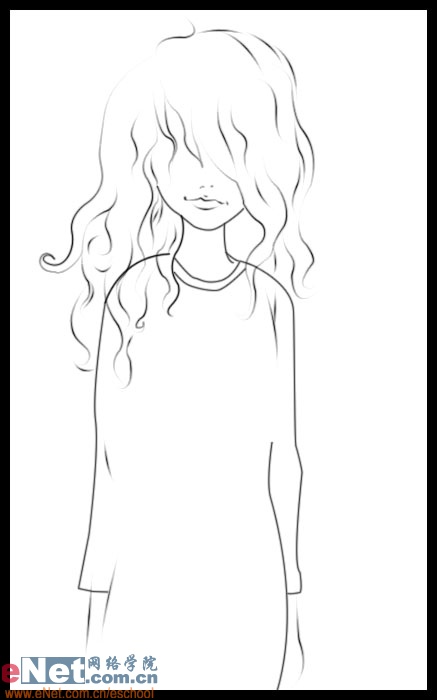
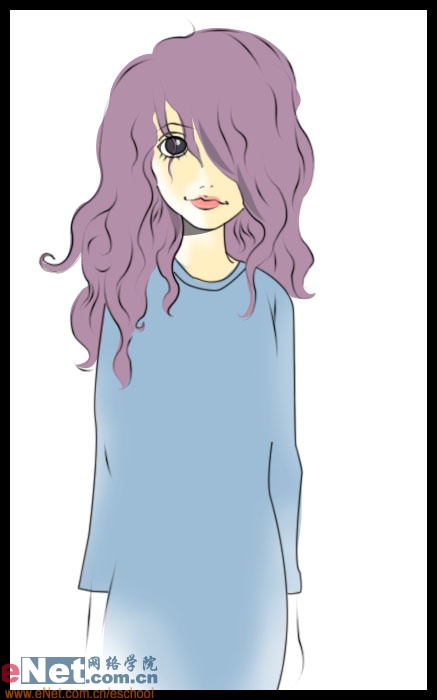
接着勾出MM的嘴巴,嘴角上杨,略带微笑。
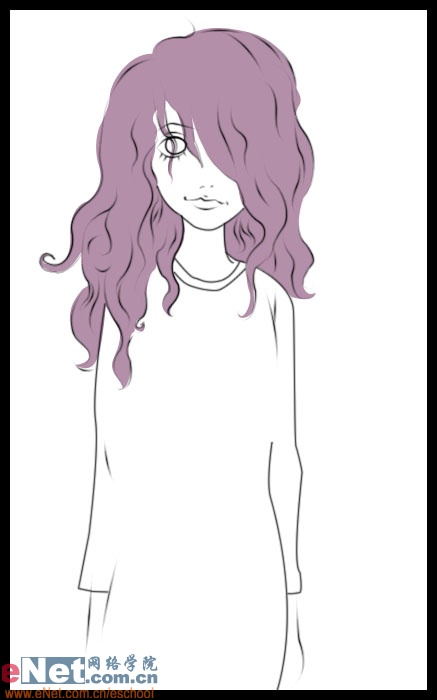
![](https://img.lvups.com/d/file/bigpic/2022/12/26/00nblhfy4pf.jpg)
在轮廓层下新建一层,给头发上紫色。
![](https://img.lvups.com/d/file/bigpic/2022/12/26/uzwaogywdgm.jpg)
本新闻共6
衣服与皮肤上色,皮肤层在头发层下新建,这样给皮肤上色会容易得多
![](https://img.lvups.com/d/file/bigpic/2022/12/26/hudu0qdv2mo.jpg)
用减淡工具对受光面皮肤的颜色进行适当减淡,以增加面部的立体感,顺便给眼睛上色。
![](https://img.lvups.com/d/file/bigpic/2022/12/26/wk3au4ynyfm.jpg)
本新闻共6
嘴唇上色
![](https://img.lvups.com/d/file/bigpic/2022/12/26/m3ntlxdwvuq.jpg)
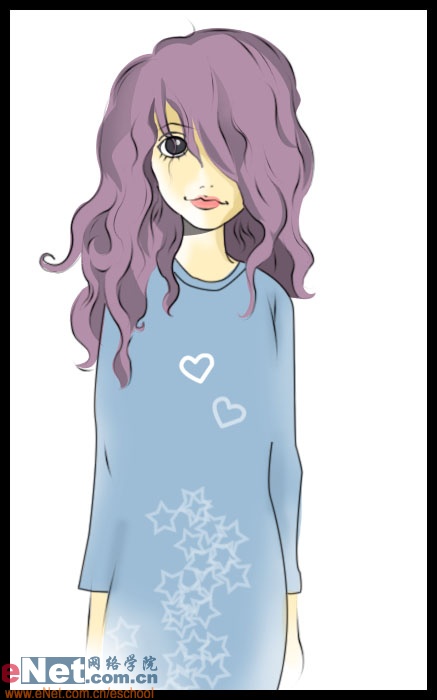
在头发层上新建图层,对暗部进行着色,以突出头发的纵深感。
![](https://img.lvups.com/d/file/bigpic/2022/12/26/kqxdyeznvu5.jpg)
本新闻共6
衣服上的图案可以用自己喜欢的画笔涂鸦。
![](https://img.lvups.com/d/file/bigpic/2022/12/26/3upfspmmfde.jpg)
最后加上实景就完成了,别忘了给嘴唇点个高光。
下一篇:ps鼠绘美国队长的铁盾