Photoshop教程:鼠绘刘亦菲手中的冰糖葫芦
2023-11-27 17:32:49
来源/作者: /
己有:1人学习过
Photoshop教程:鼠绘刘亦菲手中的冰糖葫芦作者:Sweetwitch 来源:eNet硅谷动力
今天我们来用photoshop画几串可口滴冰糖葫芦,主要用到涂抹工具,加深和减淡工具……
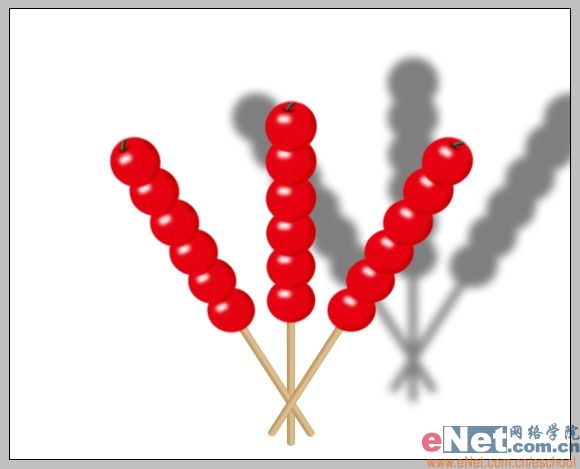
先看下完成图吧:
最终效果:

制作步骤:
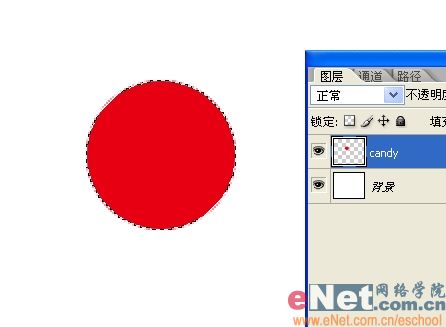
1、新建一个文件,背景为白色。新建一个图层,命名为糖,用椭圆工具画一个椭圆,填充红色。
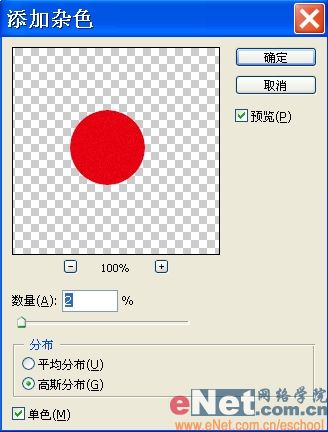
2、执行菜单/滤镜/杂色/添加杂色,设置如下。
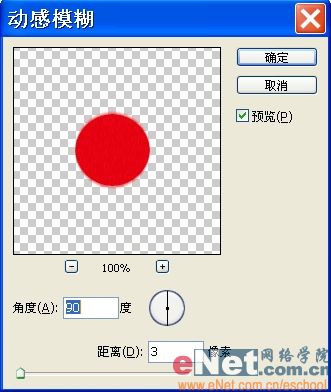
 3、执行菜单/滤镜/模糊/动感模糊,设置如下,增加表皮的质感。
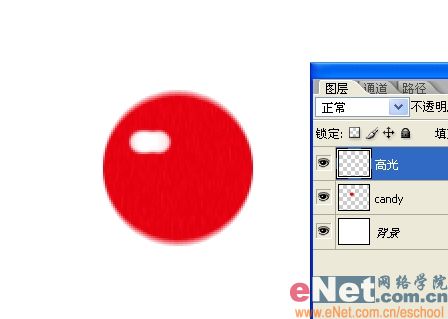
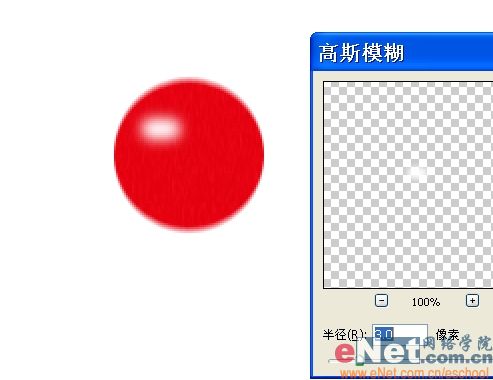
4、新建一个图层,命名为高光,用画笔工具在表面上点几下,然后高斯模糊3个像素。
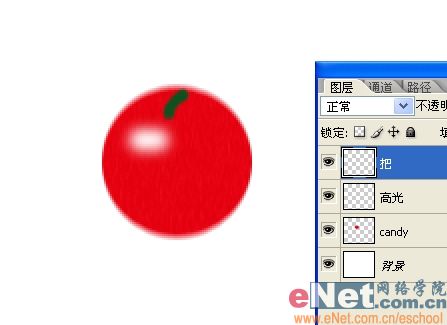
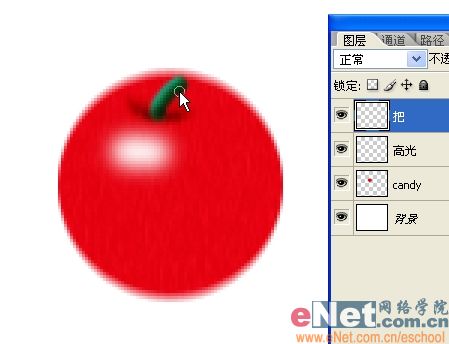
 5、新建一层,命名为“把”,用画笔工具画一个深绿色的把。
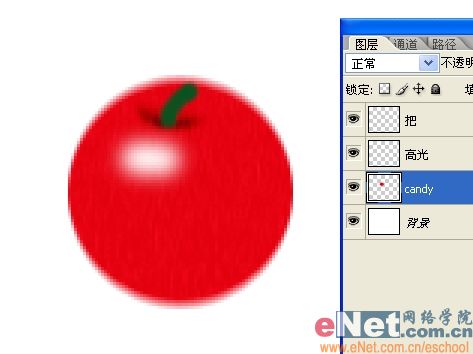
6、选择糖图层,用加深工具涂抹出把儿根部的阴影。
7、用加深和减淡工具涂抹出把儿的明暗。
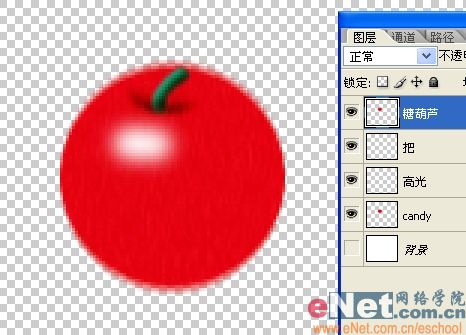
8、隐藏背景图层,按Ctrl Shift Alt E盖印可见图层,得到一个合并后的新图层,命名为糖葫芦。这样做既可以得到合并后的结果,又不会破坏原图层。
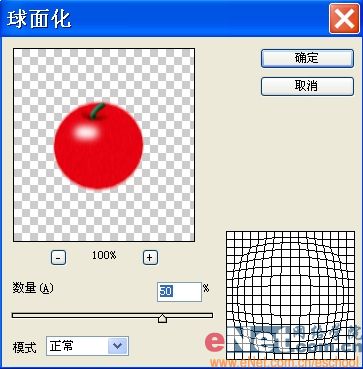
 9、执行菜单/滤镜/扭曲/球面化,设置如下,让糖葫芦更立体。
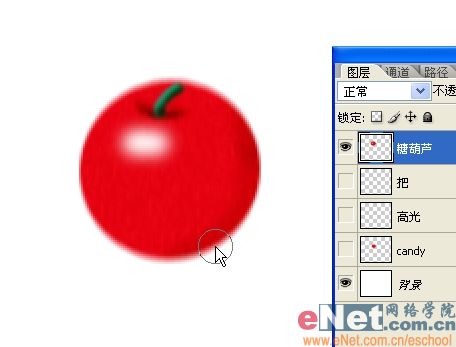
10、用加深工具涂抹出糖葫芦右侧面的阴影。
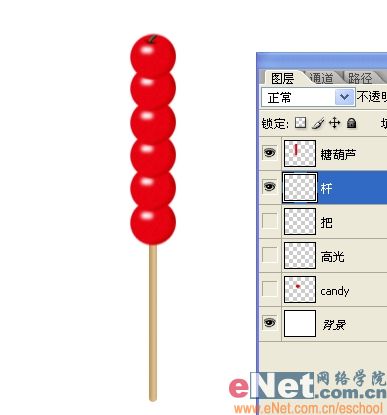
11、选择移动工具,按住Shift Alt键向上拖动糖葫芦,就能复制出另外5个糖葫芦。
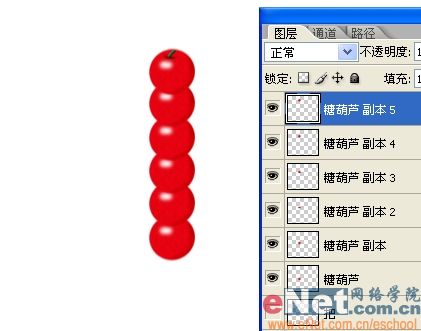
12、将所有糖葫芦图层合并,用圆角矩形工具拉出一个长矩形,角度为5个像素。
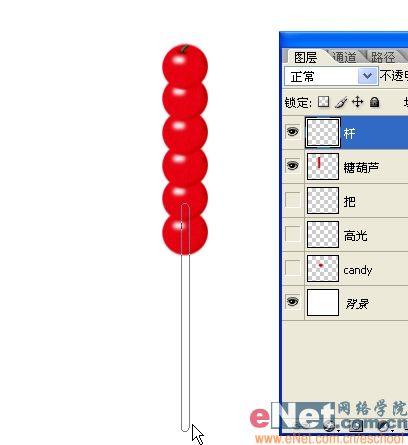 13、新建一个图层,命名为“杆”,Ctrl Enter将路径转为选区,填充一个浅褐色。
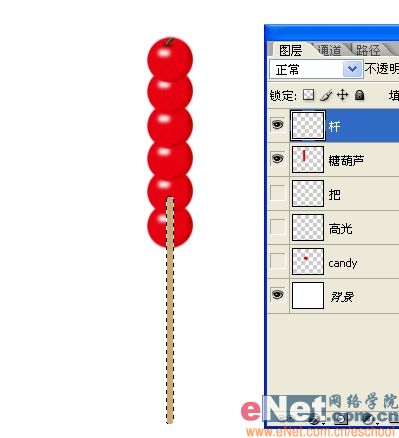
14、按住Shift键,用减淡工具在杆的中间从上到下涂一次,笔触小一点,形成杆的高光。
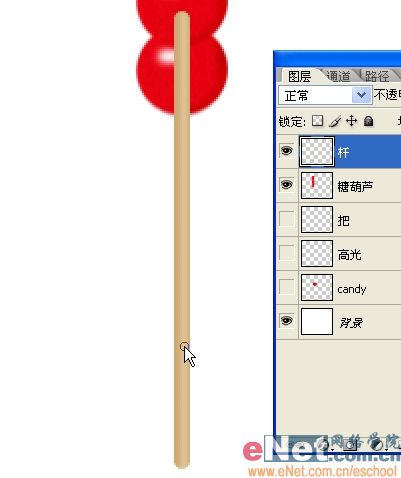
15、按住Shift键,用加深工具在杆的左侧面从上到下涂一次,笔触稍大一点,形成杆的暗面。
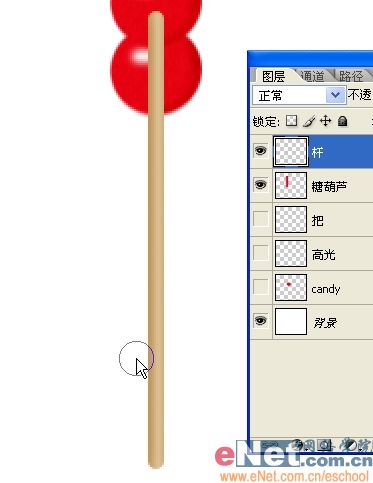
16、将杆图层拖到糖葫芦层之下,再次盖印可见图层,得到新的带杆儿的糖葫芦图层。
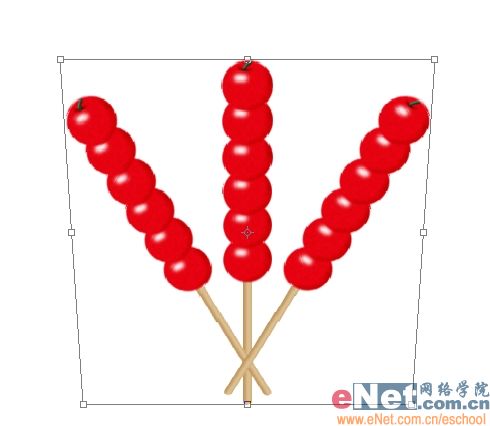
17、选择移动工具,按住Alt键拖动糖葫芦复制出另外2个。
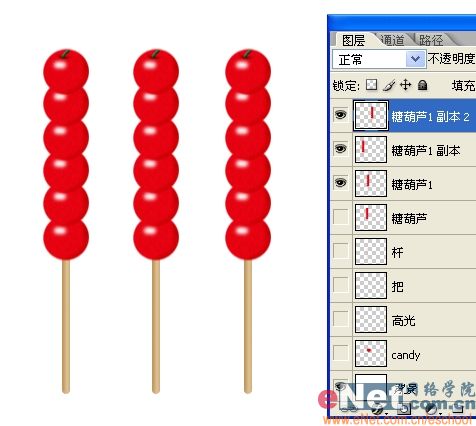
18、Ctrl T分别旋转到合适位置。
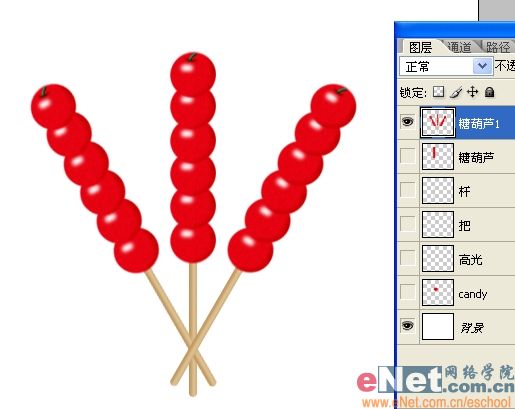
19、将三个糖葫芦图层合并,执行菜单/编辑/变换/透视,增加整体立体感。
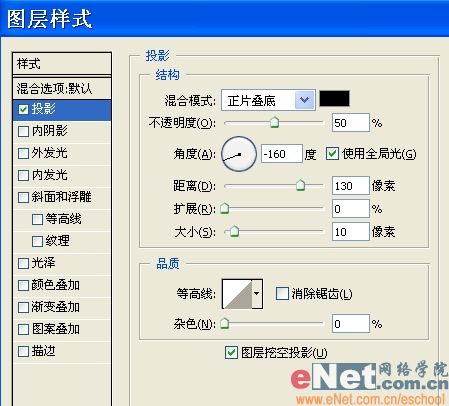
20、双击糖葫芦图层调出其图层样式,勾选投影,设置如下,完工。
今天我们来用photoshop画几串可口滴冰糖葫芦,主要用到涂抹工具,加深和减淡工具……
先看下完成图吧:
最终效果:
制作步骤:
1、新建一个文件,背景为白色。新建一个图层,命名为糖,用椭圆工具画一个椭圆,填充红色。
2、执行菜单/滤镜/杂色/添加杂色,设置如下。
3、执行菜单/滤镜/模糊/动感模糊,设置如下,增加表皮的质感。 4、新建一个图层,命名为高光,用画笔工具在表面上点几下,然后高斯模糊3个像素。
5、新建一层,命名为“把”,用画笔工具画一个深绿色的把。 6、选择糖图层,用加深工具涂抹出把儿根部的阴影。
7、用加深和减淡工具涂抹出把儿的明暗。
8、隐藏背景图层,按Ctrl Shift Alt E盖印可见图层,得到一个合并后的新图层,命名为糖葫芦。这样做既可以得到合并后的结果,又不会破坏原图层。
9、执行菜单/滤镜/扭曲/球面化,设置如下,让糖葫芦更立体。 10、用加深工具涂抹出糖葫芦右侧面的阴影。
11、选择移动工具,按住Shift Alt键向上拖动糖葫芦,就能复制出另外5个糖葫芦。
12、将所有糖葫芦图层合并,用圆角矩形工具拉出一个长矩形,角度为5个像素。
13、新建一个图层,命名为“杆”,Ctrl Enter将路径转为选区,填充一个浅褐色。 14、按住Shift键,用减淡工具在杆的中间从上到下涂一次,笔触小一点,形成杆的高光。
15、按住Shift键,用加深工具在杆的左侧面从上到下涂一次,笔触稍大一点,形成杆的暗面。
16、将杆图层拖到糖葫芦层之下,再次盖印可见图层,得到新的带杆儿的糖葫芦图层。
17、选择移动工具,按住Alt键拖动糖葫芦复制出另外2个。
18、Ctrl T分别旋转到合适位置。
19、将三个糖葫芦图层合并,执行菜单/编辑/变换/透视,增加整体立体感。
20、双击糖葫芦图层调出其图层样式,勾选投影,设置如下,完工。
相关推荐

ps鼠绘心形的烟雾教程

ps cc做下雨效果教程

ps鼠绘装饰彩带教程

ps cs6调出风景照片绚丽光彩效果教

Photoshop钢笔工具绘制逼真的头发教程

鼠绘袋子,绘制一个透明的塑料袋教程

PS绘画变形金刚中的霸天虎

绘画人像,皱纹雀斑疤痕的绘制方法


