PS创意打造玻璃瓶中的世界:人像后期合
2022-12-26 01:31:18
来源/作者: /
己有:22人学习过
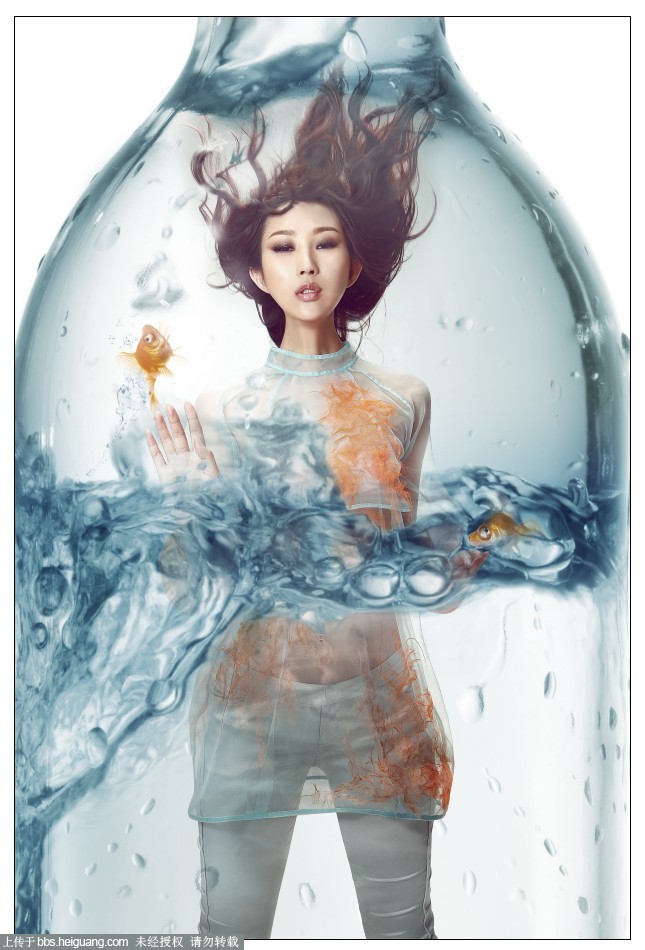
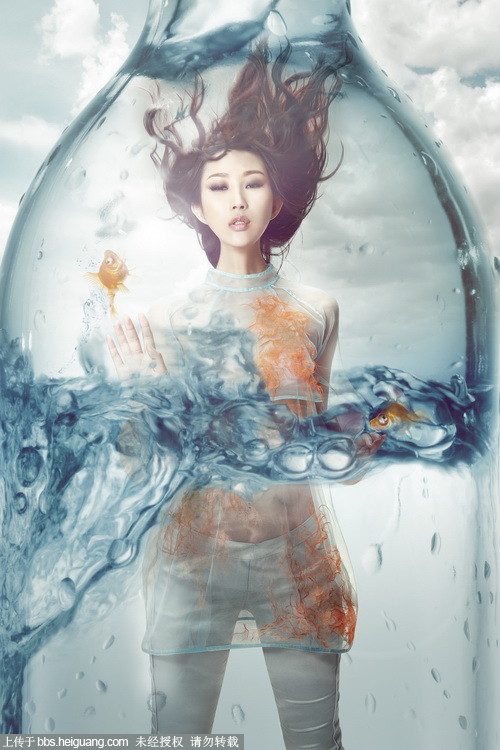
5.添加素材三:金鱼,把跳跃的金鱼放到人物右手上方,混合模式改为正片叠底,把另一条金鱼放到水里,用钢笔工具描绘金鱼路径,再将
路径作为选区载入,再将添加矢量蒙版,前景色为黑色,画笔不透明为30,擦除金鱼被水覆盖的部分。

6.添加素材四:天空,把天空放在人物图层下面,打开色相/饱和度调整天空颜色[参考数值:色相-16.饱和度-68.明度0],图层不透明度为70%,
添加矢量蒙版,前景色为黑色,使用画笔工具擦除不需要部分。


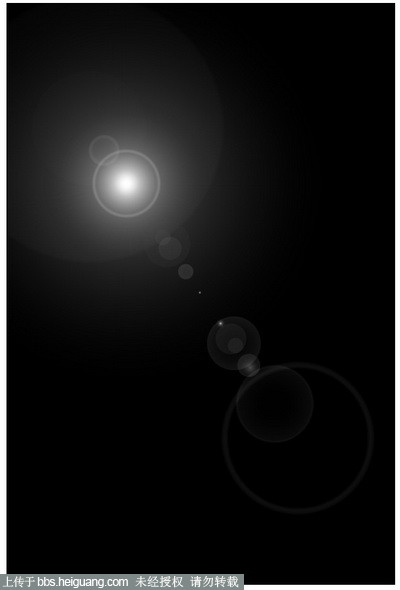
7.创建新图层填充黑色,混合模式改为虑色,添加滤镜里的渲染/镜头光晕,调整光晕位置。
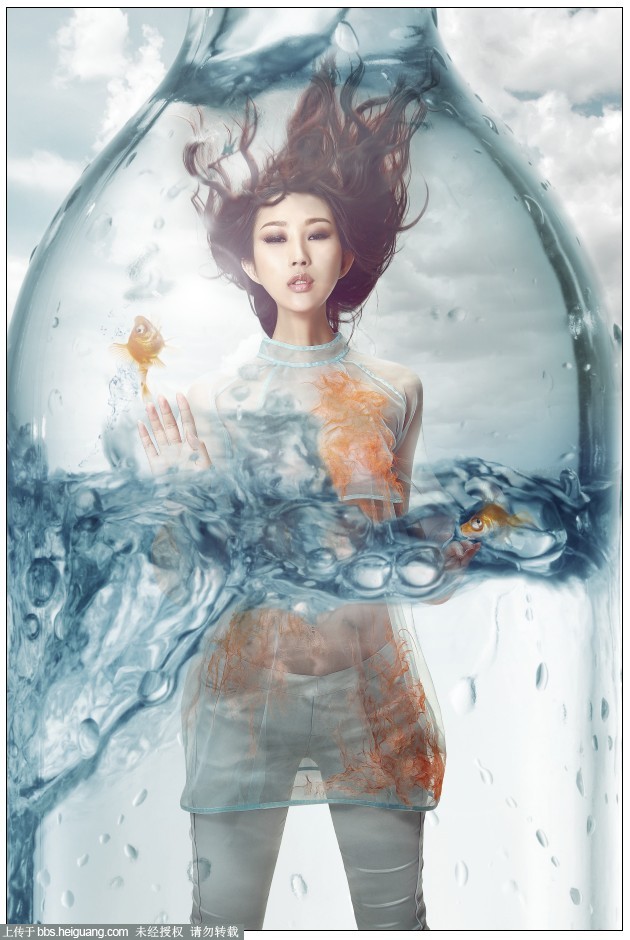
8.并合图像,使用套索工具选取人物局部然后羽化[参考数值:100],用曲线增加亮度。

完成图一
完成图二

上一篇:ps合成跳出相框场景教程
下一篇:ps合成暗色效果的地狱女战士
相关推荐

Photoshop打造MM喜爱的小熊壁纸

用ps合成沙漠风暴之门

ps合成灵异寂寞女孩实例

PS用镜像合成可怕公鸡

合成行驶在梦幻森林中火车照片的PS教程

合成恐怖灵异双重曝光头像照片的PS教程

PS合成明亮夜色下的天使白狼场景图片

战争海报,PS合成战争电影主题海报图片设计教程