ps合成吉他人教程
2022-12-25 21:36:25
来源/作者: /
己有:26人学习过
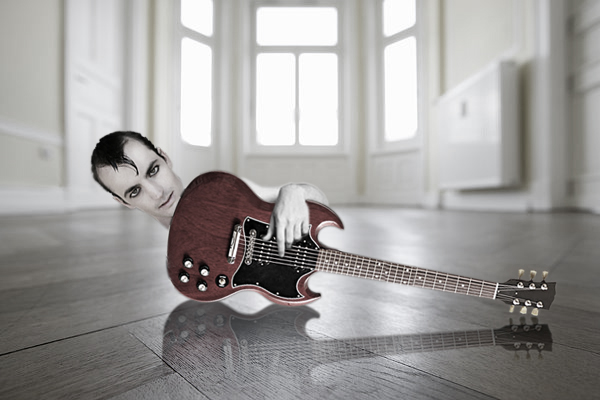
先看下素材和完成图
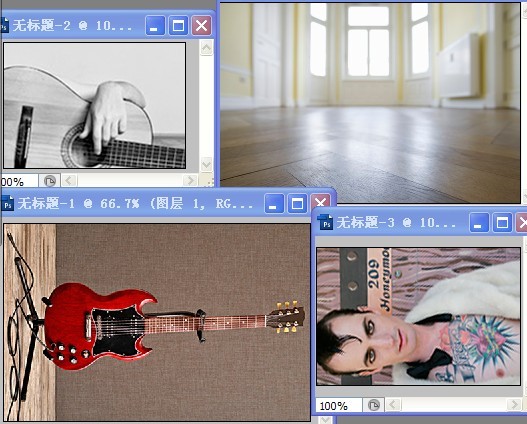
步骤1:打开背景图片,拖入人物图片
做选区蒙版,拉入吉他图片选区蒙版
放入适当位置。
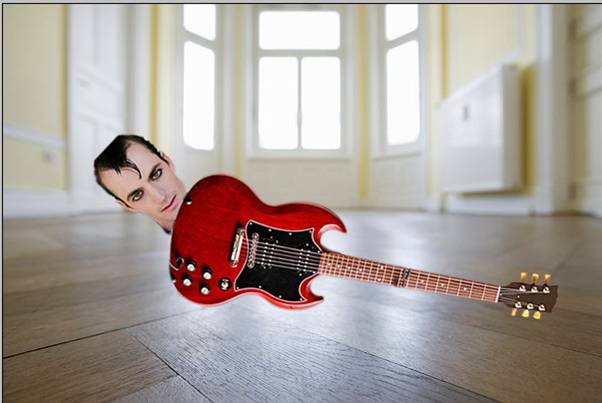
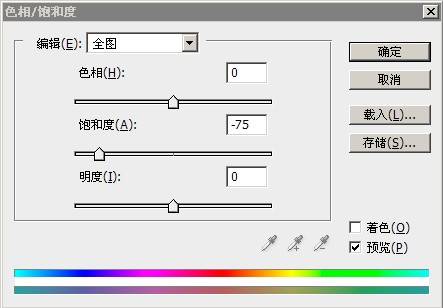
步骤2:调整色相/饱和度面板,
数值如下图。
 a
a步骤3:拖入手的图层钢笔路径蒙版,新建色相/饱和度图层,
针对下一层。
数值如下图。

相关推荐

Photoshop快速修复强光照射的非主

Photoshop通道修复偏蓝照片的方法

祁连山教你四种用photoshop优化模

卒仔:用photoshop還原真實顔色...

合成行驶在梦幻森林中火车照片的PS教程

合成恐怖灵异双重曝光头像照片的PS教程

PS合成明亮夜色下的天使白狼场景图片

战争海报,PS合成战争电影主题海报图片设计教程


