Photoshop教程:用合成技巧为MM添加一个纹身图案
2022-12-25 22:31:36
来源/作者: /
己有:7人学习过
Photoshop教程:用合成技巧为MM添加一个纹身图案作者:思令 来源:IT世界网

原图

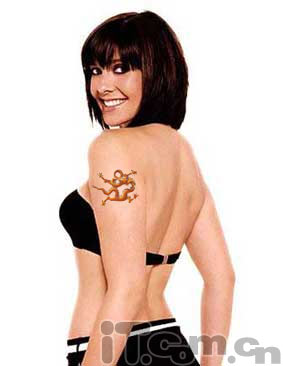
效果图
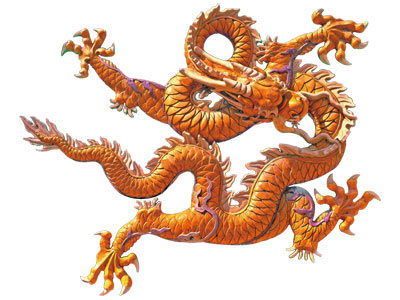
素材图
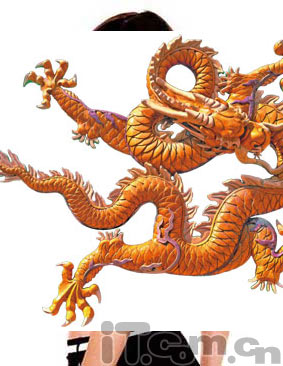
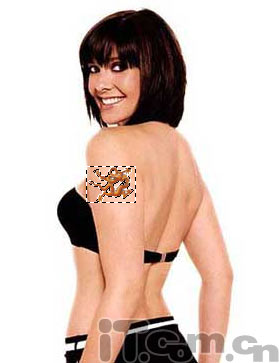

原图
效果图
素材图
制作过程:
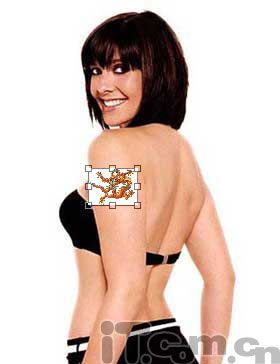
把素材图拉到美女的那个图层。如图:
然后按CTRL+T,右键按自由变换或缩放,调成适当的大小。然后按确定。如图:
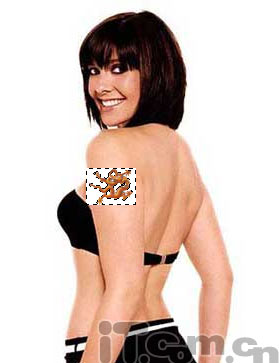
因为底色是纯色调的,可以点击魔棒工具,然后按删除健,删除后可能会出现小部份没删除干净,可将原图放大后再细心删除。如图:
把图层样式改为正片叠底,使两个图层更好的溶合在一起。
最后可部分调节一下纹身图层的明度或亮度,及它的透明度。最后如下:
相关推荐

PS实用教程:ps修复偏色风景照片

精细调整还你山清水秀——桔子教程

photoshop修复教程:还原泛黄色照片

photoshop修复教程:Lab模式还原雪

合成行驶在梦幻森林中火车照片的PS教程

合成恐怖灵异双重曝光头像照片的PS教程

PS合成明亮夜色下的天使白狼场景图片

战争海报,PS合成战争电影主题海报图片设计教程


