PS怀旧灰色照片教程
2022-12-25 23:06:50
来源/作者: /
己有:10人学习过
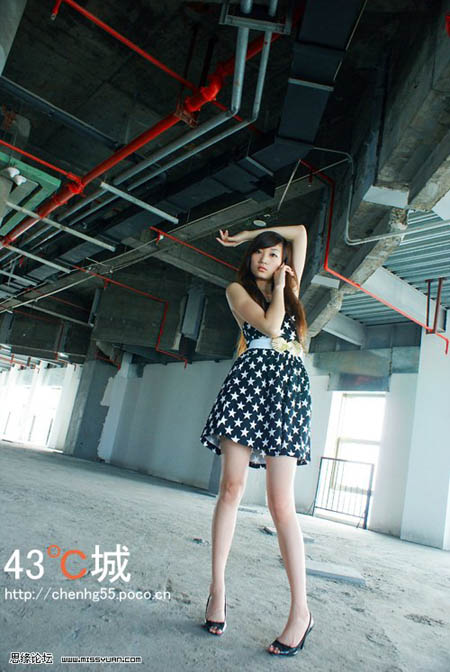
最终效果

一、打开原图,创建曲线调整图层,参数设置如下图。

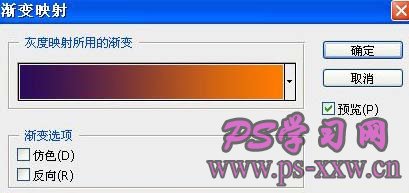
二、创建渐变映射调整图层,颜色设置如下图。
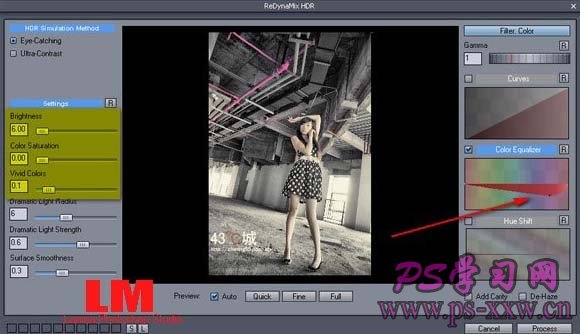
三、新建一个图层,按Ctrl + Alt + Shift + E盖印图层,使用HDR滤镜加点艺术效果(如果你还没有安装这款滤镜,可以到本站下载)。
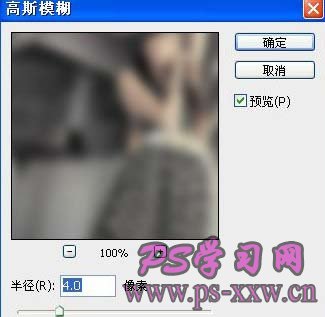
四、新建一个图层,盖印图层,执行:滤镜 > 模糊 > 高斯模糊,数值为4,确定后把图层混合模式改为“正片叠底”,图层不透明度改为:40%,完成最终效果。
标签(TAG) 人物调色
下一篇:ps调出夏日外景柔和日系色调
相关推荐

撕纸效果,在PS中绘制人像撕纸效果

简易画猫头鹰的步骤 画猫头鹰的简

幼儿简笔画乌鸦的画法 教你如何画

如何简单的画一条鱼 5步画鱼简笔画

ps调出高级复古欧美色调教程

PS夜景美化:调出唯美蓝色夜景灯光照片效果

调出绚丽蓝天白云山水风景图片的PS教程

调出金色晨曦森林儿童背影照片的PS教程


