Photoshop教程:制作质感的粉色妆面广告美女
2022-12-25 22:05:03
来源/作者: /
己有:3人学习过
作者:佚名 出处:
PhotoShop调出质感粉色妆面效果
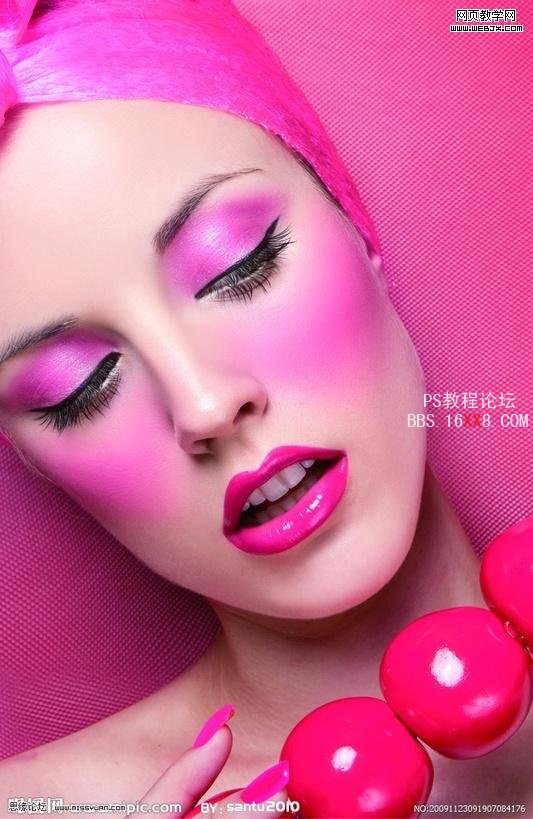
效果图:
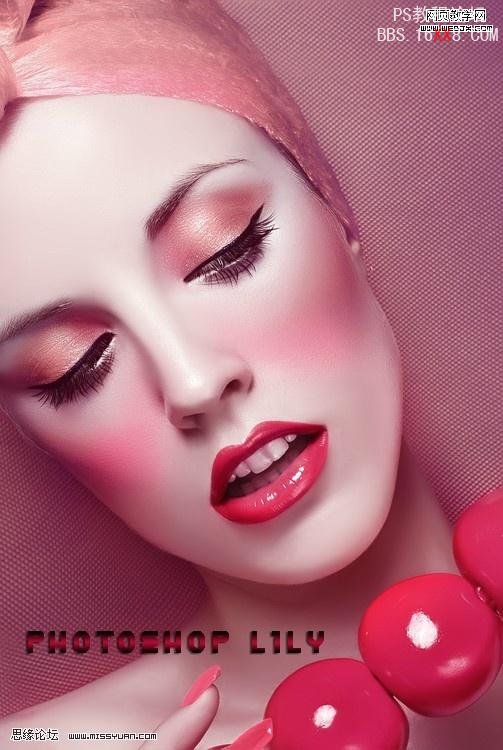
原图:
接下来。。
1,打开图,先把人物皮磨好,
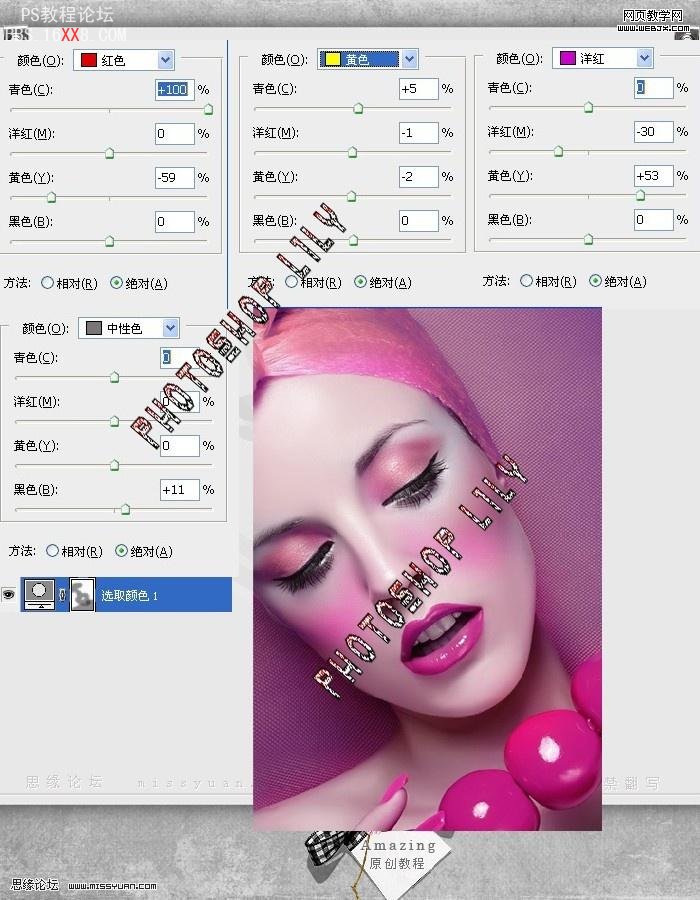
2,新建可选颜色层,做色彩变换处理,在绝对模式下调节此图,
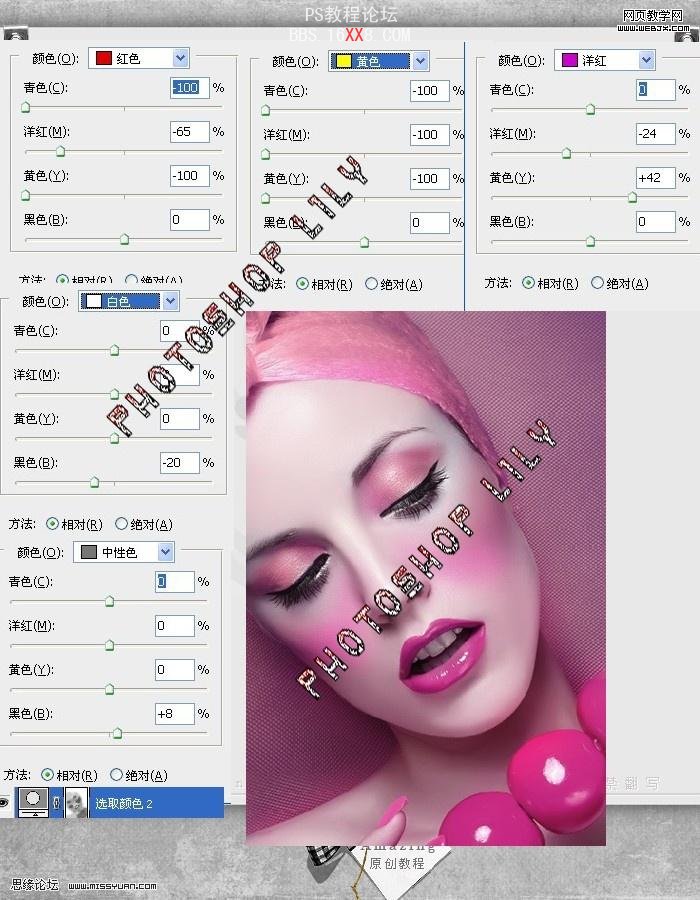
3,在新建可选颜色层,这次在相对的模式下调此图。
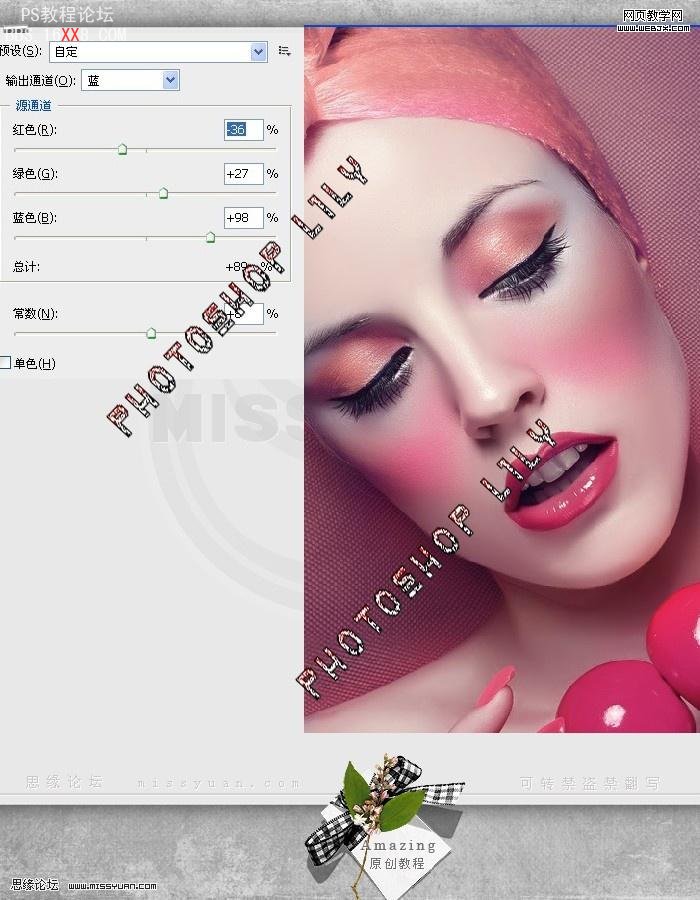
3,新建混合通道器,用这个工具来调此图。
到这里基本效果已经出来了。。如果你喜欢这个效果,那么下面的步骤就可以不做。
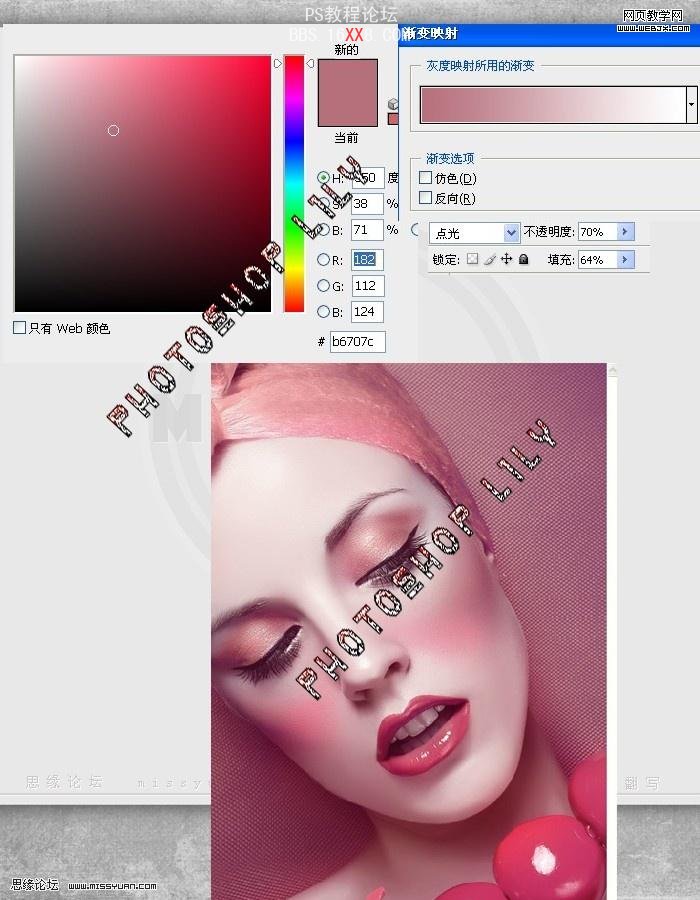
4,新建渐变工具层,
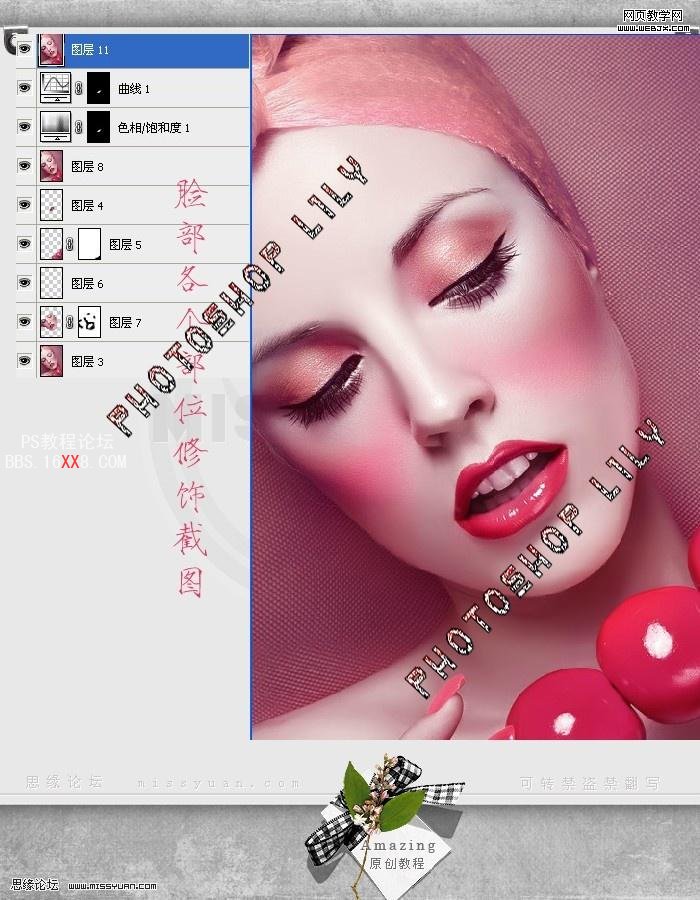
5,最后对人物的脸部皮肤,眼影,嘴,还有高光部分做细节处理。
最终效果!
上一篇:ps为非主流黄昏暗黄艺术色调
下一篇:ps非主流公园美女淡美效果
相关推荐

ps绘画出糖果色彩妆教程

粉色教程,简单几步调出粉色范冰冰照

PS成签教程:你是我唯一的爱-----人

人物调色--秋天不回来

ps调出高级复古欧美色调教程

PS夜景美化:调出唯美蓝色夜景灯光照片效果

调出绚丽蓝天白云山水风景图片的PS教程

调出金色晨曦森林儿童背影照片的PS教程


