Photoshop调出MM清新色调
2022-12-25 18:43:53
来源/作者: /
己有:7人学习过
Photoshop调出MM清新色调Photoshopdiao chu MMqing xin se diao
作者:鸿雁南飞 教程来源:中国教程网论坛
在论坛上看到很多高手.调的这种效果.但是还没怎么见过类似的教程.自己试着做了一下.贴上来请大家指出不足的地方..
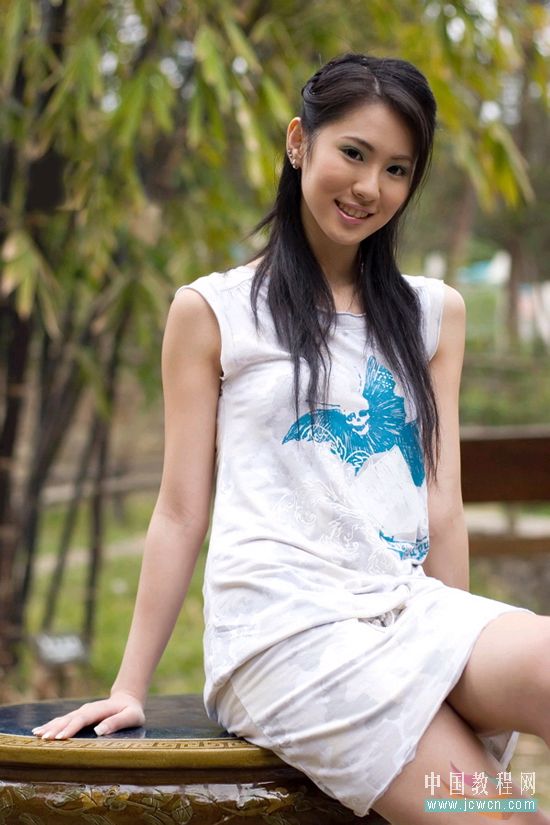
先看原图和效果图

本新闻共7
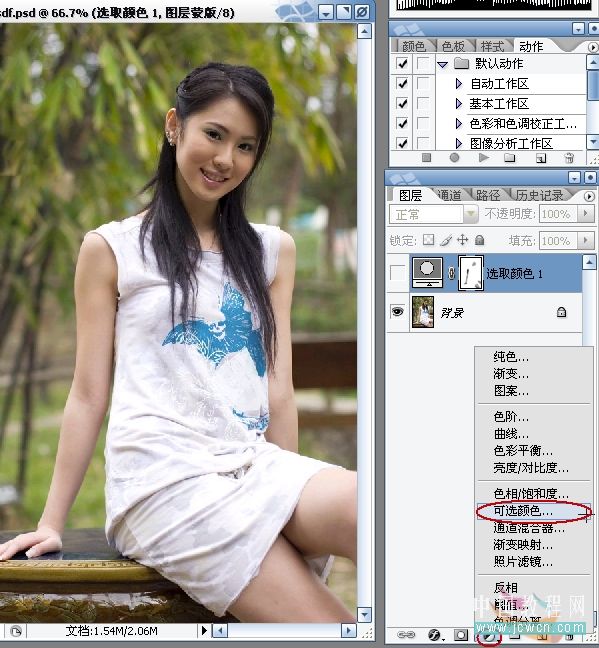
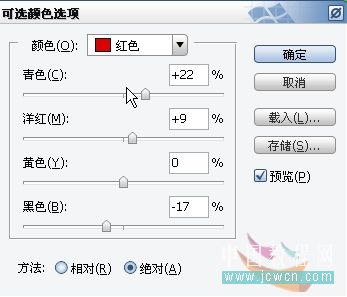
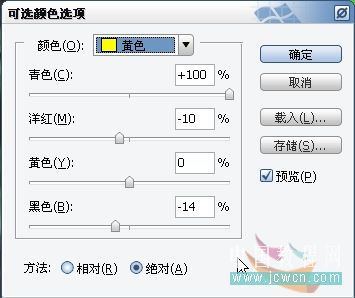
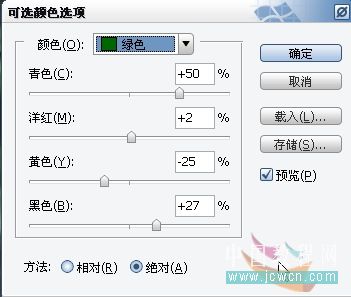
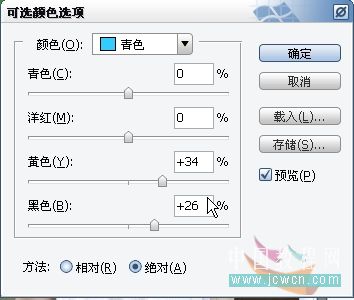
打开素材.点图层面板右下角创建新的调整层.可选颜色.
本新闻共7
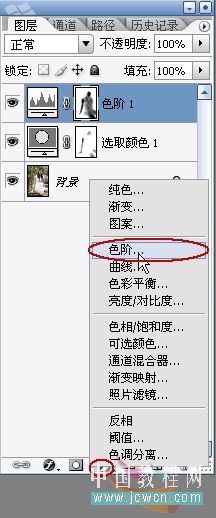
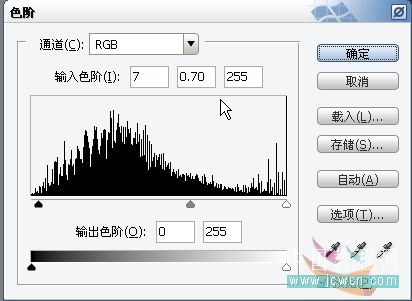
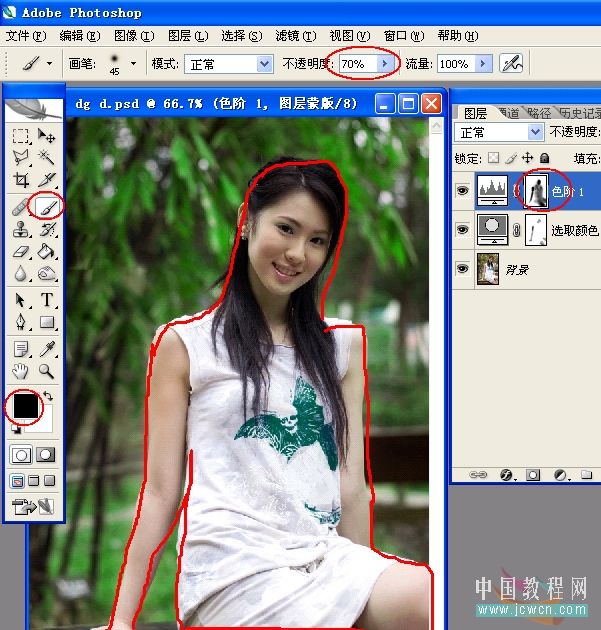
再创建一层色阶调整层
本新闻共7
用黑色画笔擦除人物部分
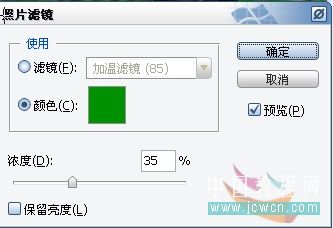
再创建一层照片滤镜层.
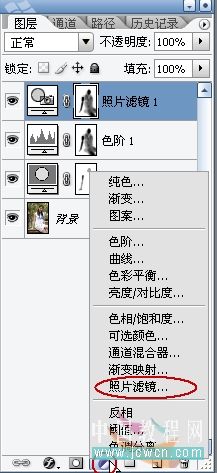
颜色选绿色.加蒙板擦掉人物的位置.
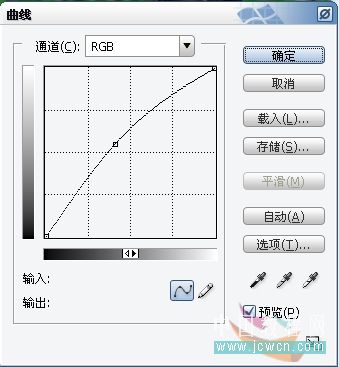
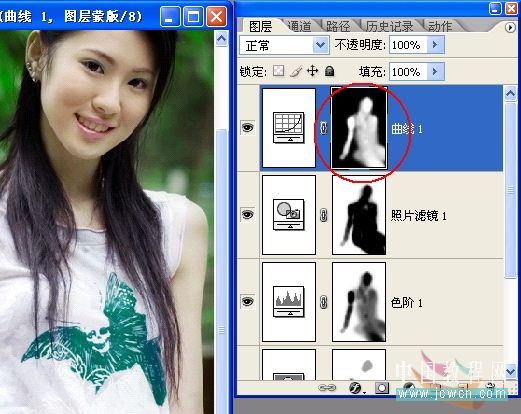
再创建一层曲线调整层.
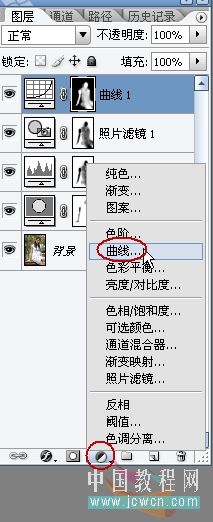
本新闻共7
主要提亮人物部分..在选中蒙板的状态下用黑色画笔擦除人物以外部分.
Ctrl Shift Alt E盖印图层
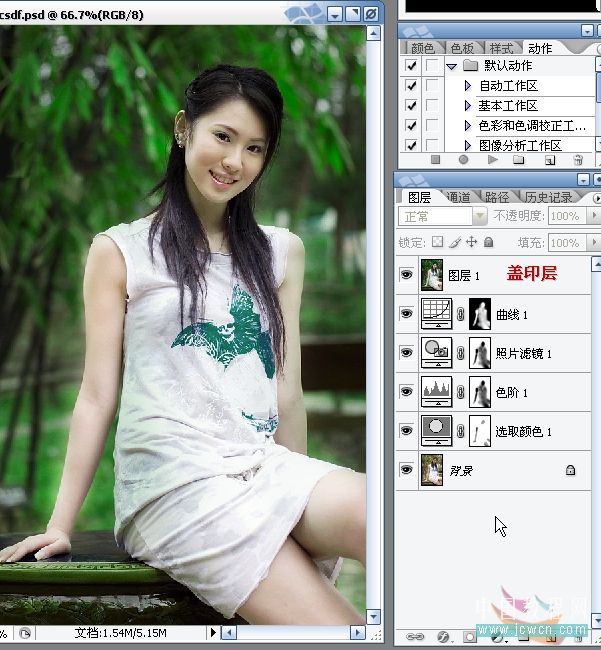
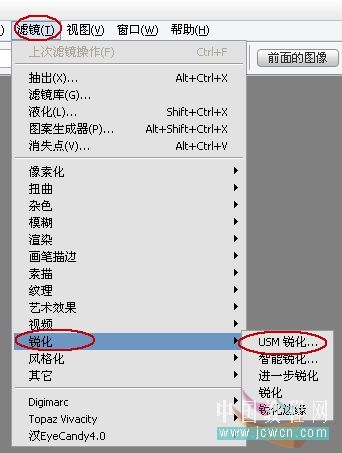
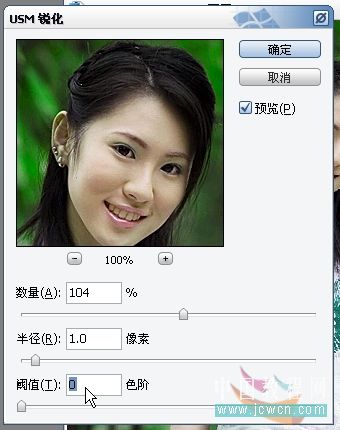
锐化一下细节.看起来更清晰.
本新闻共7
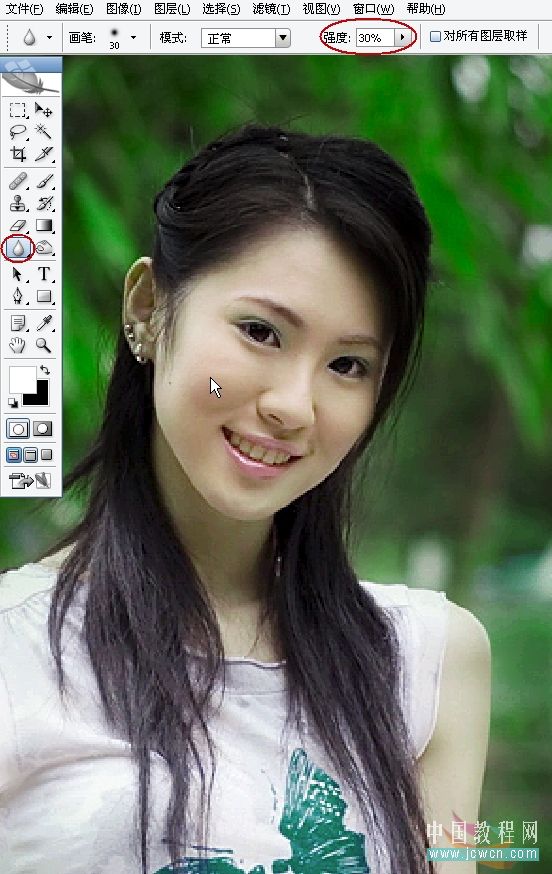
用模糊工具.稍稍磨一下皮.MM长的比较嫩.嘿嘿...
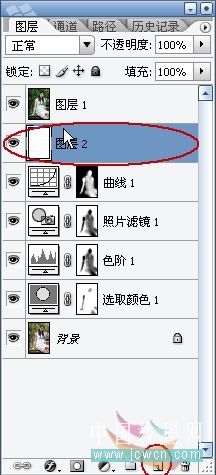
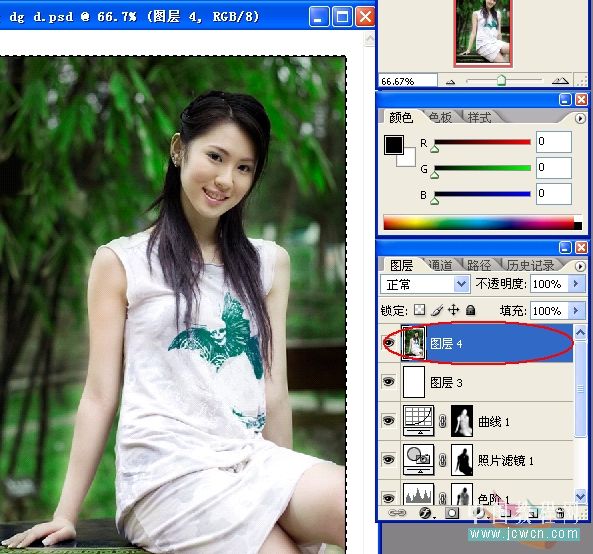
按住Ctrl键在盖印层下面创建一个层.填充白色.
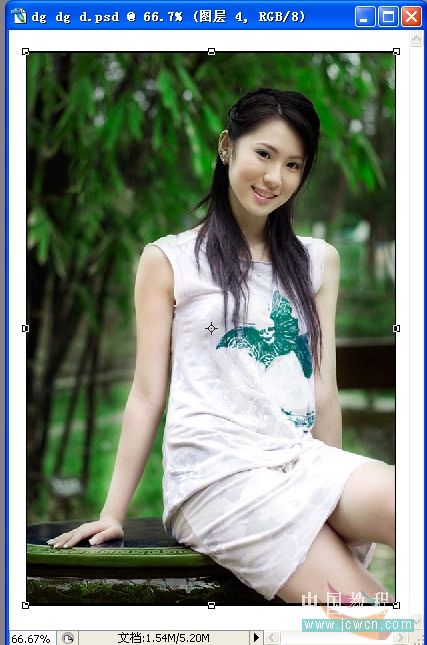
Ctrl T自由变换.变换的时候要按住Alt和Shift键.要么就变形了.
本新闻共7
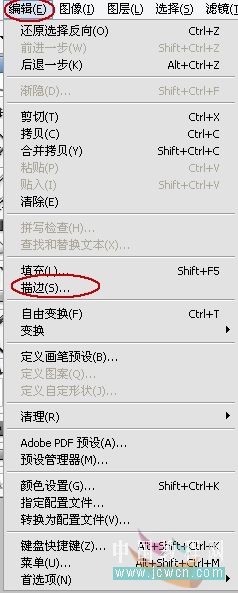
先载切一下上面和下面.使四周边框一样大再按住Ctr键点刚刚变换的那个层.出现蚁行线.Shift F7反选.
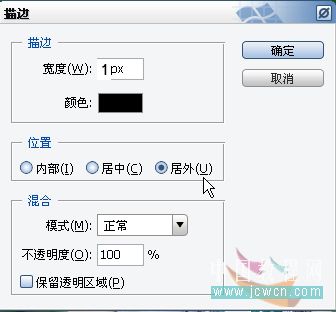
编辑.描边.
描边
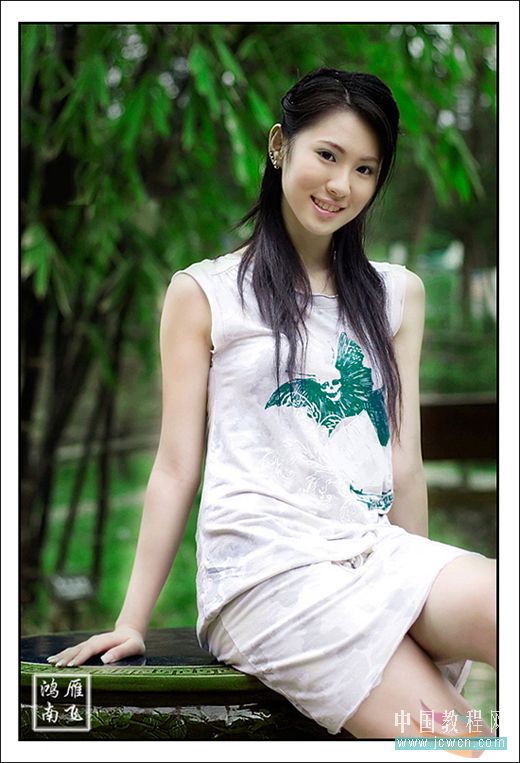
最终效果:
 简单的,我们教你,深奥的,你来分享,非主流照片|qqkongjian|feizhuliu|tupian|luntan|psjiaocheng|bishua|ruanjian|chajian|xiazai|psxiazai|qqkongjiandaima
作者:鸿雁南飞 教程来源:中国教程网论坛
在论坛上看到很多高手.调的这种效果.但是还没怎么见过类似的教程.自己试着做了一下.贴上来请大家指出不足的地方..
先看原图和效果图
本新闻共7
打开素材.点图层面板右下角创建新的调整层.可选颜色.
本新闻共7
再创建一层色阶调整层
本新闻共7
用黑色画笔擦除人物部分
再创建一层照片滤镜层.
颜色选绿色.加蒙板擦掉人物的位置.
再创建一层曲线调整层.
本新闻共7
主要提亮人物部分..在选中蒙板的状态下用黑色画笔擦除人物以外部分.
Ctrl Shift Alt E盖印图层
锐化一下细节.看起来更清晰.
本新闻共7
用模糊工具.稍稍磨一下皮.MM长的比较嫩.嘿嘿...
按住Ctrl键在盖印层下面创建一个层.填充白色.
Ctrl T自由变换.变换的时候要按住Alt和Shift键.要么就变形了.
本新闻共7
先载切一下上面和下面.使四周边框一样大再按住Ctr键点刚刚变换的那个层.出现蚁行线.Shift F7反选.
编辑.描边.
描边
最终效果:
简单的,我们教你,深奥的,你来分享,非主流照片|qqkongjian|feizhuliu|tupian|luntan|psjiaocheng|bishua|ruanjian|chajian|xiazai|psxiazai|qqkongjiandaima相关推荐

ps cc设计多边形艺术文字教程

ps制作漂亮的照片光线教程

ps cc合成雪山后的月亮场景教程

ps cc中国风照片效果教程

ps调出高级复古欧美色调教程

PS夜景美化:调出唯美蓝色夜景灯光照片效果

调出绚丽蓝天白云山水风景图片的PS教程

调出金色晨曦森林儿童背影照片的PS教程


