人像调色——酒吧女(附教程)
2022-12-25 18:43:20
来源/作者: /
己有:51人学习过
人像调色——酒吧女(附教程)先看对比图:
 7.JPG (112.83 KB)
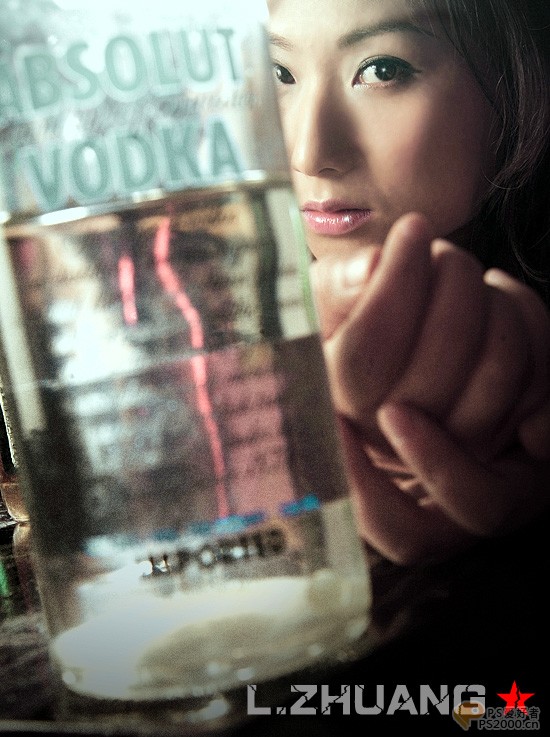
原图.JPG (66.16 KB)
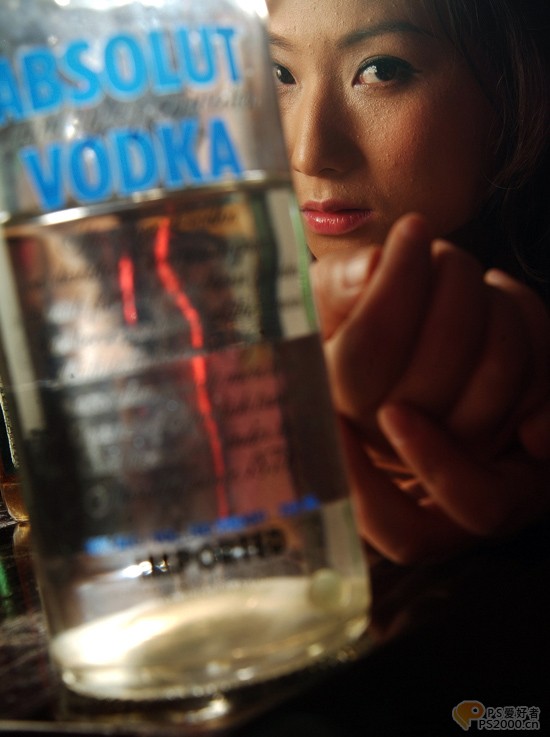
1。复制原图一次
2。图象——调整——通道混合器
1.jpg (32.86 KB)
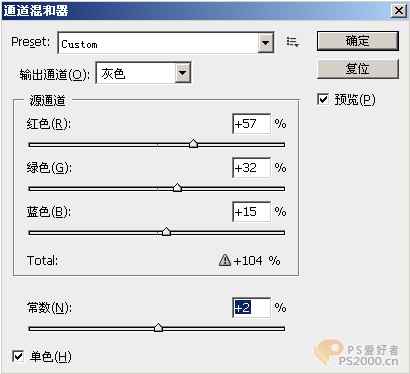
3。图层混合模式改为滤色 透明度85%左右
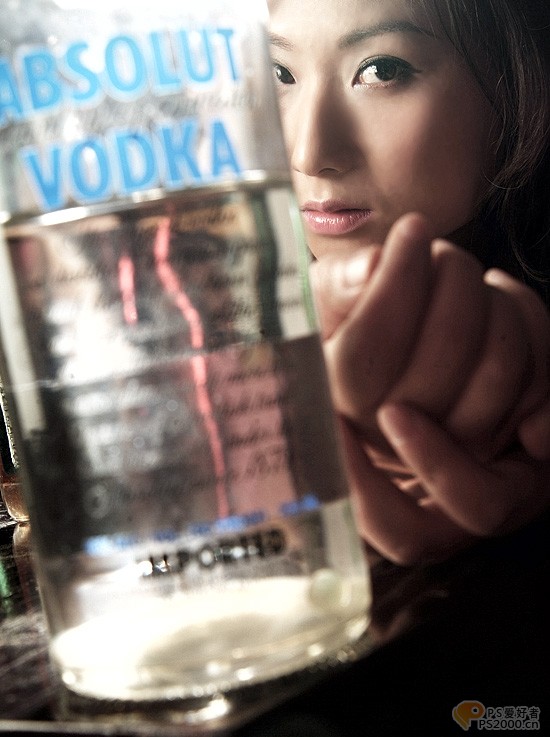
4。磨皮 这就不用说了吧 (方法很多)总之看起来健康通透就好 本人用图章30%透明读度。
2.JPG (90.06 KB)
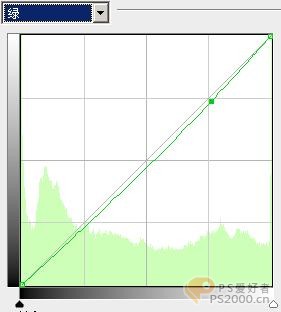
5。调色调 ctrl m 调色介 做如下设置
3.jpg (14.93 KB)
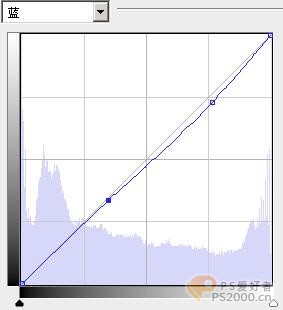
4.jpg (15.82 KB)
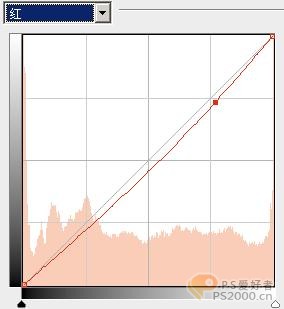
5.jpg (15.47 KB)
6.JPG (89.68 KB)
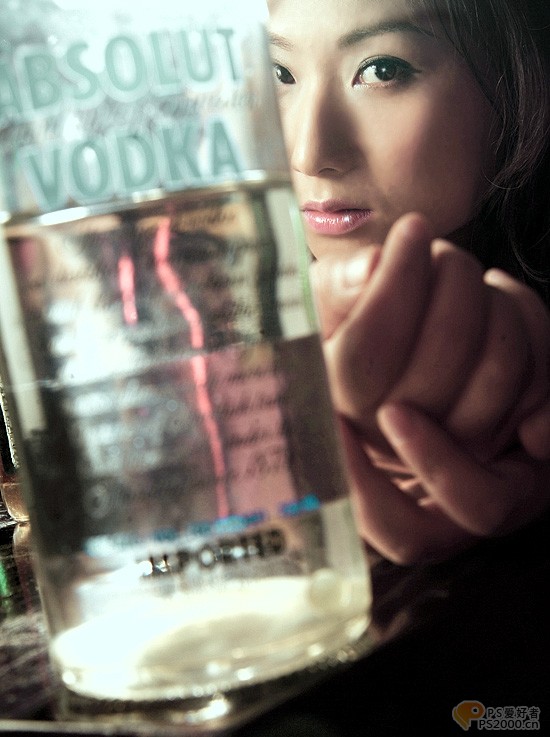
6。加杂色 建新图层—填充中性灰—滤镜—杂色—添加杂色(数量15%,平均分布,单色)—图层混合模式柔光(透明度85%)—擦除脸布的杂色—加暗角(黑白渐变 小透明度 多拉几次 这样好把握)—加文字—收工。
注:本人第一次发教程,大家多支持啊!有问题,我一定第一时间答复!!
7.JPG (112.83 KB)

7.JPG (112.83 KB) 原图.JPG (66.16 KB) 1。复制原图一次
2。图象——调整——通道混合器
1.jpg (32.86 KB) 3。图层混合模式改为滤色 透明度85%左右
4。磨皮 这就不用说了吧 (方法很多)总之看起来健康通透就好 本人用图章30%透明读度。
2.JPG (90.06 KB) 5。调色调 ctrl m 调色介 做如下设置
3.jpg (14.93 KB) 4.jpg (15.82 KB) 5.jpg (15.47 KB) 6.JPG (89.68 KB) 6。加杂色 建新图层—填充中性灰—滤镜—杂色—添加杂色(数量15%,平均分布,单色)—图层混合模式柔光(透明度85%)—擦除脸布的杂色—加暗角(黑白渐变 小透明度 多拉几次 这样好把握)—加文字—收工。
注:本人第一次发教程,大家多支持啊!有问题,我一定第一时间答复!!
7.JPG (112.83 KB) 相关推荐

ps cc设计多边形艺术文字教程

ps制作漂亮的照片光线教程

ps cc合成雪山后的月亮场景教程

ps cc中国风照片效果教程

ps调出高级复古欧美色调教程

PS夜景美化:调出唯美蓝色夜景灯光照片效果

调出绚丽蓝天白云山水风景图片的PS教程

调出金色晨曦森林儿童背影照片的PS教程


