Photoshop调对比度制作冷酷照片效果
2022-12-25 19:10:07
来源/作者: /
己有:9人学习过
Photoshop调对比度制作冷酷照片效果来源:照片处理网
本教程主要是调色的一些基础应用,可以整体来调节照片的对比度,制作冷酷的照片效果
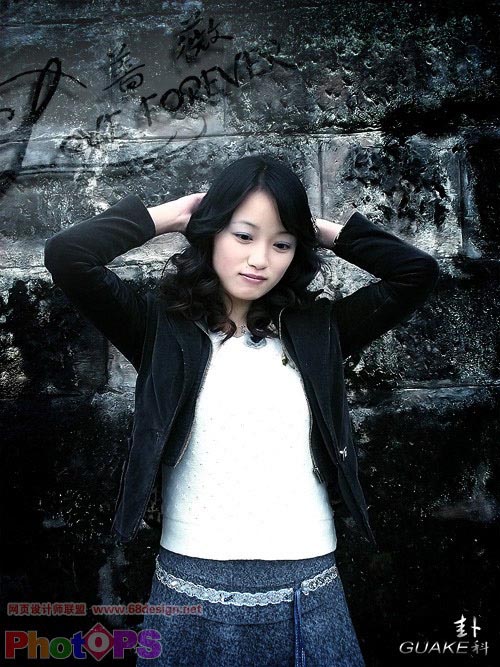
原图
最终效果
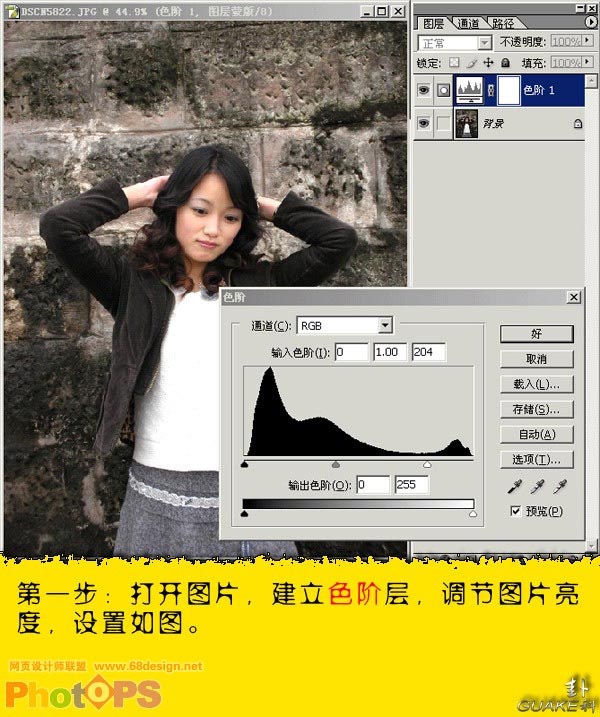
1.打开原图按Ctrl L 调色阶参数设置如下图
2.按Ctrl B 调色彩平衡分别对暗调,中间调,高光进行调节,参数设置如下图

3.选择菜单:图像 > 调整 > 可选颜色对黄色进行调整参数设置如下图

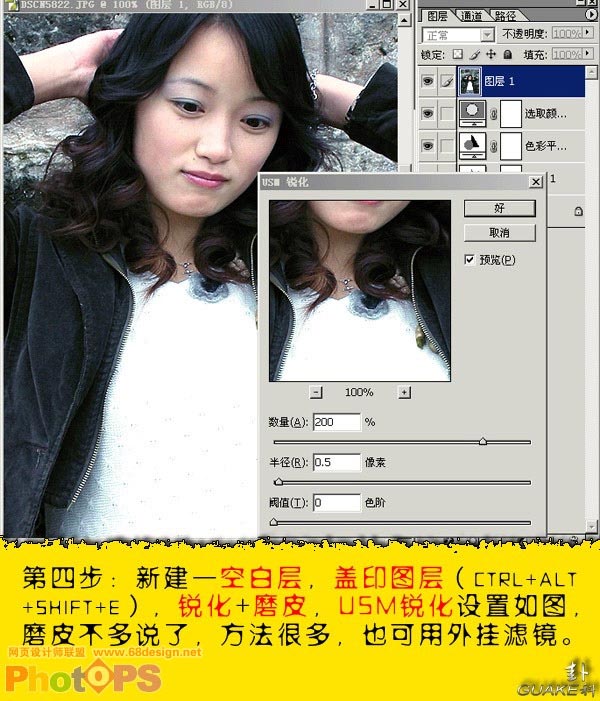
4.选择菜单:滤镜 > 锐化 > USM锐化参数设置如下图,然后在适当的磨皮
5.新建调整图层选择渐变映射,颜色设置如下图颜色是从:#3c4d57到#d3d3d3渐变,由左到右渐变然后把图层混合模式改为柔光

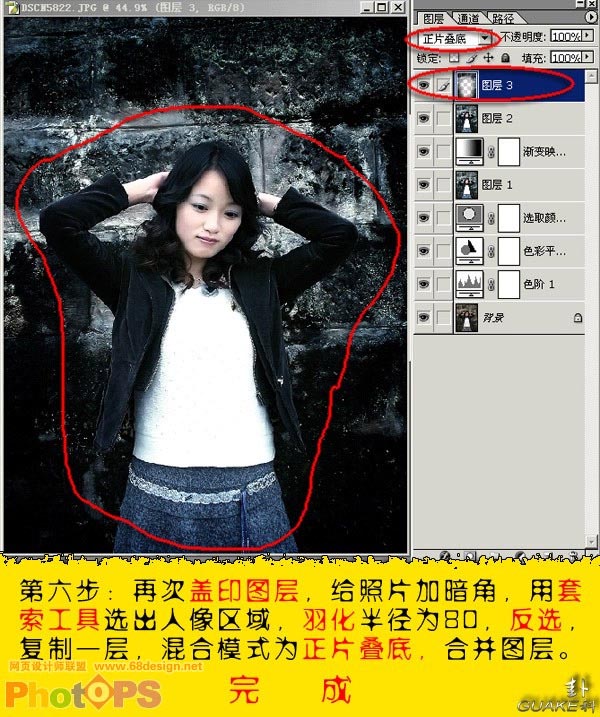
6.新建一层按Ctrl Shift Alt E 盖印图层,用套索工具把人物部分勾出来如下图红圈,然后按Ctrl Alt D羽化数值为80,按Ctrl Shift I 反选按Ctrl J 复制一层然后把这图的图层混合模式改为正片叠底完整最终效果
本教程主要是调色的一些基础应用,可以整体来调节照片的对比度,制作冷酷的照片效果
原图
最终效果
1.打开原图按Ctrl L 调色阶参数设置如下图
2.按Ctrl B 调色彩平衡分别对暗调,中间调,高光进行调节,参数设置如下图
3.选择菜单:图像 > 调整 > 可选颜色对黄色进行调整参数设置如下图
4.选择菜单:滤镜 > 锐化 > USM锐化参数设置如下图,然后在适当的磨皮
5.新建调整图层选择渐变映射,颜色设置如下图颜色是从:#3c4d57到#d3d3d3渐变,由左到右渐变然后把图层混合模式改为柔光
6.新建一层按Ctrl Shift Alt E 盖印图层,用套索工具把人物部分勾出来如下图红圈,然后按Ctrl Alt D羽化数值为80,按Ctrl Shift I 反选按Ctrl J 复制一层然后把这图的图层混合模式改为正片叠底完整最终效果
搜索更多相关主题的帖子:照片效果 对比度 Photoshop 制作 教程
相关推荐

用ps制作个性Banner

ps简单制作网页的内容阴影块

PS设计制作网页专题顶部图片教程

化妆品美工,制作一幅化妆品的宣传海

ps调出高级复古欧美色调教程

PS夜景美化:调出唯美蓝色夜景灯光照片效果

调出绚丽蓝天白云山水风景图片的PS教程

调出金色晨曦森林儿童背影照片的PS教程


